Pages

Thursday, April 05, 2012

Seedling Sale - only 6 weeks away!

Six more weeks to go until our annual Little City Farm Seedling Sale (Sat May 19th).  Our list of morning chores is growing, now including the careful watering of hundreds of little seedlings each day (and lots of transplanting to come in the weeks ahead!).  The indoor racks are brimming with these seedlings - eggplants, peppers, hot peppers, tomatoes, basil, other herbs and flowers...and in the next few weeks the brassicas, zucchini, cukes, and more.  Busy time, exciting time!


New babies in the house...

There are new babies in the house...six fluffy peeping day-old bundles of feathery down.  Sleeping in our living room near the woodstove, in a large box lined with bran, with an old wool sock as a bed, and a heat lamp for extra warmth.  And a little "mother hen" constantly watching them carefully, attentive to their every need. Their names: Star, Blackberry, Stella, Sam, Daisy and Buttercup. Now it feels like spring is finally here! 


Natural egg dyes

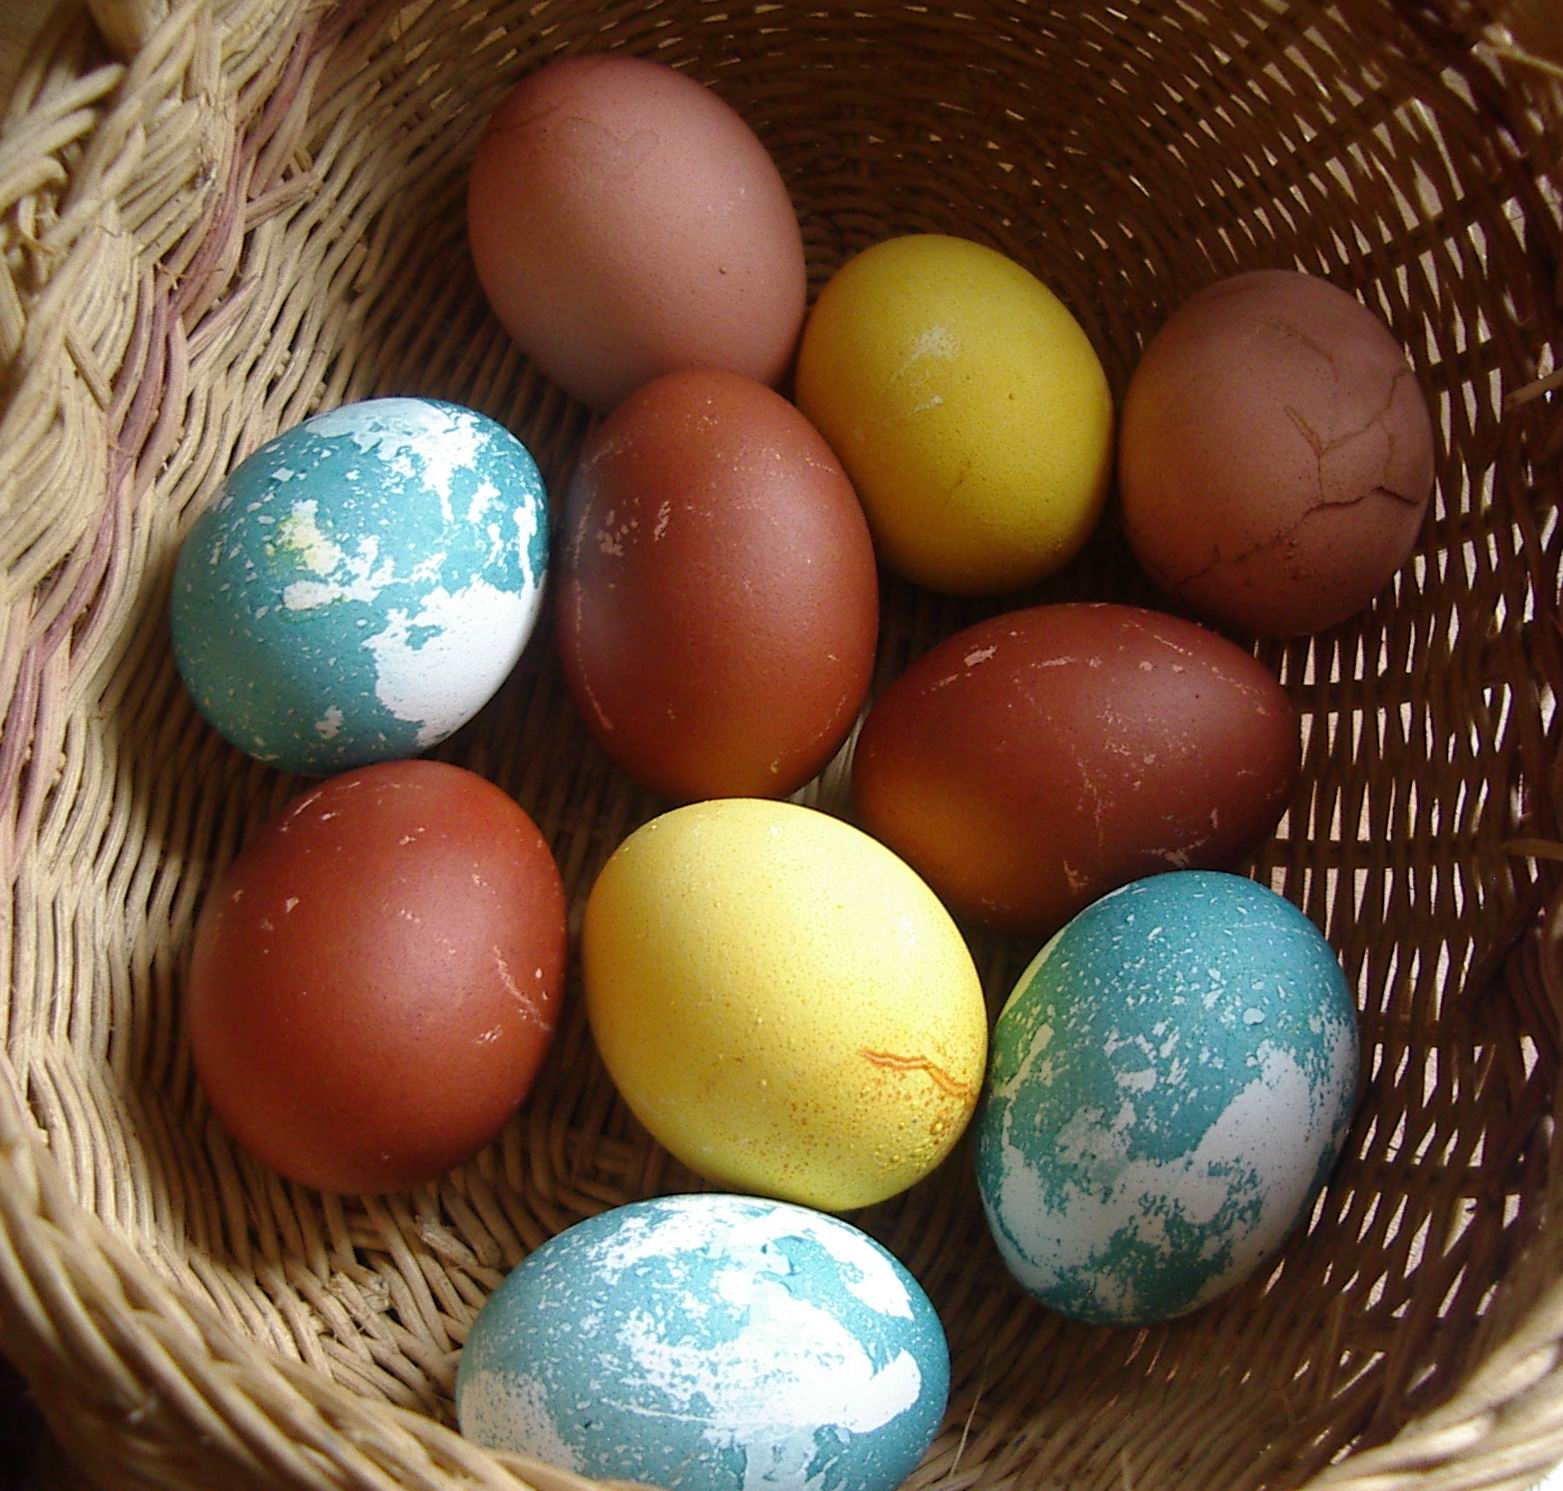
Whether you celebrate Easter or not, decorating eggs is such a lovely way to welcome spring.  Here in the neighbourhood we have an annual egg hunt in a nearby park, which has become a great gathering moment for reconnecting with families we haven't seen during the long winter hibernation. We like to colour our eggs using natural dyes, and this year we used the method described in the exciting first issue of the new Taproot magazine (which we are loving!).

To dye eggs:
a) Using onion skins for reddish-copper colour, turmeric powder for sunny yellow, frozen blueberries for blue, and coffee grounds for brown, we came up with a nice variety with just items found in the kitchen. 

b) The recipe calls for 1 quart water and 2 Tbsp white vinegar, plus dye agent.  This is simmered for at least 20 minutes.

c) Then uncooked white eggs are added and again simmered for about 30 minutes (until they achieve desired level of colour).  Simple, effective, fun that little helpers can easily enjoy lending a hand with.

d) Other ideas - wrap strings, elastic bands or cloth around the white eggs before dyeing.  Wax the eggs with melted wax or draw on them with wax crayons before dyeing to get variety of patterns and shapes.


Tuesday, March 27, 2012

Make your own: Butter

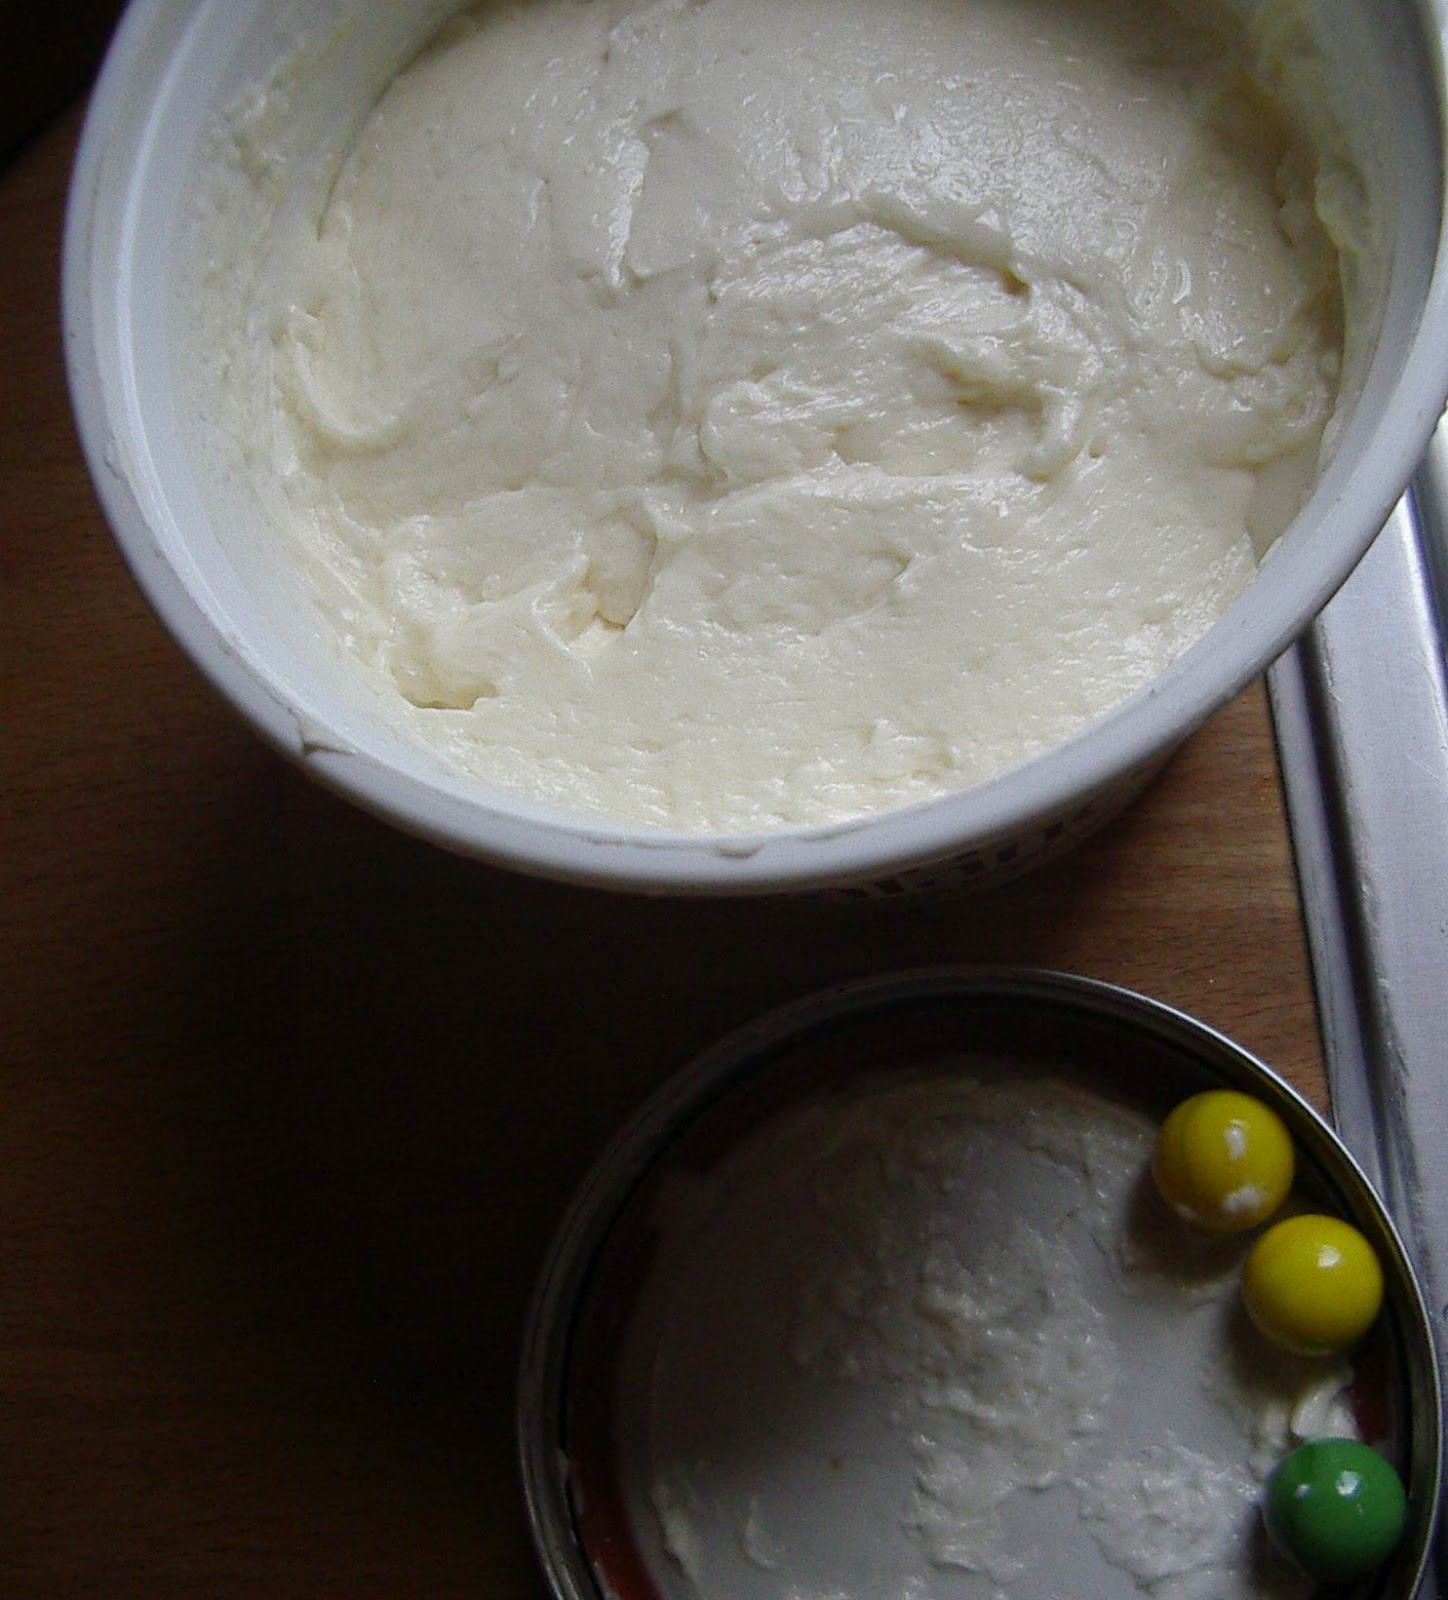
While we've been making our own yogurt and cheese for some time, and even tried our hand at homemade icecream (with our handcrank icecream maker) last summer, butter was something I had not ventured to try yet.  This week we realized how easy it is...as long as you have a lot of patience as well.  Give yourself about an hour, and a few helpers, while you shake the jar to create butter.  Here's how we made our own delicious creamy smooth butter:

What you will need
500 ml of fresh organic milk (raw if you can)
1 litre clean glass mason jar with lid
3 clean marbles
container to hold your finished butter

1) Pour milk into jar.  Add marbles and tighten the lid.
2) Start to shake the jar vigorously up and down.  The marbles will rattle around, but will become quiet as the  whey separates and the milk turns into butter.  Be patient!  It takes a while, but the butter will come.  Some books tell you to sing a little butter-making song while you agitate the jar, which helps to keep kids interested in participating. 
3) Pour off a little of the whey to help speed up the process of thickening, and when your butter is desired thickness spoon it into a plate or container and remove the marbles.  You can paddle the butter to smooth out the lumps and press out whey. 
4) After butter is stored in the fridge for half an hour it will be very firm.  Enjoy!


Friday, March 23, 2012

This Moment

{This moment} - This moment - an end of week ritual, no words, just a special photo to remember, savour, enjoy.


First wild edibles spring salad

Arugula, dandelion greens, chives, green onions, kale, parsley, red orach (wild mountain spinach)...bitter, and delicious.  Just what our body craves at this time of year.


Spring blooms


Wednesday, March 21, 2012

Do the best you can

Around here, there are long lists made at this time of year.  We anticipate the warmer weather and have renewed energy for all the outdoor work that was put on hold at the end of last season, now feeling the resolve to tackle these forgotten projects with vigor.  Whitewashing the strawbale house walls, building a proper outdoor fireplace, trimming trees, redesigning the herb gardens, planting more fruit trees, garden expansions...and many more projects listed under categories of fixing, mending, building, preparing, digging, cleaning, reading, and reorganizing.  I am reminded about well-known words we like to quote around here, said by an inspirational fore-runner of the homesteading movement (Scott Nearing) - to "do the best you can, where you are, and be kind".  How important to tackle these lists of endless to-do's in a manner that is kind, calm, thoughtful, patient, honest, and imperfect - we simply do the best that we can in any given moment and do so with joy, learning what we can (especially from our mistakes), and that is enough.


Seasons turn, spring's return

Today - garden soil under our fingernails again after rows of fresh new peas were dug into the ground; garlic greens and yellow crocuses found poking their way through the warming soil; a spontaneous mid-day picnic with friends; toes longingly dipped into the pond to cool off from the unseasonal heat of afternoon; reading a favourite book in the shady back porch hammock while gleeful hens hunt for bugs and preen themselves nearby; a cozy evening with family around a small bonfire with hot mugs of tea and a game of cards by candlelight as the last light of this lovely day fades...happy spring equinox from our little urban farm to you in all the places where you are.


Sunday, March 18, 2012

This Moment

{This moment} - This moment - an end of week ritual, no words, just a special photo to remember, savour, enjoy. 


Wednesday, March 14, 2012

Seedling Sale Official Date Change - May 19th!

Please note to all our local friends, neighbours and customers - our annual Seedling Sale, which is always held on the Saturday of the May long weekend here at Little City Farm, is going to be on Saturday May 19th from 9 am - 12 noon (oops - not May 26).  Mark your calendars with the correct date so you won't miss this exciting event!!!  It's our 10th anniversary of the sale this year so we are planning some extra special touches!

Seedlings started

Seedlings have been started by now - one whole grow rack is full with flats of hot peppers, sweet peppers (we are growing sweet chocolate peppers this year), several kinds of eggplant, bunching onions, herbs (sage, cilantro, parsley, fennel, marjoram, lavender, thyme), some native flowers...it feels so good to get our hands back into the soil on a daily basis again.  Tomatoes come next, and soon our house and greenhouse will be bursting at the seams with seedlings on every available rack, table and countertop.  That's usually what the months of April and May look like around here!


Spring Chickens

They really are happy in the spring, these chickens (and children)!


Make your own: Permaculture Seed Balls

This was a fun outdoor project yesterday when we had our first burst of warm spring weather!  I have been waiting all winter to make seed balls - I needed to wait for our clay pile to thaw.  The idea with seed balls is that they are self-contained compact gardens (tiny, but mighty).   You can place any variety of seeds in a seed ball and make the balls to the size you wish.  Usually they are penny sized to golf ball sized, and hold seeds such as wildflower blends, vegetables or even grains.  The mix of 1.5 parts clay to 1 part compost (with just enough water to hold it together) offers the perfect home for the seeds until they are ready to germinate - clay protects the seeds and compost offers nutrients once the seed balls are broadcast and rain falls on them to dissolve the ball.  It's seen as a quick efficient way to plant.  We used a bird and bee friendly wildflower mix, and will dry the balls outside in this week of warm sunny weather.


Sunday, March 04, 2012

This Moment

{This moment} - This moment - an end of week ritual, no words, just a special photo to remember, savour, enjoy. 


Thursday, March 01, 2012

Make your own: Handmade Seed Paper

Recently we had another little "disaster" at our house.  Somehow, two whole rolls of toilet paper made their way into our 3 year old's bath, and were dissolved with glee into mushy wet wads of mess.  Wanting to go with the flow, I thought for a minute about how to solve this situation.  There had been so much fun creating this "art" in the bath, and it would be wasteful to just strain it off into the garbage or compost.  We decided this was the perfect opportunity for a lesson in making handmade paper.  Toilet paper is not the best material to use as it's already recycled thin paper weight and made of short fibres.  We shredded up additional scrap paper, including colours and new textures and scooped out all the soggy pulp into a large plastic bin.  Here are our steps for making paper (best done in the summer months outdoors, but in a pinch you can line your table or floor with thick towels and make your paper indoors).

Handmade Seed Paper

You will need:
- Paper pulp (about 10 sheets of scrap paper, including different colours and textures will do)
- Blender or Food Processor
- Screen (we made one from an embroidery hoop and mosquito netting)
- Seeds (optional, to add into your paper for "growing" your paper in soil)
- Two large plastic water-proof tubs
- Felt pieces large enough to cover your screen, and/or old tea towels
- Rolling pin (to use as a press)
- Drying area (we are using our plant growing rack, but drying outdoors in warm weather would be perfect)

1) Soak your paper in warm water.  Rip it into shreds, let it become a soggy mess!
2) Scoop out paper pulp with your screen and blend in small batches in your food processor/blender.
3) Now you should have uniform mushy paper pulp.  Add small flat seeds or other bits you want to decorate your paper.  We added marigold seeds.
4) Add about one cup of pulp into your plastic tub (which is filled with warm water).  You will need to test the thickness of your paper when you screen it out, to see if you need to add more water or pulp to the mix.
5) Use your screen to strain out the pulp into smooth sheets.  Press your screen down onto the felt or tea towels in your second plastic tub.  Layer with more felt in between each sheet.
6) When you have made a stack of about 10 sheets of handmade pulp paper, roll the top of the pile gently with a small rolling pin to press out the water.  Pour off as much water as you can.
7) Lay out your sheets to dry.  Drying time will depend on the thickness of your paper, and the temperature.  Indoors in a cool house it will take several days.  You could set up a fan beside your drying rack to help with the drying.  Flip them part way through the drying process to help speed the drying.  Outside in summer weather they can be dried in a day.
8) Pulp should be used up within a few days as it will not keep.
9) Write letters or make drawings on your seed paper, then plant in the ground for new flowers to grow!