

Showing posts with label eco art. Show all posts
Showing posts with label eco art. Show all posts
Tuesday, November 27, 2018

Thursday, October 20, 2016
Waldorf-inspired art for kids: peg dolls
Today's art class was all about peg dolls! The kids each made one doll to take home, little Autumn gnomes with wool capes and hoods. We read a few stories about gnomes (or tomtens) to get into the spirit of making our own gnome friends, and talked about how they are sometimes thought of as guardians of the home, garden, forest or farm.
Making gnomes really brought out the creativity in the kids - each gnome had it's own personality as there were numerous embellishments added (eyes, beads, buttons, long braided hair, shoes!); there were different coloured capes and embroidered stitching by the older kids; there were leaves, feathers and acorns pasted onto the gnome outfits; extra clothes and scarves made for the gnomes, and so on! We hope these unique gnomes will become helpful little guardians in each of the children's homes!


Making gnomes really brought out the creativity in the kids - each gnome had it's own personality as there were numerous embellishments added (eyes, beads, buttons, long braided hair, shoes!); there were different coloured capes and embroidered stitching by the older kids; there were leaves, feathers and acorns pasted onto the gnome outfits; extra clothes and scarves made for the gnomes, and so on! We hope these unique gnomes will become helpful little guardians in each of the children's homes!


Waldorf-inspired art classes for kids: wool felting
Last week the kids in our Waldorf art classes tried their hands at another wool project - wool felting. Working with soft wool roving in vibrant colours is always a favourite kids activity. The tactile nature of wool felting is soothing and relaxing, and the art that comes from it is always beautiful even for a beginner.
In the class we talked about where we find felted wool in our lives - maybe as coasters, under table or chair legs, made into warm waterproof slippers or winter boot liners, wool diaper covers for babies, and even (in some cultures) traditionally made into houses such as the amazing wool yurts in Mongolia in which whole families can live!
There are many ways to felt wool - any which of us hasn't done some accidental wool felting at least once when we shrink a favourite 100% wool sweater in the wash? The basic idea with wet felting is to use hot water, soap, and friction, to bring the wool barbs together tightly into a wool mat. The more friction or agitation, the tighter the wool felt will become. There is also needle felting in which a sharp felting needle is used to poke at the wool barbs to bring them together. We used several techniques with the kids - the younger group wet felting using a simple ziploc bag method (see below), and the older group used bubble wrap and mat rolling method (see below). We used white wool roving as our base "canvas" and layered colours on top. There were such lovely art pieces that came out of this, and most of the kids could have keep going long after class was over.
How to wet felt with wool:
Ziploc Bag Technique (great for younger kids)
a) Lay out base wool roving (white) on a table. Mist with hot soapy water. Press firmly down with both hands on wet wool to flatten.
b) Layer any coloured wool into a pattern as desired on top of the white wool roving. Mist again.
c) Place wet wool into ziploc bag, then flatten it out as best you can before sealing the bag.
d) Agitate the bag, pressing, pounding and rolling it, to felt the wool.
e) Take out wool, let dry on flat surface. It will tighten up and shrink a little as it dries overnight.
Bubble Wrap & Mat Technique (great for older kids)
a) Lay out bamboo sushi mat, and cover with one piece of bubble wrap that is a similar size to the mat.
b) Now lay out while wool roving on the bubble wrap, and mist with hot soapy water.
c) Lay out colours of roving into a picture or pattern as desired. Mist again.
d) Carefully roll up the sushi mat around the bubble wrap and wool.
e) Agitate the wool by rolling and pressing the mat as firmly as possible. The longer this is done, then more felted the piece will become.
f) Unroll then let wool art piece dry on a flat surface. It will tighten up and shrink a little as it dries overnight.


In the class we talked about where we find felted wool in our lives - maybe as coasters, under table or chair legs, made into warm waterproof slippers or winter boot liners, wool diaper covers for babies, and even (in some cultures) traditionally made into houses such as the amazing wool yurts in Mongolia in which whole families can live!
There are many ways to felt wool - any which of us hasn't done some accidental wool felting at least once when we shrink a favourite 100% wool sweater in the wash? The basic idea with wet felting is to use hot water, soap, and friction, to bring the wool barbs together tightly into a wool mat. The more friction or agitation, the tighter the wool felt will become. There is also needle felting in which a sharp felting needle is used to poke at the wool barbs to bring them together. We used several techniques with the kids - the younger group wet felting using a simple ziploc bag method (see below), and the older group used bubble wrap and mat rolling method (see below). We used white wool roving as our base "canvas" and layered colours on top. There were such lovely art pieces that came out of this, and most of the kids could have keep going long after class was over.
How to wet felt with wool:
Ziploc Bag Technique (great for younger kids)
a) Lay out base wool roving (white) on a table. Mist with hot soapy water. Press firmly down with both hands on wet wool to flatten.
b) Layer any coloured wool into a pattern as desired on top of the white wool roving. Mist again.
c) Place wet wool into ziploc bag, then flatten it out as best you can before sealing the bag.
d) Agitate the bag, pressing, pounding and rolling it, to felt the wool.
e) Take out wool, let dry on flat surface. It will tighten up and shrink a little as it dries overnight.
Bubble Wrap & Mat Technique (great for older kids)
a) Lay out bamboo sushi mat, and cover with one piece of bubble wrap that is a similar size to the mat.
b) Now lay out while wool roving on the bubble wrap, and mist with hot soapy water.
c) Lay out colours of roving into a picture or pattern as desired. Mist again.
d) Carefully roll up the sushi mat around the bubble wrap and wool.
e) Agitate the wool by rolling and pressing the mat as firmly as possible. The longer this is done, then more felted the piece will become.
f) Unroll then let wool art piece dry on a flat surface. It will tighten up and shrink a little as it dries overnight.


Thursday, September 22, 2016
Waldorf-inspired art classes for kids: watercolour painting
This week our new series of Waldorf-inspired art classes for kids started. We have our Young Acorns group (ages 3-6) and the Green Saplings (ages 7-12) coming for 10 weeks of hands-on art, practicing a different Waldorf-based art technique each week: from wet-on-wet watercolour painting, to modelling clay, to sketching, to wool felting, to knitting, to sewing, to lantern making, and more! What a pleasure to host these kids here, setting the tone of peaceful mindful art-making using nature-based art supplies, where the process is more important than the end result.
This week started with very simple wet-on-wet watercolour painting in the classic Waldorf style, exploring individual colours. The younger group spent time with yellow and red, and the older group also worked with blue, yellow and red (individually, and then together to see what would emerge). We reminded them that Picasso had about three years where he simply worked with the colour blue in his paintings during Picasso's blue period. Then we had a chance to look at these colours outside - the younger group spent time finding all the yellows and reds around the garden, while the older group helped to harvest flowers that we will dry to use for a natural dye project in the final week.


This week started with very simple wet-on-wet watercolour painting in the classic Waldorf style, exploring individual colours. The younger group spent time with yellow and red, and the older group also worked with blue, yellow and red (individually, and then together to see what would emerge). We reminded them that Picasso had about three years where he simply worked with the colour blue in his paintings during Picasso's blue period. Then we had a chance to look at these colours outside - the younger group spent time finding all the yellows and reds around the garden, while the older group helped to harvest flowers that we will dry to use for a natural dye project in the final week.


Saturday, February 06, 2016
Mendfulness Gathering Announced! Sneak peek for this exciting day-long retreat coming in September at Little City Farm
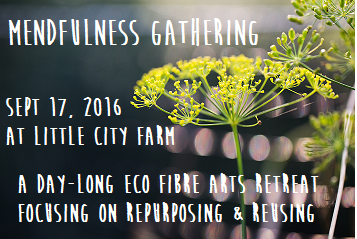
Join us for our very special
MENDFULNESS GATHERING
coming September 17, 2016 at Little City Farm.
Check out our website for the event here:
www.mendfulnessgathering.com
Make - Thrift - Mend - Repair - Reuse - Restore - Reinspire
An exciting day-long eco-fibre-arts crafting retreat focusing on reusing and repurposing clothing and fibres. Recharge yourself with this "mendful" retreat, taking time to learn new fibre-arts skills, meet other crafters, relax in the garden at Little City Farm, and find ways to bring more mendfulness into your life.
Here is a sneak peek:
The Workshops:
The day will be packed with 10+ hands-on workshops to choose from, led by a team of talented local fibre-arts-eco-crafters as our instructors! Learn useful new skills by taking part in sessions such as:
- spinning wool;
- felting wool (needle felting, wet felting);
- natural plant dyes;
- repurposing wool clothing into new useful household goods;
- making rag rugs;
- creative stitching & mending as an artform;
- altering garments to renew them;
- sewing rope coil baskets;
- making reusable beeswax food wraps;
- and more...
We'll feed you a hearty healthful lunch in Little City Farm homegrown style (eat delicious foods as we would make for our family, and learn how to make these foods at home yourself): wood-fired organic vegetarian pizzas, freshly-picked garden salad with edible flowers & herbs, and homemade pickles & lacto-fermented krauts, fruity kombucha; plus hearty homegrown snacks, herbal teas and organic wholegrain baked treats throughout the day.
Early-Bird Registration:
Limited space - registration is on first-come basis until we are full.
Register before June 1 - $70
Register after June 1 - $80
REGISTER HERE on our website.
More Info / Questions:
Contact Karin at info (at) littlecityfarm.ca
Saturday, November 22, 2014
Coming THIS WEEK! Annual Handmade Holiday Sale Nov 29
Here's one last reminder - about the upcoming annual Handmade Holiday Sale at Little City Farm.
We look forward to hosting this fun holiday sale held annually in our house. Our house is not big, but we pack in the vendors and everyone squeezes together to make for a cozy sale filled with unique handmade eco-conscious items!
When: Sat, Nov 29 from 10 am-2 pm
More info: www.littlecityfarm.ca

Friday, October 25, 2013
Mark Your Calendar! Annual Handmade Holiday Sale coming to Little City Farm Dec 7 from 9 am-2 pm

Featuring 8 local vendors including:
Sew Oiseau - original handmade clothing and accessories from recycled fibres
Your Time Candles - handmade pure beeswax candles
Once Upon A Tree - fine wood turnings (bowls, cutting boards) from fallen trees
Homestead Herbals - natural herbal soaps, salves & botanicals
Recycled bicycle art & jewelry
Eco journals, children's eco toys & handmade dolls
Wool slippers & felted wool ornaments
Organic baked goods & more surprises!
Wednesday, March 20, 2013
Eco craft - egg candles
In celebration of the spring equinox tomorrow we thought we'd share a simple little eco craft idea with you! We've had some fun making beeswax candles here lately. We found a great idea in the book The Children's Year for making candles in the shape of eggs, by using eggshells that have been blown out. They work perfectly - what a fun project for kids to make in celebration of spring, with help from an adult (when pouring the hot beeswax). Here's how we did it:
You need:
- two large eggs and egg cups to hold them
- small artists paint brush
- olive oil
- newspaper
- old pot (reserved for candlemaking)
- old clean tin can
- pure beeswax
- candlewick
- small piece of plastecine
1) To blow out the eggs - poke a mid sized hole in top and small hole in bottom of the egg using a sharp knife. Then blow through the smaller hole to push the egg insides out into a bowl. Wash egg inside, and let dry out. Then plug bottom hole with small piece of plastecine.
2) Oil the inside of the egg using paint brush. Do this gently as the hollow eggshell is fragile!
3) Prepare workspace by covering with newspaper. Then heat beeswax in tin can, set inside the old pot with about an inch of water. Heat on low until beeswax melts.
4) Pour small amount of melted wax into eggshell. Then add wick, hold in place and pour melted wax to fill the eggshell. Let harden by setting egg into an egg cup, and placing in the fridge.
5) When wax is completely hardened peel off the eggshell. It should peel off easily. If not, there was not enough oil inside. Your candle is complete! Happy spring!


You need:
- two large eggs and egg cups to hold them
- small artists paint brush
- olive oil
- newspaper
- old pot (reserved for candlemaking)
- old clean tin can
- pure beeswax
- candlewick
- small piece of plastecine
1) To blow out the eggs - poke a mid sized hole in top and small hole in bottom of the egg using a sharp knife. Then blow through the smaller hole to push the egg insides out into a bowl. Wash egg inside, and let dry out. Then plug bottom hole with small piece of plastecine.
2) Oil the inside of the egg using paint brush. Do this gently as the hollow eggshell is fragile!
3) Prepare workspace by covering with newspaper. Then heat beeswax in tin can, set inside the old pot with about an inch of water. Heat on low until beeswax melts.
4) Pour small amount of melted wax into eggshell. Then add wick, hold in place and pour melted wax to fill the eggshell. Let harden by setting egg into an egg cup, and placing in the fridge.
5) When wax is completely hardened peel off the eggshell. It should peel off easily. If not, there was not enough oil inside. Your candle is complete! Happy spring!


Thursday, April 05, 2012
Natural egg dyes
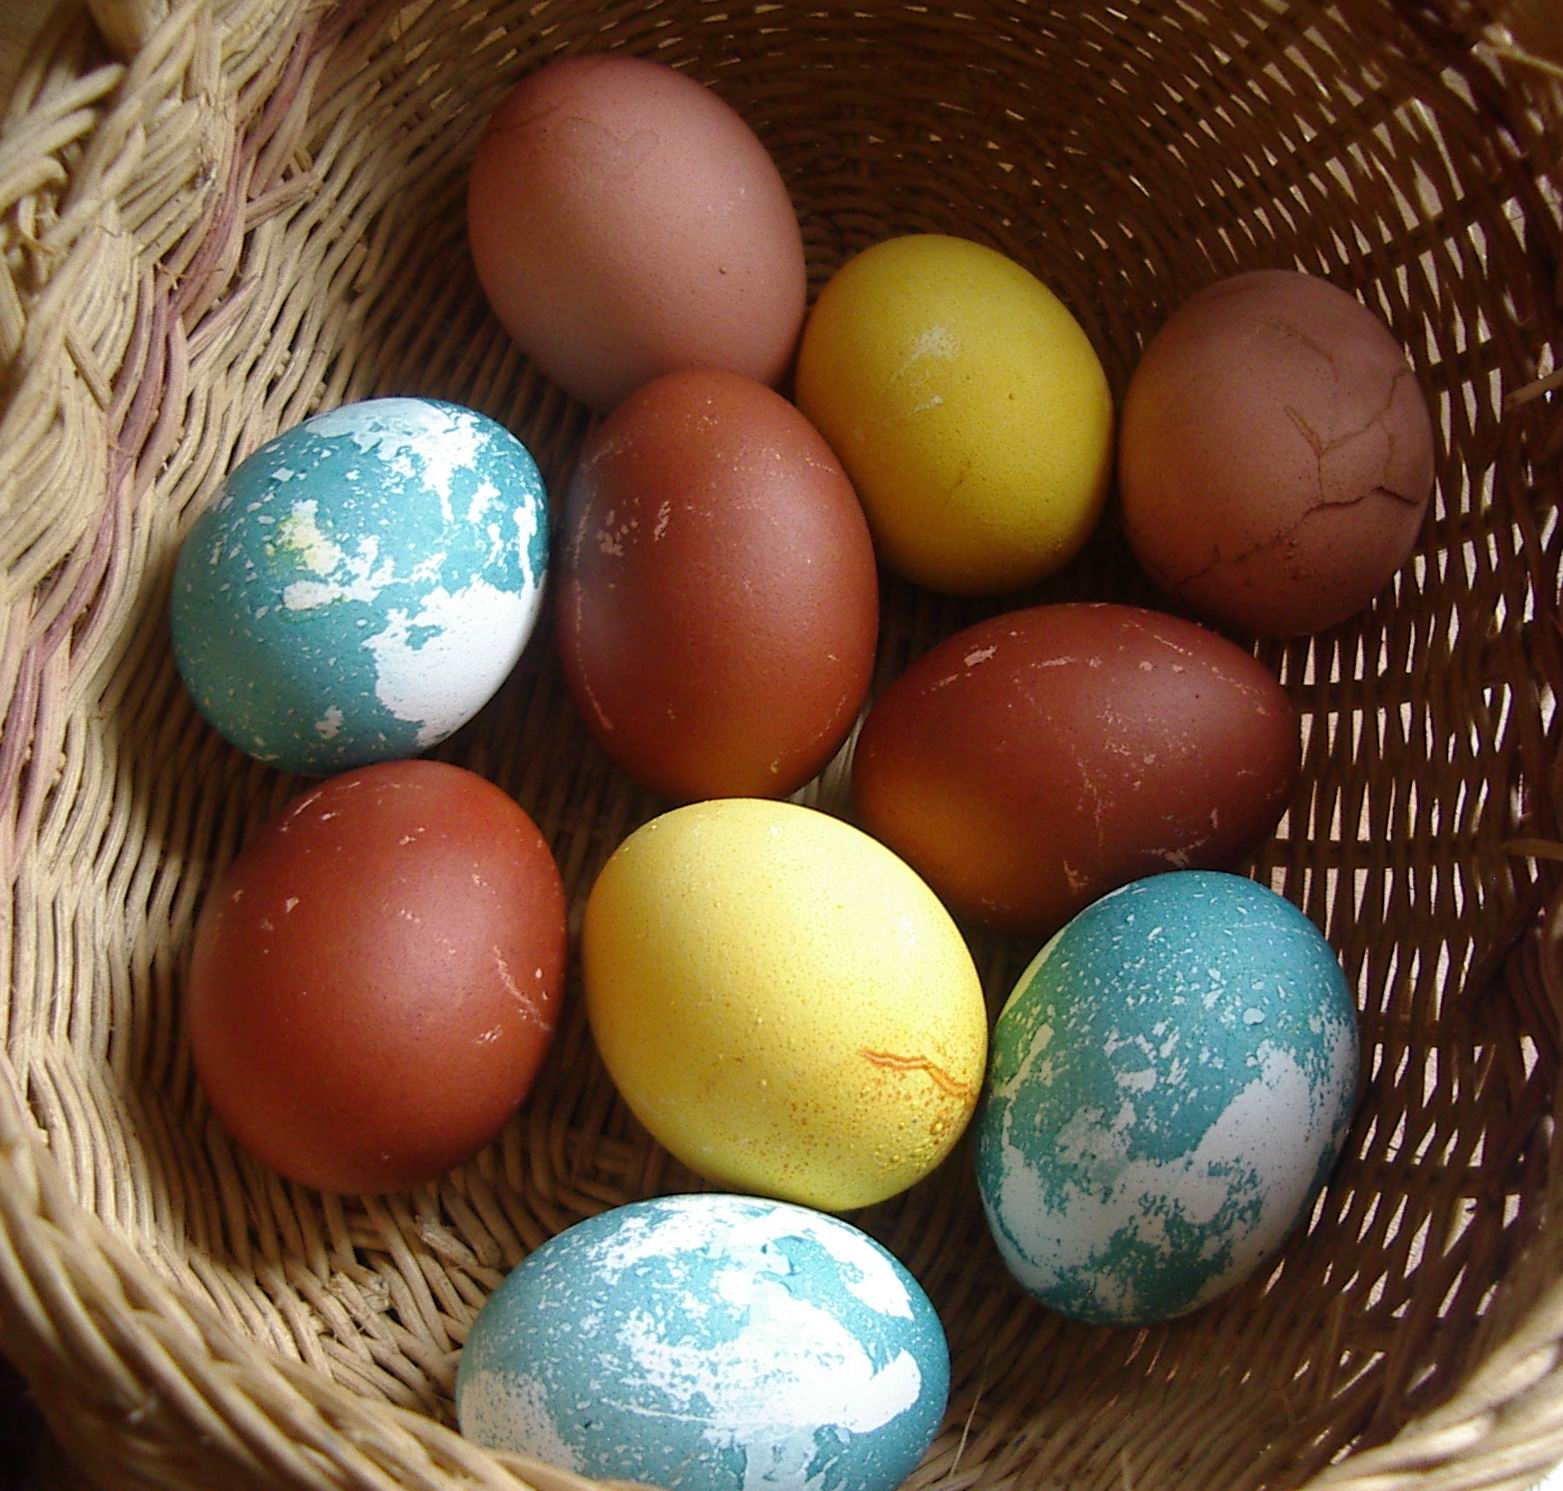
Whether you celebrate Easter or not, decorating eggs is such a lovely way to welcome spring. Here in the neighbourhood we have an annual egg hunt in a nearby park, which has become a great gathering moment for reconnecting with families we haven't seen during the long winter hibernation. We like to colour our eggs using natural dyes, and this year we used the method described in the exciting first issue of the new Taproot magazine (which we are loving!).
To dye eggs:
a) Using onion skins for reddish-copper colour, turmeric powder for sunny yellow, frozen blueberries for blue, and coffee grounds for brown, we came up with a nice variety with just items found in the kitchen.
b) The recipe calls for 1 quart water and 2 Tbsp white vinegar, plus dye agent. This is simmered for at least 20 minutes.
c) Then uncooked white eggs are added and again simmered for about 30 minutes (until they achieve desired level of colour). Simple, effective, fun that little helpers can easily enjoy lending a hand with.
d) Other ideas - wrap strings, elastic bands or cloth around the white eggs before dyeing. Wax the eggs with melted wax or draw on them with wax crayons before dyeing to get variety of patterns and shapes.


To dye eggs:
a) Using onion skins for reddish-copper colour, turmeric powder for sunny yellow, frozen blueberries for blue, and coffee grounds for brown, we came up with a nice variety with just items found in the kitchen.
b) The recipe calls for 1 quart water and 2 Tbsp white vinegar, plus dye agent. This is simmered for at least 20 minutes.
c) Then uncooked white eggs are added and again simmered for about 30 minutes (until they achieve desired level of colour). Simple, effective, fun that little helpers can easily enjoy lending a hand with.
d) Other ideas - wrap strings, elastic bands or cloth around the white eggs before dyeing. Wax the eggs with melted wax or draw on them with wax crayons before dyeing to get variety of patterns and shapes.




Thursday, March 01, 2012
Make your own: Handmade Seed Paper
Recently we had another little "disaster" at our house. Somehow, two whole rolls of toilet paper made their way into our 3 year old's bath, and were dissolved with glee into mushy wet wads of mess. Wanting to go with the flow, I thought for a minute about how to solve this situation. There had been so much fun creating this "art" in the bath, and it would be wasteful to just strain it off into the garbage or compost. We decided this was the perfect opportunity for a lesson in making handmade paper. Toilet paper is not the best material to use as it's already recycled thin paper weight and made of short fibres. We shredded up additional scrap paper, including colours and new textures and scooped out all the soggy pulp into a large plastic bin. Here are our steps for making paper (best done in the summer months outdoors, but in a pinch you can line your table or floor with thick towels and make your paper indoors).
Handmade Seed Paper
You will need:
- Paper pulp (about 10 sheets of scrap paper, including different colours and textures will do)
- Blender or Food Processor
- Screen (we made one from an embroidery hoop and mosquito netting)
- Seeds (optional, to add into your paper for "growing" your paper in soil)
- Two large plastic water-proof tubs
- Felt pieces large enough to cover your screen, and/or old tea towels
- Rolling pin (to use as a press)
- Drying area (we are using our plant growing rack, but drying outdoors in warm weather would be perfect)
1) Soak your paper in warm water. Rip it into shreds, let it become a soggy mess!
2) Scoop out paper pulp with your screen and blend in small batches in your food processor/blender.
3) Now you should have uniform mushy paper pulp. Add small flat seeds or other bits you want to decorate your paper. We added marigold seeds.
4) Add about one cup of pulp into your plastic tub (which is filled with warm water). You will need to test the thickness of your paper when you screen it out, to see if you need to add more water or pulp to the mix.
5) Use your screen to strain out the pulp into smooth sheets. Press your screen down onto the felt or tea towels in your second plastic tub. Layer with more felt in between each sheet.
6) When you have made a stack of about 10 sheets of handmade pulp paper, roll the top of the pile gently with a small rolling pin to press out the water. Pour off as much water as you can.
7) Lay out your sheets to dry. Drying time will depend on the thickness of your paper, and the temperature. Indoors in a cool house it will take several days. You could set up a fan beside your drying rack to help with the drying. Flip them part way through the drying process to help speed the drying. Outside in summer weather they can be dried in a day.
8) Pulp should be used up within a few days as it will not keep.
9) Write letters or make drawings on your seed paper, then plant in the ground for new flowers to grow!


Handmade Seed Paper
You will need:
- Paper pulp (about 10 sheets of scrap paper, including different colours and textures will do)
- Blender or Food Processor
- Screen (we made one from an embroidery hoop and mosquito netting)
- Seeds (optional, to add into your paper for "growing" your paper in soil)
- Two large plastic water-proof tubs
- Felt pieces large enough to cover your screen, and/or old tea towels
- Rolling pin (to use as a press)
- Drying area (we are using our plant growing rack, but drying outdoors in warm weather would be perfect)
1) Soak your paper in warm water. Rip it into shreds, let it become a soggy mess!
2) Scoop out paper pulp with your screen and blend in small batches in your food processor/blender.
3) Now you should have uniform mushy paper pulp. Add small flat seeds or other bits you want to decorate your paper. We added marigold seeds.
4) Add about one cup of pulp into your plastic tub (which is filled with warm water). You will need to test the thickness of your paper when you screen it out, to see if you need to add more water or pulp to the mix.
5) Use your screen to strain out the pulp into smooth sheets. Press your screen down onto the felt or tea towels in your second plastic tub. Layer with more felt in between each sheet.
6) When you have made a stack of about 10 sheets of handmade pulp paper, roll the top of the pile gently with a small rolling pin to press out the water. Pour off as much water as you can.
7) Lay out your sheets to dry. Drying time will depend on the thickness of your paper, and the temperature. Indoors in a cool house it will take several days. You could set up a fan beside your drying rack to help with the drying. Flip them part way through the drying process to help speed the drying. Outside in summer weather they can be dried in a day.
8) Pulp should be used up within a few days as it will not keep.
9) Write letters or make drawings on your seed paper, then plant in the ground for new flowers to grow!


Subscribe to:
Posts (Atom)