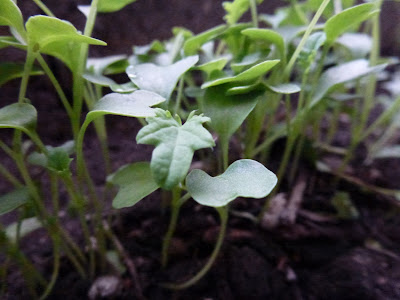
Doing especially well - mizuna, arugula, chard, kale, and cold hardy lettuces. Maya also planted carrots (a few have germinated) and I planted cilantro (also moving along slowly, since it's such a heat loving plant), and a few days ago Greg added beets (i.e. old sprouted beets to grow now for their tops). It's a mish-mash grow bed, and fun to have different family members adding their own suggestions.
We all crave these fresh greens at this time of year - to renergize our bodies and detox from winter sluggishness, giving our livers a boost with the dark leafy greens (more talk about wild dark greens like dandelions and nettles soon).
What are microgreens -
Microgreens are immature (baby) versions of vegetables, herbs and edible flowers. They are larger than sprouts, but are harvested when still much smaller than the full-grown vegetable. Easy to grow microgreens include broccoli, chard, basil, kale, cilantro, radish, buckwheat.
How to grow your own microgreens:
You will need:
- potting soil, lightly moistened
- trays to grow in (garden plug trays, or upcycled food trays like plastic or styrofoam from grocery or take-out)
- plastic wrap, damp newspaper, or plastic lid to fit your trays
- seeds (non GMO, organic), soaked for several hours (follow package instructions)
- water spray bottle
2) Sprinkle your choice of seeds evenly across the soil, pressing in lightly with hands (add enough seeds to fill the tray, but not more than one layer thick).
3) Cover with plastic wrap, damp newspaper or plastic lid - and leave covered until seeds germinate. Then remove covers so mold doesn't develop on the soil.
4) Mist seeds at least 2 times a day. Try not to let the soil dry out in between if possible, but do not over-water. Soil and seeds should simply be lightly damp.
5) Growing period will take anywhere from 7-21 days, depending on seeds you are growing and your growing conditions (e.g. light levels, temperature of house, humidity, how often you water, etc). During growing period the trays can be left on a kitchen counter - they do not need grow lights or direct sunlight.
6) To harvest - usually microgreens are harvested after the second set of true leaves has emerged. Remember, microgreens are larger than sprouts, but smaller than the full grown vegetable. Shoots, stems, leaves and even roots are all edible. Harvest with sharp kitchen scissors. Store in a sealed container in fridge for several days, but ideally harvest just before you want to eat! Enjoy!


No comments:
Post a Comment