Thursday, January 29, 2015
Get your organic non-GMO seeds from Little City Farm this spring!
NOW AVAILABLE FOR LOCAL CUSTOMERS!
We are so excited to be offering unique organic non-GMO and heirloom seeds through our Little City Farm store & studio. Just in time for spring planting local customers will be able to find seeds from our "farmers market" collection including unique varieties of peas, beans, chard, kale, greens and more - as well as pollinator-friendly and kids-garden collections. Our seeds are coming from High Mowing Seeds, an organic seed company that we think very highly of due to their strict organic and non-GMO verification standards. We have over 48+ varieties to choose from!
How to buy seeds from Little City Farm - visit us on Saturdays between 10-4 pm (from Februrary through April, and May 23 at our annual Seedling Sale), or contact Karin directly at: info@littlecityfarm.ca
Now on facebook!
After many years of considering, we have decided to join Facebook. Find our Little City Farm page here and like us!
Tuesday, January 20, 2015
New homestead projects & first Grain Share
There are so many new ideas brimming forth for our homestead as this new year unfolds - it is quite exciting to explore these new possibilities and start setting things in motion - but also a bit overwhelming. This is of course the time for seed orders and garden planning, and we'll post our annual Seed Planting Guide here shortly. We are also renovating and setting up that barn into production once again...we are reorganizing our eco bed and breakfast...we will be starting to offer organic non-GMO seeds through our Little City Farm store (more on that soon)...we have homesteading classes on the go...we hope to start keeping bees this summer...
We've also been trying to streamline our food purchases as part of our homestead focus - so that everything we can't grow/sprout/preserve/make/bake ourselves is bought either through our food co-op buying club, or from local farmers. We'd like to avoid purchases at the grocery store wherever we can so we can instead support co-ops and nearby farms, and help reduce our food budget by buying in bulk. And today, we received our first Grain Share - one of a five-part delivery of a variety of locally grown organic and freshly milled grains we are getting as part of a share program through Cedar Down Farm. We are hosting the local in-city pick up for people interested in this grain share idea, and today is the first day. Our farmer arrived with a van full of brown paper bags neatly stacked, sorted and labelled. Our daughter helped to carry all the bags in eagerly, and then peeked into what our family had received. Today's delivery included hard wheat, rolled oats, rye (5 lbs each, all freshly milled), and 2 lbs of black beans - all grown at the farm. Cedar Down Farm is just over an hour away from here, and we are so happy to be supporting these local farmers and their new initiative. We promptly made a huge batch of granola, and have bread dough rising (can't wait to see how the freshly milled flour works), and are anticipating next month's delivery surprises!
Monday, January 19, 2015
Beautiful snow & sunshine
What gorgeous snow and sunshine we've been having! The thick flakes were so fun to photograph, and the slightly warmer weather with heavily textured snow was enjoyed on walks and tobogganing this week.
Barn reno update!
It's coming along...wood siding is now on, we are working on the interior! There's still a lot to do, but we hope to have it ready in some capacity for hosting our first workshop in the new space - the Seedling Starting Workshop at the end of February (Feb 21) with our guest facilitator Angie Koch from Fertile Ground CSA and the greenhouse ready for the annual Little City Farm Seedling Sale coming on May 23!
Friday, January 09, 2015
What to do on a cold snowy morning? Two delicious ideas
Oh, what to do on a cold snowy morning? Well we could stay in bed and read books, or make a cozy fire and play a boardgame...or bundle up and have some snowy adventures outside.
We always try to head for the outdoors. Today, to make things different, we decided to use two winter cooking ideas from The Kids Outdoor Adventure Book - which is packed full of simple seasonal ideas for getting you and your kids outside.
First we collected the most pristine newly fallen snow to make snow icecream (strawberry coconut was our blend - yum), and then we built up a little bonfire in the backyard to bake bannock. There is nothing like hot smoke-flavoured bannock covered with melting butter and jam or applebutter, eaten right off a stick (it needs to be slightly burnt too to be just right). What a delicious morning it turned out to be, and no one seemed to feel too cold. Here are our own slightly healthier versions of tried-and-true recipes.
Easy Snow Ice Cream (vegan, gluten-free)
Ingredients:
10 cups freshly fallen clean snow
1 1/2 cups organic sugar or slightly less maple syrup or sweetener of your choice
1 cup organic coconut milk
1 cup frozen strawberries (or other fruit)
1 tsp pure vanilla
To do:
Blend half the snow and the rest of the ingredients well in a blender.
Keep it moving quickly so the icecream doesn't get too warm.
Fold in the rest of the snow and stir gently. Eat immediately. It tastes like sorbet.
Store the rest in a tub in your freezer.
Wood-Fired Bannock (on a stick)
4 cups spelt flour
1 1/2 cups water
1 tsp sea salt
5 Tbsp baking powder
To do:
Mix dry ingredients in mid sized bowl
Mix in water and knead gently to form a sticky ball.
Take bannock outside to your fire (best to have some embers or coals on the side to toast over).
Wrap a small piece of bannock into a log shape around a thumb-sized stick.
Hold over the embers and let the bannock toast to a nice golden brown, so it's baked all the way through.
Enjoy with butter and jam, or applebutter (or your favourite spreads).
Best eaten outdoors on a winters day, near a hot bonfire, with friends.
Wednesday, January 07, 2015
Fluffy Chia Spelt Biscuits
Oh yum! We've been enjoying winter soups and stews to warm us these past colds days. I love to always keep a pot of soup going on the stove, ready for a cozy quick nourishing meal. We like to have sourdough bread or these chia biscuits alongside a bowl of hearty soup. Here is a simple recipe for the fluffiest chia biscuits I have ever made. We experiment with different grains, but like whole spelt flour the best. They can also be made gluten-free by substituting GF flours for the spelt. These biscuits cut out well, and are fun for kids to shape or cut to their heart's desire. Isn't eating a star or heart shaped biscuit more delicious, especially if it was made by little hands?
Fluffy Chia Spelt Biscuits
Yields: approx. 10 large biscuits
1 1/4 cups whole spelt flour (or flour of your choice)
3/4 cup arrowroot flour
1 Tbsp baking powder
3/4 tsp sea salt
10 Tbsp organic butter
1 cup coconut milk (or other dairy or substitute)
2 Tbsp black chia seeds, ground finely
1) Preheat oven to 425 F.
2) Lightly oil baking sheet or line with parchment paper.
3) Mix together the dry ingedients in one bowl, and then add butter.
4) Blend butter using your fingers so the mixture resembles coarse crumbs. It's ok to have pieces of butter left in the mixture as this makes the biscuits flaky.
5) Mix wet ingredients in another small bowl and let sit for 5 minutes to thicken.
6) Then form dough by mixing wet into dry. Mix lightly to knead dough into two balls.
7) Pat dough into 1 inch rounds on a floured surface. Cut into rounds or shapes.
8) Bake for 15 minutes. Serve warm with butter or another delicious spread.
Thyme-honey infusion & cough syrup for sore throats and winter coughs
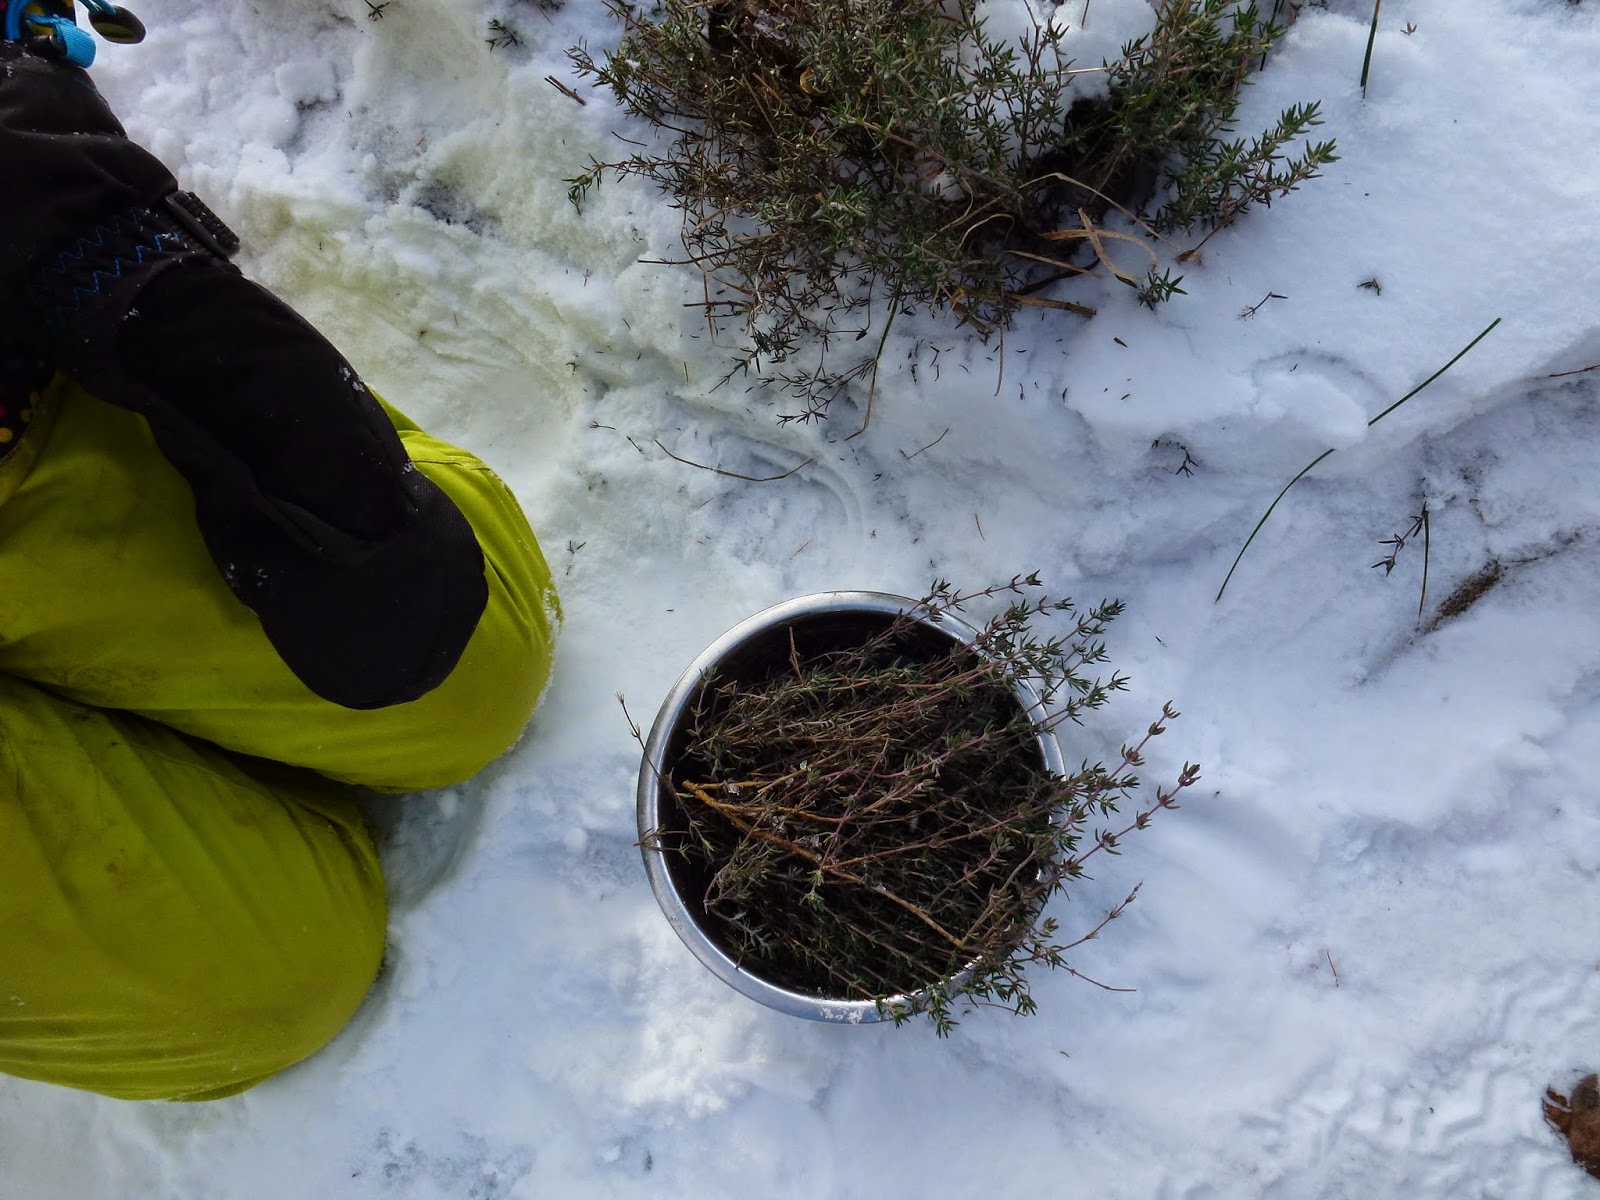
Winter time calls for easy recipes to help ward off coughs and sore throats. Here are two recipes using the simple kitchen herb thyme - thyme may be common but it has long been a revered healer. If you have not harvested enough thyme from your garden (or used it up like we had) you can still go to pick some - this hardy herb still looked beautifully green as it peeked out from under the blanket of newly fallen snow in our garden. Here are two easy tried-and-true recipes to help fight coughs, bronchitis and sore throats. The recipes are delicious and quick to prepare. Enjoy and keep your household healthy this winter. Please note that traditionally it has been recommended to use little or none of the herb thyme during pregnancy.
THYME-HONEY-LEMON INFUSION
Yields: 1 cup infusion
1 cup water
1 tsp fresh thyme (fresh tastes much better in a tea than dried)
1 slice lemon, or 1 tsp organic lemon juice
1 tsp raw honey, or to taste (or agave, or maple syrup as you prefer)
1) Bring water to a boil.
2) Pour over thyme in a mug or bodum and let steep 5-10 minutes (or longer for stronger infusion).
3) Add slice of lemon/lemon juice, and honey to sweeten.
4) Enjoy sipping your hot tea and letting it soothe your throat!
Do not drink thyme infusion if you are pregnant.
THYME-HONEY COUGH SYRUP
Yields: approx. 3 cups syrup
2 cups water
3 Tbsp thyme (fresh) or 1 Tbsp dried
1 cup raw honey
1) Heat water in a mid-sized pot, add fresh or dried thyme thyme and steep for 10 minutes after water has boiled.
2) After thyme infusion has cooled, strain out the herbs. Then add 1 cup raw honey and whisk to combine until all honey is completely melted.
3) Store in glass jars with tight lid in fridge, which will keep for about 2 months.
To use: Use 1 tsp at first sign of cough or sore throat. Do not use if pregnant.
Monday, January 05, 2015
Easiest Gluten-free Vegan Granola Bars with Options!
Here's a new simple granola bar recipe that even our 6 year old daughter can make (with only a tiny bit of help)! They store well, pack a good amount of protein, and are delicious.
Easiest Gluten-Free Vegan Granola Bars with variations
Basic Ingredients:
1 1/2 cups whole oats (gluten free if you want a gluten-free bar)
1 1/2 cups brown rice crisp cereal (or use ground nuts for slightly different texture)
1/2 cup dried fruit (we love sour cherries, or cranberries)
1 cup total dried seeds or nuts of choice (we love pumpkin, sunflower, sesame seeds, or walnuts)
1/4 cup unhulled hemp seeds
1/4 cup coconut (unsweetened, shredded)
2 Tbsp chia seeds
1/2 tsp cinnamon
1/2 tsp ginger
1/4 tsp sea salt
1/2 cup liquid sweetener (maple syrup or brown rice syrup, or honey if not vegan)
1/4 cup almond butter (or tahini, or peanut butter)
1 Tbsp flax or hemp oil
1/2 cup dark chocolate chips (at least 70%) or cacao nibs
Instructions:
1) Combine all dry ingredients, other than chocolate chips/cacao nibs. Mix well in medium sized bowl.
2) Melt the liquid sweetener and the almond butter (or nut butter you are using) in medium saucepan over low heat, just stirring to combine.
3) Mix wet into dry and blend well.
4) Now add flax oil/hemp oil, and chocolate chips/cacao nibs. Mix well to combine, using your hands if necessary.
5) Press firmly and evenly into 8x8 inch pan that is lined with parchment paper.
6) Let chill for 20 minutes, then slice into bars. Makes 24 bars.
7) Wrap individually or store in sealed container. Keep well in freezer for several months, although you will enjoy these bars long before that!
Our favourite variations:
Pumpkin seed & cranberry
Sour cherry & chocolate chip
Coconut-lemon (add one tsp lemon oil)
Hemp seed & cacao nibs, with extra flaked sea salt sprinkled on top of bars
Winter ice garden
Oh, what lovely ice encapsulating every twig, stem and branch in our garden after the freezing rain...
Chickens love the snow (man)!
What a funny moment today, watching our hens trying to eat the carrot nose off the mini snowman Maya built. I think we might build a few more bird-friendly snow creatures around our yard, with sunflower seed eyes, carrot noses, berry mouths...
Friday, January 02, 2015
Handcrafted Wooden Soap Molds & Cutters now available from Little City Farm
Handcrafted wooden soap molds now available from Little City Farm!
Made to order. See details below:
---------------------------------------------------------------------------
PURCHASE WOODEN SOAP MOLD WITH LID
Cost: $35
(this rate is for local orders with pick up at Little City Farm - for non-local orders please see our Homestead Herbals Store)
Premium handcrafted wooden pine 4 lb mold with simple end closures, PLUS wooden pine lid.
Holds 13 x 1 inch bars of soap. Made right here at Little City Farm!
Perfect for using in our Beginner Organic Vegan Soap Making Classes.
Please give us a minimum of 1 week notice if you wish to order a soap mold for an upcoming class.
Once you place your order you will receive an email to let you know about a pick-up time. If you are ordering this mold to be used during a workshop you can pick up your mold on the workshop day.
Use and care of wooden soap molds:
Wooden soap molds have long been used by soap makers to create beautiful uniform soaps in the traditional loaf shape. Wooden soap molds should be lined with parchment or waxed paper before using. Wooden soap molds can be lightly oiled with a vegetable oil (e.g. olive or linseed) if you wish to help preserve the wood.
-----------------------------------------------------------------------------
PURCHASE WOODEN SOAP MOLD WITH LID AND SOAP CUTTER
Cost: $45
(this rate is for local orders with pick up at Little City Farm - for non-local orders please see our Homestead Herbals Store)
Premium handcrafted wooden pine 4 lb mold with simple end closures, PLUS wooden pine lid.
Holds 13 x 1 inch bars of soap. Made right here at Little City Farm!
This purchase comes with a professional wooden-handled soap cutting tool.
Perfect for using in our Beginner Organic Vegan Soap Making Classes.
Please give us a minimum of 1 week notice if you wish to order a soap mold for an upcoming class.
Once you place your order you will receive an email to let you know about a pick-up time. If you are ordering this mold to be used during a workshop you can pick up your mold on the workshop day.
Use and care of wooden soap molds:
Wooden soap molds have long been used by soap makers to create beautiful uniform soaps in the traditional loaf shape. Wooden soap molds should be lined with parchment or waxed paper before using. Wooden soap molds can be lightly oiled with a vegetable oil (e.g. olive or linseed) if you wish to help preserve the wood.
Made to order. See details below:
---------------------------------------------------------------------------
PURCHASE WOODEN SOAP MOLD WITH LID
Cost: $35
(this rate is for local orders with pick up at Little City Farm - for non-local orders please see our Homestead Herbals Store)
Premium handcrafted wooden pine 4 lb mold with simple end closures, PLUS wooden pine lid.
Holds 13 x 1 inch bars of soap. Made right here at Little City Farm!
Perfect for using in our Beginner Organic Vegan Soap Making Classes.
Please give us a minimum of 1 week notice if you wish to order a soap mold for an upcoming class.
Once you place your order you will receive an email to let you know about a pick-up time. If you are ordering this mold to be used during a workshop you can pick up your mold on the workshop day.
Use and care of wooden soap molds:
Wooden soap molds have long been used by soap makers to create beautiful uniform soaps in the traditional loaf shape. Wooden soap molds should be lined with parchment or waxed paper before using. Wooden soap molds can be lightly oiled with a vegetable oil (e.g. olive or linseed) if you wish to help preserve the wood.
-----------------------------------------------------------------------------
PURCHASE WOODEN SOAP MOLD WITH LID AND SOAP CUTTER
Cost: $45
(this rate is for local orders with pick up at Little City Farm - for non-local orders please see our Homestead Herbals Store)
Premium handcrafted wooden pine 4 lb mold with simple end closures, PLUS wooden pine lid.
Holds 13 x 1 inch bars of soap. Made right here at Little City Farm!
This purchase comes with a professional wooden-handled soap cutting tool.
Perfect for using in our Beginner Organic Vegan Soap Making Classes.
Please give us a minimum of 1 week notice if you wish to order a soap mold for an upcoming class.
Once you place your order you will receive an email to let you know about a pick-up time. If you are ordering this mold to be used during a workshop you can pick up your mold on the workshop day.
Use and care of wooden soap molds:
Wooden soap molds have long been used by soap makers to create beautiful uniform soaps in the traditional loaf shape. Wooden soap molds should be lined with parchment or waxed paper before using. Wooden soap molds can be lightly oiled with a vegetable oil (e.g. olive or linseed) if you wish to help preserve the wood.
Subscribe to:
Posts (Atom)