Recently, after a bit of a snowfall, we had a great time building a child-sized quinzhee (quincy?) - a snow house that is not an igloo but is a large mound of snow packed down and that is tunneled out to form a cozy shelter. While this was a fun project, the cold weather and snow didn't last and by the next day our quinzhee was shrinking considerably so it could no longer house a small person. By day three it was only knee sized. Disappointing for a 3 year old (and me) who had put in hours of work piling up the snow.
However, it only took a few minutes for our little one to brighten up with a new plan. "Let's play bake oven - this can be my outdoor kitchen" - meaning her miniature shrunken quinzhee was now an ideal child version of our outdoor wood-fired cob oven. She formed snow loaves of bread, lined them up on old boards to "rise", gathered small sticks to make a "fire" in the oven, and then "baked" the snow bread to perfection. Little round log bits were potatoes, baked alongside. Then she set up her "CSA stand" with a handlettered sign saying "fresh bread", and sold her snow loaves to all of us happy customers! Mmm, delicious. This is just another example of the endless lessons our kids can teach us about seeing the opportunity in every moment, even if it takes us in unexpected diretions, if we keep our minds and creative hearts open.
Thursday, March 01, 2012
Homesteading - easy mozzarella
We are so excited about cheese making around here - we have two cheese making workshops coming up at Little City Farm in the next month, both filled to capacity and with waiting lists of additional people who are interested in learning. Although we are not leading the cheesemaking workshops ourselves (we are bringing in a local cheesemaking "expert"!), we have been experimenting with various cheeses just for our own family and are getting better at it with each try. Farmhouse cheddar, cream cheese, ricotta, feta, chevre and mozzarella, are wonderful diverse cheeses that are all very easy to make. Cheese is best made with organic raw milk (if you can get it), organic milk (not ultra-high pasteurized) from the store, as well as organic goats milk. We add herbs and have been coming up with some delicious flavours. One of the best sources for cheese making supplies is the New England Cheese Supply Company but we have recently also found some of their cheese making "kits" at a local shop here in town (Vincenzos). You can also skip the "kits" and simply buy bulk quantities of citric acid, cheese salt, and rennet tablets (depending on what kind of cheese you want to make). A little of each of these supplies goes a long way. Here is a simply recipe for mozzarella - this is a super project to do with kids! We had a hard time not devouring the fresh cheese right away.
Simple Mozzarella
1 gallon organic milk (non ultra-high pasteurized)
1/4 rennet tablet (vegetarian rennet) dissolved in 1/4 cup cool filtered water
1 1/2 tsp citric acid dissolved in 1 cup cool filtered water
1-2 tsp cheese salt
1) Pour the dissolved citric acid in 1 cup cool water into a large stainless steel pot. Add milk and heat milk on low, stirring until milk is at 90F. Only use a wooden spoon or stainless steel spoon (not aluminum). Take off burner.
2) Slowly stir in rennet solution and stir 30 seconds. Then cover with lid and let stand 5-10 minutes.
3) During this time the milk will have formed a curd - cut curd with a long sharp knife into small cubes.
4) Reheat curd/milk on stove to about 105F while slowly stirring. Then remove from heat and keep stirring 5 minutes more.
5) Pour off the liquid whey and reserve this for baking, adding to smoothies, soups, etc. Or use the whey for making Ricotta with this recipe here. Ladle the curds into a colander and gently drain.
6) Heat pot of fresh water to 185F. Dip your curds (in the colander) into the hot water. They will start to become stretchy and look more like soft mozzarella, then start to fold with a spoon.
7) When completely stretchy you can remove curd from hot water and pull into long strands. Shape into logs, balls, cheese strings, braids, etc. Add 1-2 tsp cheese salt and/or herbs at this time and blend in while you stretch and shape the cheese.
8) Dip into ice water to cool for about 5 minutes - this will harden the cheese and it will hold it's shape.
9) You are done! Enjoy!
Simple Mozzarella
1 gallon organic milk (non ultra-high pasteurized)
1/4 rennet tablet (vegetarian rennet) dissolved in 1/4 cup cool filtered water
1 1/2 tsp citric acid dissolved in 1 cup cool filtered water
1-2 tsp cheese salt
1) Pour the dissolved citric acid in 1 cup cool water into a large stainless steel pot. Add milk and heat milk on low, stirring until milk is at 90F. Only use a wooden spoon or stainless steel spoon (not aluminum). Take off burner.
2) Slowly stir in rennet solution and stir 30 seconds. Then cover with lid and let stand 5-10 minutes.
3) During this time the milk will have formed a curd - cut curd with a long sharp knife into small cubes.
4) Reheat curd/milk on stove to about 105F while slowly stirring. Then remove from heat and keep stirring 5 minutes more.
5) Pour off the liquid whey and reserve this for baking, adding to smoothies, soups, etc. Or use the whey for making Ricotta with this recipe here. Ladle the curds into a colander and gently drain.
6) Heat pot of fresh water to 185F. Dip your curds (in the colander) into the hot water. They will start to become stretchy and look more like soft mozzarella, then start to fold with a spoon.
7) When completely stretchy you can remove curd from hot water and pull into long strands. Shape into logs, balls, cheese strings, braids, etc. Add 1-2 tsp cheese salt and/or herbs at this time and blend in while you stretch and shape the cheese.
8) Dip into ice water to cool for about 5 minutes - this will harden the cheese and it will hold it's shape.
9) You are done! Enjoy!
Tuesday, February 21, 2012
Winter crafting - Ice Candles
Since the weather has turned cold again we have been searching for wintery projects, both inside and out. We have been reading about the history of ice candles. There are many ways to make ice candles, and many northern countries have wonderful long-standing traditions and festivities using ice candles during the cold dark months. This would be a great project to do with kids just before the winter solstice, but mid-February will do! To make an ice candle you can simply freeze buckets or cartons filled with water which, when unmolded, become candle holders; or create more elaborate ice scuplted shapes as the water slowly freezes; or another variation is to add ice chunks or cubes to a candle mold, add a wick and pour hot wax over (the ice leaves designs in the candle). We used a very easy method - freezing water in a round bundt pan - but first added sage, lavender, hops, cedar and thyme from the garden (and other bits from the yard) as decoration from our garden to add delicious scent as the ice melts and candle burns.


Soil and seeds
We've filled an entire growing rack - mainly with sprouts that we plan to eat, but also with some seedlings for this season - a few herbs and flowers that need an extra long start to their growing season. It's a nice ritual each morning, turning on all the lights (or having them come on by timer before we even get out of bed!), unwrapping the heavy plastic sheeting we have around the rack to keep heat in, checking the plants for moisture, having my 3 year old helper fill the spray bottles and mini watering can to give each tray the water they need for the day. And in the evening, happily stoking the wood stove next to the rack to bring a little extra heat to the seedlings.
As our starter soil we use a certified organic grower's mix which is used by the professional organic farmers who we know. It's the Pefferlaw brand, which is widely available in Ontario through various garden centres - here is a list of where you can find the soil. We actually ordered directly from them, and got a skid delivered (45 bags x 85 L soil) and split this with another friend last year. We still have a little soil left as this was a huge order for us!
Monday, February 13, 2012
Starting Seeds & Organic Gardening Primer - Upcoming Workshop!
This is the time of year that seeds are arriving in the mail, we are planning our garden layout and dreaming about new varieties and flavours, and reading back in our journal from last year to learn how we could improve what we did. Coming up in a few weeks is our annual Seed Starting Workshop here at Little City Farm. If you are a new gardener, or have experience but want to build on your knowledge, consider coming out to this great workshop. We will have Angie, owner of Fertile Ground CSA here to lead the workshop, discussing how and when to start seeds, what soil to use, where to source seeds, germination issues, transplanting seedlings, etc. She will also cover some key information about organic gardening, and knowing that she is a well-respected local organic farmer with years of experience (and a personal friend), we can vouch that this workshop will be well worth attending. The workshop is on Sat, March 10 from 1-3 pm. Limited space so sign up soon. Go here to register.
Winter Sprouts
It's so satisfying to grow sprouts in the winter. They delicious, nutritious live foods, with a gorgeous fresh green colour and flavour that we crave in the cold months. We are growing a variety of sprouts in trays of soil this year (in the months before our grow racks are needed to hold our seedlings) - pea shoots, cilantro greens, lettuces, arugula, sunflower shoots, chives...and cat grass that our 3 year old is tending patiently (aka. wheat grass, which grows so quickly that it's exciting for kids to care for). Most sprouts only take about a week to grow (depending on how warm your house is), and some can be cut to grow again (cilantro, lettuces). They prefer nice steady temperatures and watering, so we like to mist them every day and keep them under plastic lids in a grow rack wrapped with greenhouse grade plastic sheeting to keep out the drafts. After they have germinated we turn on the lights so they can green up more quickly. Our favourite source for sprouting seeds and other materials is Mumm's, in Saskatchewan.
Make your own live-cultured cream cheese
We've posted our workshop series for this season, and have several topics back by popular demand! One of these is cheese making. We are excited to be offering this workshop again, where we'll be making mozzerella, cream cheese, talking about other cheeses and also how to make yogurt. Here at home we make our own mozzarella, cream cheese and yogurt on a regular basis, and I want to start making feta and soft goat cheese as well. The winter is such a good time for these kinds of kitchen experiments.
On the weekend we baked our own homemade bagels, made live-cultured cream cheese to go with them, and opened a precious jar of blueberry jam from our pantry!
Live Cultured Cream Cheese
You will need:
2 cups live cultured yogurt
several layers of cheesecloth and one elastic band
wooden stick (e.g. a chopstick)
large pitcher or measuring cup
1) Pour the yogurt through the cheesecloth, into the large pitcher/measuring cup. Secure the cheesecloth with the elastic band to hold it in place while the whey from the yogurt continues to drip through.
2) After about 2 hours (or when the yogurt stops dripping), wrap the cheesecloth tightly around the "ball" of yogurt and secure with elastic. Hang this from the chopstick over top of the pitcher.
3) After 24 hours you will have nice firm live cultured cream cheese that you can scrape out of the cheesecloth, plus about a cup of whey in your pitcher. Use the whey in smoothies, baking, etc.
On the weekend we baked our own homemade bagels, made live-cultured cream cheese to go with them, and opened a precious jar of blueberry jam from our pantry!
Live Cultured Cream Cheese
You will need:
2 cups live cultured yogurt
several layers of cheesecloth and one elastic band
wooden stick (e.g. a chopstick)
large pitcher or measuring cup
1) Pour the yogurt through the cheesecloth, into the large pitcher/measuring cup. Secure the cheesecloth with the elastic band to hold it in place while the whey from the yogurt continues to drip through.
2) After about 2 hours (or when the yogurt stops dripping), wrap the cheesecloth tightly around the "ball" of yogurt and secure with elastic. Hang this from the chopstick over top of the pitcher.
3) After 24 hours you will have nice firm live cultured cream cheese that you can scrape out of the cheesecloth, plus about a cup of whey in your pitcher. Use the whey in smoothies, baking, etc.
Sunday, February 05, 2012
The radical act of baking bread
"Creating something meaningful by hand using simple materials and tools is how we begin to re-skill ourselves and our communities. We begin to see ourselves as active producers, rather than passive consumers. We lessen our dependence on corporations, fossil fuels and unsustainable purchases. Once we become empowered there is no end to what we can do." This was how I introduced a "radical bread baking" workshop I led on the weekend.
How can bread baking at home can be a radical act?
1. Moving us from being consumers to active "producers"
2. Choosing organic non GMO ingredients (a vote against corporations like Monsanto)
3. Supporting local farmers growing grains, and local mills that grind the flour
4. Realizing a connection to people of all cultures, all times, all walks of life
5. Having the ability to teach others how to bake bread
6. Sharing nourishing healthful food with others
7. Slowing down and taking time to be grateful for this food
Not to mention the satisfaction of making something yourself by hand, superior flavour and freshness, cost effectiveness, and artful elements of bread baking...
How can bread baking at home can be a radical act?
1. Moving us from being consumers to active "producers"
2. Choosing organic non GMO ingredients (a vote against corporations like Monsanto)
3. Supporting local farmers growing grains, and local mills that grind the flour
4. Realizing a connection to people of all cultures, all times, all walks of life
5. Having the ability to teach others how to bake bread
6. Sharing nourishing healthful food with others
7. Slowing down and taking time to be grateful for this food
Not to mention the satisfaction of making something yourself by hand, superior flavour and freshness, cost effectiveness, and artful elements of bread baking...
February thaw
This warm thaw saw us outside all weekend enjoying the mild weather, strange as it may be for February. We started to organize the greenhouse, pruned some vines, planted new greens into the cold frames - all the while with our chicken companions happily following along behind.
Monday, January 30, 2012
Eco B&B's
Here at Little City Farm we do various things to make our living - urban homesteading projects galore (gardening, preserving, sewing, baking, sprouting, yogurt making); making, selling and teaching about natural soaps & herbals; wood-fired baking; natural building; re-skilling workshops for the community; and we also operate a small eco bed & breakfast using the top floor of our home. We like to see the B&B as a way of sharing our home and our way of life with the guests who choose to stay here, hoping to inspire and be inspired by others along the path toward sustainability and eco-conscious living.
By offering a unique B&B that is very openly about promoting sustainability, we have the great fortune of meeting many wonderful people. This past weekend we were honoured to host a couple, Chai & Andy, who also run their own eco-B&B here in Ontario. The Giving Tree B&B is located near Collingwood, actually situated right along an old railway line that is now a bike path that leads into town! They are on the Bruce Trail, near Georgian Bay, and have a wonderful rustic barn that has been converted into a yoga studio, guest space and sprouting operation. The couple is also involved with the local Transition Town movement, and promote many interesting re-skilling workshops in the community. We were inspired by their story and hope to have the chance to visit them soon.
Seed Starting Schedule for 2012
It's time to plan out the seed starting schedule. On this past weekend we made our annual "pilgrimmage" to the Organic Conference in Guelph, where we saw many old friends, ate organic icecream from Mapletons (my favourites are chai, ginger and pumpkin), came back with a pile of exciting new seed packages from our favourite Ontario small seed companies Cottage Gardener, Greta's, and Urban Harvest, and were generally inspired by the crowd of farmers/gardeners and other folks who live, advocate for, and grow organically.
Each year we post our Seed Starting Schedule (for zone 5-6, where we need to start plenty of our seeds in advance, e.g. tomatoes, brassicas, hot peppers, herbs)...Here is the link to last year's post regarding our seed schedule, or if you don't want to read the entire post again I will include the summary of our Seed Starting Schedule below.
We also placed seed orders with West Coast Seeds, High Mowing, and Richters Herbs today - in particular, the photos and selection of High Mowing were astounding - we are especially anticipating their specialty greens, edamame, high-resin medicinal calendula, and wild greens (wild arugula, purslane, amaranth, purple mustards, etc). Maya is excited about what she chose for her garden: dragon beans, rainbow carrots, dinosaur kale...she wants to plant a rainbow selection of vegetables this year.
PLANTING GUIDE (based on frost-free date of May 24):
FEBRUARY (the greens listed here can continue to be planted throughout the growing season of course)
Start lettuce, chard, other greens in greenhouse or in flats indoors (to be planted out to greenhouse). Start selected medicinal and culinary herbs by middle of February. Some take 6-8 weeks to germinate!
10 WEEKS TO LAST FROST (aprox. March 15)
Start seeds of celery, eggplant, leeks, onion, pepper and flowers like impatiens, lobelia, verbena and perennials indoors.
8 WEEKS TO LAST FROST (aprox. March 29)
Start seeds of early head lettuce and flowers like begonia, coleus, nicotiana, petunia and salvia indoors.
7 WEEKS TO LAST FROST (aprox. April 5)
Start seeds of tomatoes, hot peppers, and early basil indoors.
6 WEEKS TO LAST FROST(aprox. April 12)
Start seeds of early left lettuce, early cabbages including cauliflower, broccoli, brussels sprouts, kohlrabi and kale, and small seeded annuals indoors. DIRECT SEED broad beans, carrots, peas, spinach, leaf lettuce, turnips, dill, parsley, and hardy flowers such as alyssum, candytuft, pansies, poppies, snapdragons, stocks, sunflowers and sweet peas. Plant onion sets or transplant onion seedlings outdoors.
4 WEEKS TO LAST FROST (aprox. April 26)
Start melon seeds indoors. If desired, start seeds of late basil, cucumber, squash, pumpkin, large-seeded annuals, and flowering vines indoors in peat pots. DIRECT SEED radishes, beets, cabbages, chard, head lettuce, and flowers such as godetia, hollyhock, and mallow. Plant potato eyes and transplant seedlings of early cabbages, except cauliflower.
2 WEEKS TO LAST FROST (aprox. May 10)
DIRECT SEED corn, tender bulbs such as glads, and annual vines such as morning glory. Transplant early lettuce seedlings.
WEEK OF LAST FROST (aprox. May 17-24)
Around the last frost date you can finally direct seed beans, cauliflower, cucumber, squashes, heat-loving flowers such as zinnias, marigold, and lavatera. Transplant your tomaotes. If you've got them, transplant cauliflower, squash and cucumber seedlings.
1-2 WEEKS AFTER FROST (aprox. May 31-June 7)
Wait for a couple of weeks after the last frost before direct seedling lima benas, soybeans, melons and herbs such as basil, summer savory and sweet marjoram. Transplant celery, melon, peppers, eggplant seedlings when the night temperatures stay well above 10 degrees C. Plant sweet potato slips. Start second crop of kale seedlings, and reseed spinach and peas for second crop.
Each year we post our Seed Starting Schedule (for zone 5-6, where we need to start plenty of our seeds in advance, e.g. tomatoes, brassicas, hot peppers, herbs)...Here is the link to last year's post regarding our seed schedule, or if you don't want to read the entire post again I will include the summary of our Seed Starting Schedule below.
We also placed seed orders with West Coast Seeds, High Mowing, and Richters Herbs today - in particular, the photos and selection of High Mowing were astounding - we are especially anticipating their specialty greens, edamame, high-resin medicinal calendula, and wild greens (wild arugula, purslane, amaranth, purple mustards, etc). Maya is excited about what she chose for her garden: dragon beans, rainbow carrots, dinosaur kale...she wants to plant a rainbow selection of vegetables this year.
PLANTING GUIDE (based on frost-free date of May 24):
FEBRUARY (the greens listed here can continue to be planted throughout the growing season of course)
Start lettuce, chard, other greens in greenhouse or in flats indoors (to be planted out to greenhouse). Start selected medicinal and culinary herbs by middle of February. Some take 6-8 weeks to germinate!
10 WEEKS TO LAST FROST (aprox. March 15)
Start seeds of celery, eggplant, leeks, onion, pepper and flowers like impatiens, lobelia, verbena and perennials indoors.
8 WEEKS TO LAST FROST (aprox. March 29)
Start seeds of early head lettuce and flowers like begonia, coleus, nicotiana, petunia and salvia indoors.
7 WEEKS TO LAST FROST (aprox. April 5)
Start seeds of tomatoes, hot peppers, and early basil indoors.
6 WEEKS TO LAST FROST(aprox. April 12)
Start seeds of early left lettuce, early cabbages including cauliflower, broccoli, brussels sprouts, kohlrabi and kale, and small seeded annuals indoors. DIRECT SEED broad beans, carrots, peas, spinach, leaf lettuce, turnips, dill, parsley, and hardy flowers such as alyssum, candytuft, pansies, poppies, snapdragons, stocks, sunflowers and sweet peas. Plant onion sets or transplant onion seedlings outdoors.
4 WEEKS TO LAST FROST (aprox. April 26)
Start melon seeds indoors. If desired, start seeds of late basil, cucumber, squash, pumpkin, large-seeded annuals, and flowering vines indoors in peat pots. DIRECT SEED radishes, beets, cabbages, chard, head lettuce, and flowers such as godetia, hollyhock, and mallow. Plant potato eyes and transplant seedlings of early cabbages, except cauliflower.
2 WEEKS TO LAST FROST (aprox. May 10)
DIRECT SEED corn, tender bulbs such as glads, and annual vines such as morning glory. Transplant early lettuce seedlings.
WEEK OF LAST FROST (aprox. May 17-24)
Around the last frost date you can finally direct seed beans, cauliflower, cucumber, squashes, heat-loving flowers such as zinnias, marigold, and lavatera. Transplant your tomaotes. If you've got them, transplant cauliflower, squash and cucumber seedlings.
1-2 WEEKS AFTER FROST (aprox. May 31-June 7)
Wait for a couple of weeks after the last frost before direct seedling lima benas, soybeans, melons and herbs such as basil, summer savory and sweet marjoram. Transplant celery, melon, peppers, eggplant seedlings when the night temperatures stay well above 10 degrees C. Plant sweet potato slips. Start second crop of kale seedlings, and reseed spinach and peas for second crop.
Sunday, January 22, 2012
Soaps & Herbals!
Many new bars of soap are curing - I cure them in our strawbale addition to the house (also our living room/bedroom one-room-cabin space). The woodstove heat helps to slowly dry the soaps, and they sit lined up on top of a series of wooden shelves. The space smells wonderful - a mix of our favourites: pure calendula, peppermint poppyseed, patchouli cedar, lavender oatmeal goatmilk...We are also in the process of some new designing for our soap & herbal packaging and hope to have our etsy shop back up and running in the next little while...
Yesterday was also the first soap class for this season - I am now in the sixth year of teaching soap making classes here in the community, and continue to enjoy meeting all the lovely participants who take part in our sessions. By now there must be at least 100 people I have taught soap making to - hard to believe! I am excited to say that the new Practical Herbalist series for 2012 is also full. This is one herbal workshop series I have been planning for some time, and am looking forward to hosting here over the summer months.
Thursday, January 19, 2012
This Moment
{This moment} - This moment - an end of week ritual, no words, just a special photo to remember, savour, enjoy.
Eco-crafting! A hot water bottle cozy for a cold winter day
Cold days have come! Today the snow was blowing, we had a fire going in the woodstove all day, made a big pot of chili and got into some crafting....a new quilt is in progress, my friend Michelle's beautiful handspun hand-dyed wool is slowly turning into a knitted hat, I've been sewing play food for Maya's kitchen, and a stack of old woolen sweaters have been felted and are ready to sew into warm things - like this hot water bottle cozy. I sewed this cozy without a pattern because it really is so simple, but then came across a great blog called "Resweater" that is all about reusing wool sweaters and offers a great step-by-step tutorial on making a hot water bottle cozy. The projects on this blog remind me of our local friend over at Sew Oiseau, who is well-known around these parts for her creative use of old wool sweaters - reconstructed into gorgeous shawls, wraps, skirts, kids longies, wool diaper covers, dolls, rugs, baskets, hats, arm warmers, leg warmers - you get the idea - 100% wool sweaters are indispensable!
Tuesday, January 17, 2012
Herbal crafting with kids
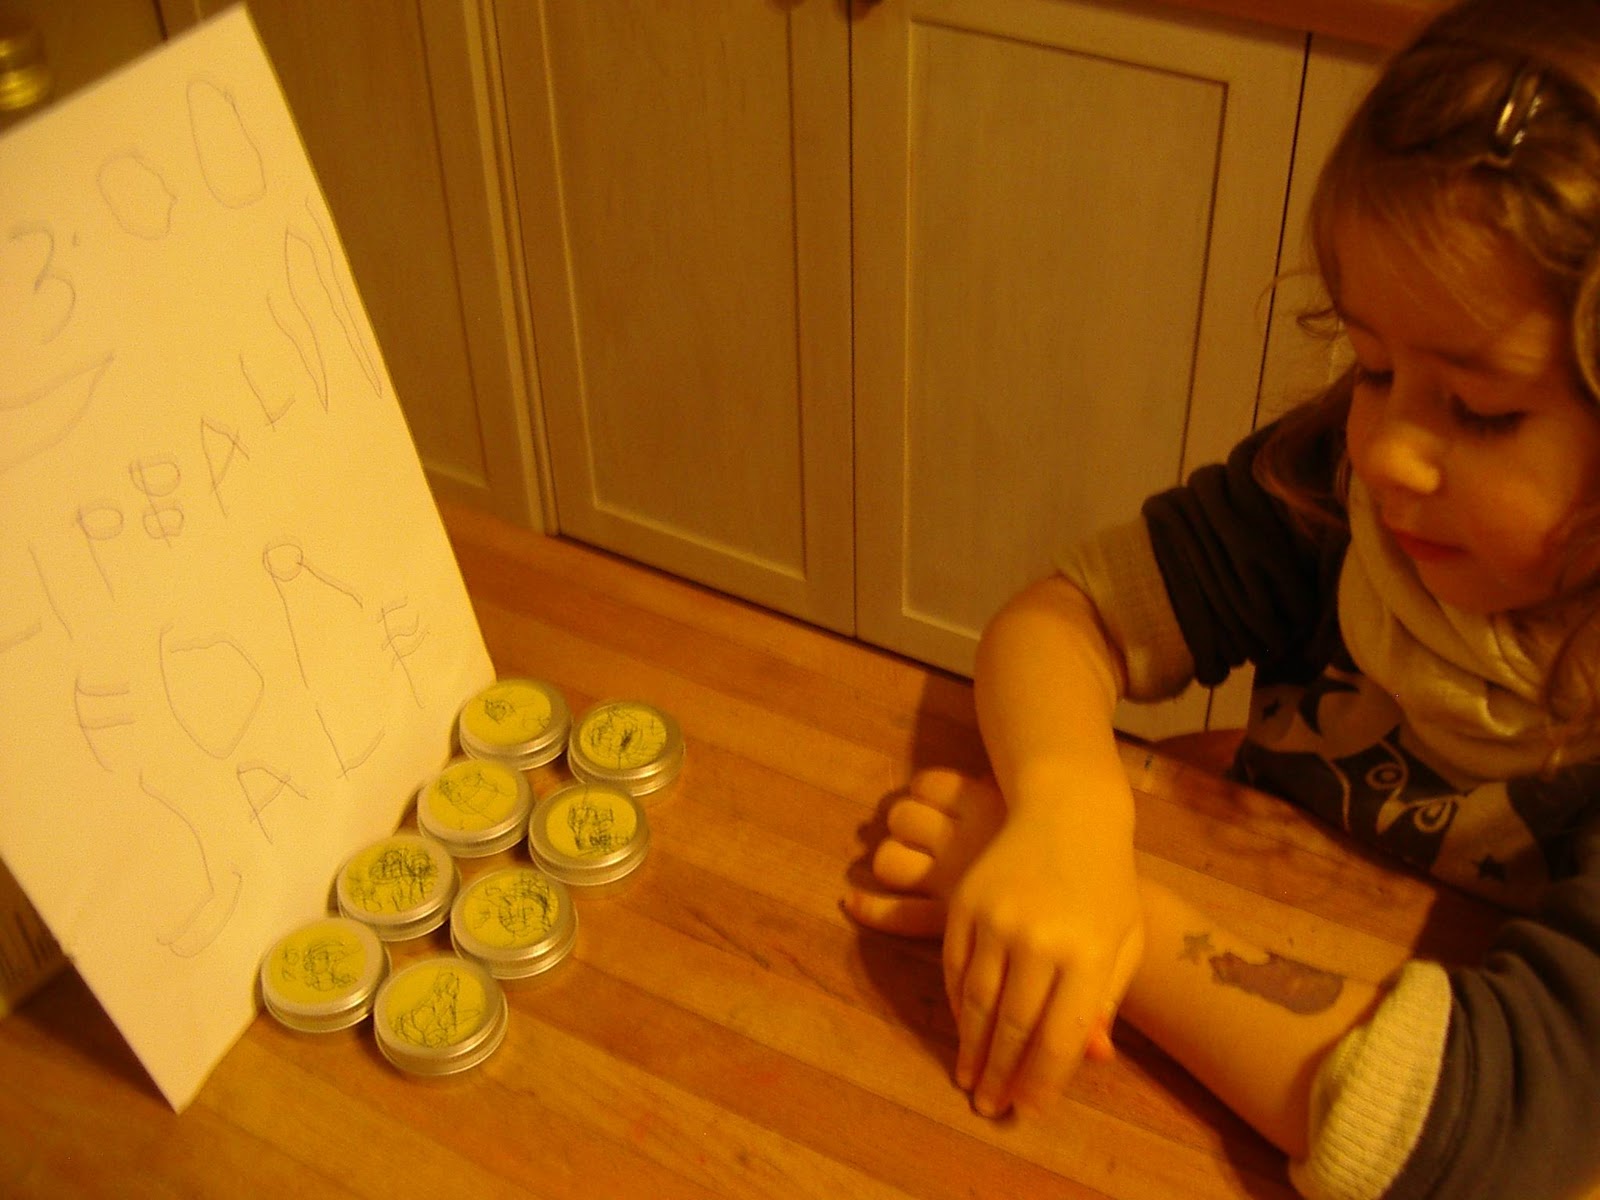
I have a budding herbalist in my household! Children thrive when given the opportunity for us to trust them with real, hands-on learning projects that they can do at their own speed and with their own style. On a recent evening my 3.5 year old and I made lipbalms together, upon her request (to my delight). She stirred and measured carefully, melted the ingredients on the stove (with supervision), tested the finished product for proper consistency, smelled numerous essential oils (settled on grapefruit), and designed her own custom labels. Then she promptly asked for some paper, and what letters were needed to make a sign for "her store". Follow our simple lipbalm recipe here.
Wintery walks
We've been exploring the fields, woods and parks in our city, trying to be outdoors a few hours each day to enjoy what comes our way with this unpredictable January weather. I am fascinated by discovering all that is still growing and alive during these winter months...gorgeous golden lichen on tree bark, beautiful red sumac...
Tuesday, January 10, 2012
January gardening
It hardly feels like January with the mild temperatures and melting snow...but we know there are still plenty of cold days and nights ahead. The start of the new year, and the slower pace around here, always gets us thinking about our garden. What will it hold this year - which new design ideas can we include, what new (and old favourite) varities will be grown, how can we better reorganize the herb gardens, and most importantly what seeds do we need to order? January is the time for browsing through seed catalogues and getting new ones in the mail (we are anticipating catalogues from Hope Seeds, West Coast Seeds, and High Mowing Seeds as recommended by our organic farming friend Angie from local CSA Fertile Ground) - as well as attending the annual Guelph Organic Conference at the end of this month. As this is the "international year of co-operatives" the conference theme is "seeds of co-operation". We would like to keep this theme in mind for our year as well, as we plan our community involvement and projects here at the homestead.
While we are talking about co-operation, I have plenty of it from my 3 year old helper who was eager to start our winter garden. She mapped out what she wants to grow in her own garden on a large sheet of paper by cutting out photos from an old seed catalogue and pasting them on the garden sketch. It includes vegetables like rainbow carrots, ruby red swiss chard, several kinds of peas and beans, baby watermelon, and corn grown for popcorn! She even drew a stone walkway leading upto a little stump for sitting on, and (to my delight) a herb section with echinacea, basil, calendula and sunflowers in one corner of her little garden outline. This week we did in fact start some herb seeds - the tiny slow germinating ones like rosemary, echinacea and lavender seeds (saved from our own plants!) that grow so slowly. We also have a nice edible "sprout garden" going, with pea shoots and sunflower greens in soil trays, plus micro greens in jars, just to give us that boost of fresh homegrown greens during these sparse months.
Friday, January 06, 2012
Practical Herbalist Series - 4 sessions at Little City Farm this summer
An exciting unique 4-part series held at Little City Farm this summer, that includes 12 hours of instruction and hands-on learning, plus some "home" assignments between sessions. Workshops will be held on 4 Saturday mornings, from June to September. This series is led by Karin Kliewer, Master Herbalist.
AT THE END OF THIS SERIES YOU WILL HAVE GAINED:
~ confidence and knowledge of growing and using basic medicinal herbs
~ a well-stocked pantry of simple effective herbal home remedies you have made
~ knowledge on where to source quality herbal product-making supplies
~ a collection of herbal recipes, lesson notes, hand-outs and other useful resources
~ a network of other community members interested in natural herbal healing
~ please see below for more details on specific topics we will cover in each session
Limited space to 10 participants. As one goal of this series is to create a continuous small-group shared learning environment, priority will be given to participants who can commit to taking all 4 sessions.
HERBALIST SESSION DATES & DETAILS:
Session 1: Spring Edibles - Sat, June 9 from 9-12 noon
In this session you will learn: herbs for digestive system; wild crafting; basic herb gardening; medicinal herb teas to grow at home; and making herbal infusions.
Session 2: Summer Flowers - Sat, July 14 from 9-12 noon
In this session you will learn: herbs for stress and women's health; drying and storing herbs; making herbal medicinal oils, salves and liniments.
Session 3: Fall Bounty - Sat, Aug 11 from 9-12 noon
In this session you will learn: herbs for respiratory system; seed saving; harvesting and drying medicinal roots; making herbal decoctions; making herbal tinctures; basic herbal first aid.
Session 4: Winter Roots - Sat, Sept 8 from 9-12 noon
In this session you will learn: herbs for the immune system; herbal remedies for children’s health; making herbal medicinal syrups and winter tonics.
Details for registration are posted on our website here.
AT THE END OF THIS SERIES YOU WILL HAVE GAINED:
~ confidence and knowledge of growing and using basic medicinal herbs
~ a well-stocked pantry of simple effective herbal home remedies you have made
~ knowledge on where to source quality herbal product-making supplies
~ a collection of herbal recipes, lesson notes, hand-outs and other useful resources
~ a network of other community members interested in natural herbal healing
~ please see below for more details on specific topics we will cover in each session
Limited space to 10 participants. As one goal of this series is to create a continuous small-group shared learning environment, priority will be given to participants who can commit to taking all 4 sessions.
HERBALIST SESSION DATES & DETAILS:
Session 1: Spring Edibles - Sat, June 9 from 9-12 noon
In this session you will learn: herbs for digestive system; wild crafting; basic herb gardening; medicinal herb teas to grow at home; and making herbal infusions.
Session 2: Summer Flowers - Sat, July 14 from 9-12 noon
In this session you will learn: herbs for stress and women's health; drying and storing herbs; making herbal medicinal oils, salves and liniments.
Session 3: Fall Bounty - Sat, Aug 11 from 9-12 noon
In this session you will learn: herbs for respiratory system; seed saving; harvesting and drying medicinal roots; making herbal decoctions; making herbal tinctures; basic herbal first aid.
Session 4: Winter Roots - Sat, Sept 8 from 9-12 noon
In this session you will learn: herbs for the immune system; herbal remedies for children’s health; making herbal medicinal syrups and winter tonics.
Details for registration are posted on our website here.
Sustainability Workshops for 2012 - Now Posted
Happy new year! We like to start the new year off by finalizing our list of Sustainability Workshops that will be held here at Little City Farm. This year we have topics like permaculture, organic gardening, seed starting, beekeeping, preserving, lacto-fermention, cheesemaking, soap making, as well as a very special "practical herbalism 4 part series". This list has just been posted on the website here, so please check in there for full list of topics and registration details. It's our 6th year of leading workshops, and we've hosted more than 75 workshops and hundreds of participants, and this is continuously both astounding to us and encouraging to see such interest from our local community members in sharing and learning skills, and creating resiliant, vibrant, sustainable neighbourhoods.
Subscribe to:
Posts (Atom)