Pages

Showing posts with label beeswax. Show all posts

Saturday, November 22, 2014

Make your own Beeswax Candles

We had fun making beeswax candles as part of our holiday gift making.  We tried our hand at dipped candles, as well as poured candles in molds.  Making smooth dipped candles is harder than it looks - and takes a huge pot of wax so the wick doesn't get bent into a curly candle.  We had some interesting and unusual results, all of which will still work just fine for lighting. Our daughter loved making tiny birthday candles, which didn't take more than a few minutes. 

What you need:
old cooking pot, reserved for beeswax (fill with water and place tins of wax in this pot to melt)
tin cans to melt wax in
molds (small tins, plastic molds, or other containers - we have used hollowed egg shells for round candles)
wick of various sizes


Saturday, April 12, 2014

DIY Beeswax Wraps

We love these beeswax wraps!  They have so many great uses, and can replace any situation where you might have used plastic wrap before.  No more plastic wrap on food, no more plastic wrap to throw away.  For example, we wrap lunch sandwiches, halves of apples, blocks of cheese stored in the fridge, and to cover mixing bowls when proofing bread.  The beeswax wraps are slightly water proof and breathable.

Cleaning: These beeswax wraps can be used almost indefinitely, and if they do need cleaning just rinse gently with cool water and a biodegradable dishsoap or wipe with cool cloth, then let air dry (do not wash with hot water as this may melt the beeswax coating).

Note of caution: Making your own beeswax wraps at home is quite simple.  The key is to keep an eye on your oven temperature and not leave the cloths in the oven too long.  This is important since the hot wax in your oven could become a fire hazard. Work carefully, and in less than half an hour you will have your own set of beeswax wraps!  These beeswax wraps make great gifts as well. 

You will need:
  • A large piece of natural unbleached un-dyed fabric (e.g. cotton, linen, hemp)
  • Pure beeswax
  • Old baking trays
  • Parchment paper
  • Old grater or knife to cut beeswax 
  • Old paintbrush (reserved for beeswax from now on)
a) Cut piece of natural fabric to the size you want - it needs to fit on a baking tray.  Consider sizes that will be small or large enough to wrap the foods you have in mind (e.g. sandwiches, fruit, to cover a mixing bowl, etc)
b) Decide if you want to serge or sew the edges of the fabric to prevent fraying.  The beeswax will also prevent fraying so it just depends on how "finished" you want your wrap to look.
c) Line baking tray with parchment paper and lay cloth flat on this tray.
d) Preheat oven to 170F (NO hotter as this can become dangerous!).
e) Shred or grate beeswax.  You will need to have a thin layer across your entire cloth.  This amounts to several tablespoons of grated was for a medium sized cloth.
f) Sprinkle beeswax across the cloth evenly.  
g) Put baking tray into the oven at 170F for 10 minutes - NO LONGER than that!  Keep an eye on the melting wax.  If the was has melted sooner than 10 minutes remove baking tray earlier.
h) While wax is still hot spread it across the cloth with the old paintbrush.  Try to get a skim coat across the entire cloth.  
i) Let cool.  Beeswax will dry and harden slightly.  Then the beeswax wrap is ready to use!
j) You can add button and string loop closures, or other cloth or string fasteners onto the edges if you want to have a way to secure the cloths.  We just fold them around our food and secure with a rubber band.


Wednesday, March 20, 2013

Eco craft - egg candles

In celebration of the spring equinox tomorrow we thought we'd share a simple little eco craft idea with you!  We've had some fun making beeswax candles here lately.  We found a great idea in the book The Children's Year for making candles in the shape of eggs, by using eggshells that have been blown out.  They work perfectly - what a fun project for kids to make in celebration of spring, with help from an adult (when pouring the hot beeswax).  Here's how we did it:

You need:
- two large eggs and egg cups to hold them
- small artists paint brush
- olive oil
- newspaper
- old pot (reserved for candlemaking)
- old clean tin can
- pure beeswax
- candlewick
- small piece of plastecine

1) To blow out the eggs - poke a mid sized hole in top and small hole in bottom of the egg using a sharp knife.  Then blow through the smaller hole to push the egg insides out into a bowl.  Wash egg inside, and let dry out.  Then plug bottom hole with small piece of plastecine.

2) Oil the inside of the egg using paint brush.  Do this gently as the hollow eggshell is fragile!

3) Prepare workspace by covering with newspaper.  Then heat beeswax in tin can, set inside the old pot with about an inch of water.  Heat on low until beeswax melts.

4)  Pour small amount of melted wax into eggshell.  Then add wick, hold in place and pour melted wax to fill the eggshell.   Let harden by setting egg into an egg cup, and placing in the fridge.

5) When wax is completely hardened peel off the eggshell.  It should peel off easily.  If not, there was not enough oil inside.  Your candle is complete!  Happy spring!


Tuesday, November 22, 2011

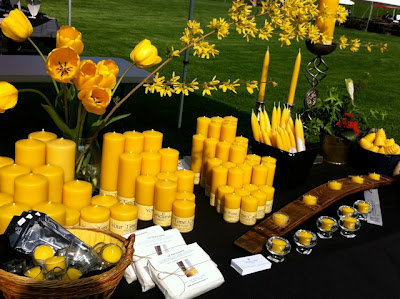
A Little Bird Told Me Craft Sale Vendor Profile: Your Time Candles

Over the weeks leading upto our annual handmade holiday craft sale, "A Little Bird Told Me", on Sat, Dec 10, we are highlighting each one of the participating vendors.  Here is a short interview with Carol Kubassek from Your Time Candles:

Little City Farm: Describe the products you will have at the Little Bird Sale?

Your Time Candles: Artisan Beeswax Candles in a variety of styles and sizes, and natural stone candle holders. 
 
Little City Farm:  How did you learn this craft?

Your Time Candles: I had the fortunate opportunity to learn from a master chandler who, for 15 years, made it his mission to develop new beeswax candle making techniques and put to rest old myths of beeswax chandlery - gone were the days of half burned, inferior quality beeswax candles made with coarse natural fibre wicking that gave off a putrid scent.  As a former chef I’ve always been passionate about what I put on your plate - I want your approval so this demands my best offering.

Little City Farm: What inspires your craft?

Your Time Candles: I am inspired by quality - I wanted to offer beeswax candles that would burn properly.

Little City Farm: Describe how your craft is eco-friendly?

Your Time Candles: Pure beeswax is nature's renewable wax - no chemicals are used in the process. It all begins at the hive. I procure Canadian cappings wax from beekeepers who haven’t scorched or overheated the wax when separating out the honey. Then, in order to maintain the integrity of the wax, with patience, and through a gentle cleaning process, I purify the wax by filtering it down to one micron. When making the candles, in order to keep alive the full bodied aroma, rich yellow colour and texture, the beeswax is heated carefully in small batches until melted then poured into the candle moulds. Next, each candle is fitted with the perfect sized 100% cotton wicking. I'm also very passionate about recycling and all our packaging is very biodegradable made from recycled paper and hemp twine.

Little City Farm:  Do you have favourite music to listen to while you craft?

Your Time Candles: Bradfield and Anael.

Little City Farm: Do you have a website/blog/online store?

www.yourtimeboutique.ca
www.yourtimecandles.ca 


Find Carol and her pure beeswax candles at the A Little Bird Told Me Handmade Craft Sale, Sat December 10th at Little City Farm (508 Duke St W, Kitchener).