Pages

Showing posts with label maple syrup. Show all posts

Friday, April 06, 2018

Black Walnut Syrup - our 4th season!

We've been busy tapping our trees the past weeks.  It's the black walnuts (Juglans nigra) that we tap, as we don't have any sugar maples or other substantially sized maples in our yard.   There are only 3
large black walnuts on this property, but enough to get a real taste for the whole tapping process. 

This year we set up some of our taps at 2-year old height, so our little guy could easily check the buckets by himself.   Both kids eagerly added this to the daily chore routine, getting tastes of fresh sap every day.  We boiled down over a fire using shallow pans, then finished the syrup indoors on the stove.  It was a 2-day boiling down process, but worth it!

Once the trees start to bud the tapping season is over, and it can last from a few days to a few weeks (this year it was a few weeks for us, but the weather this spring has been sooo unpredictable - it is snowing again right now!).   4 litres of delicious sweet syrup were accomplished in the end, plus lots of sampling of the "sweet water" along the way and some black walnut taffy - yummm!


Wednesday, October 08, 2014

Cozy fall breakfasts - Maple & Apple Baked Oatmeal

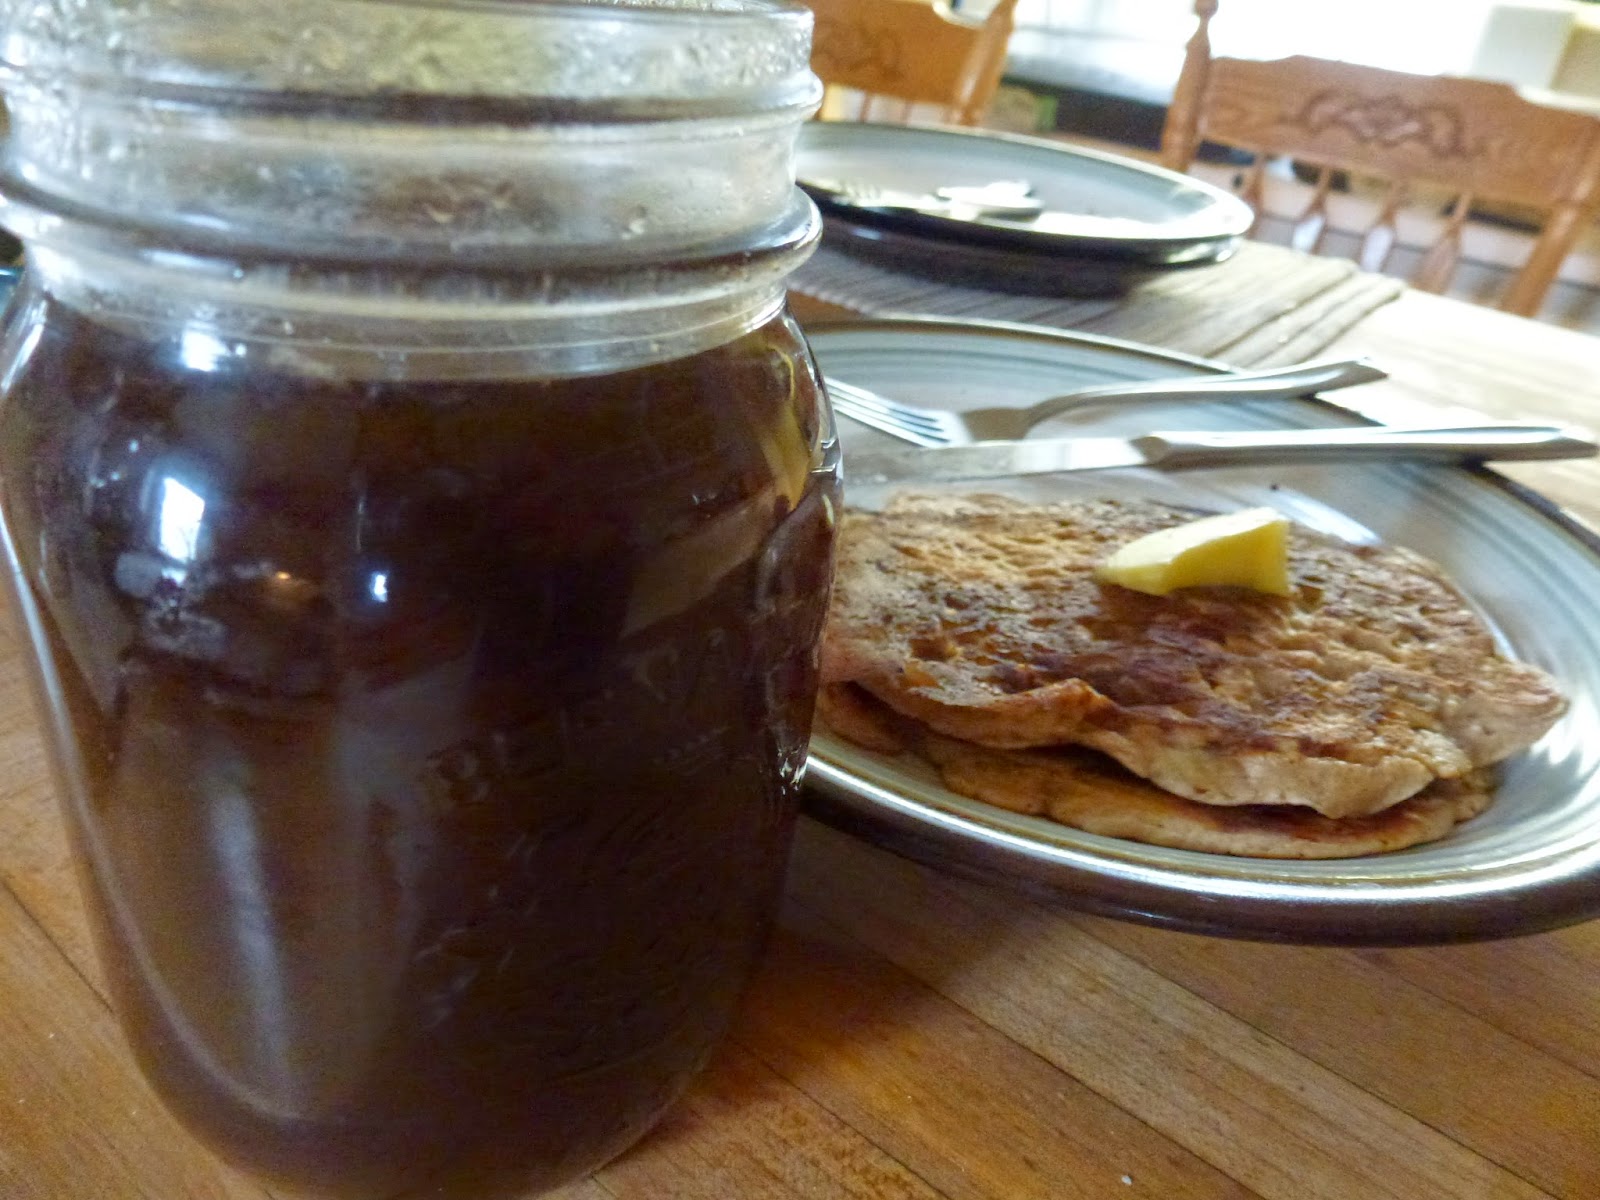
It's mid October and getting chilly around here!  We haven't had frost - yet... but the nights are cold and we've had the woodstove on a handful of times already in the past few weeks.  I even used a hot water bottle last night!  Mornings are especially chilly getting out from under the warm nest of blankets, and so, on the mornings when we need an extra special warm up we've taken to creating some cozy breakfasts in place of our regular yogurt and granola.  Since we are in southern Ontario, in peak of apple season and still enjoying the maple syrup of this year's harvest, we love to combine apples and maple into many of these warming breakfast dishes.

Cozy simple healthful and hearty breakfasts we love - and plan to have lots of this fall and winter.  These are some of the favourite ones we have served often in our B&B, and for our own family on chilly mornings:

~ warm quinoa with bananas, currents and maple syrup
~ warm oatmeal (oats soaked overnight) with apples, cranberries & cinnamon with organic cream
~ giant baked apple pancake (our favourite huge German pancake baked in the oven)
~ potato-greens frittata (with spinach, chard or kale, over fried potatoes, topped with eggs and cheddar)

And maple-apple baked oatmeal.  Here's the recipe:

Maple-Apple Baked Oatmeal
1/4 cup butter
2 cups whole oats
1 tsp sea salt
1 tsp baking powder
1/4 cup maple syrup
1 cup milk or rice/soy milk
1 large egg
1 large juicy apple (we like Empire) chopped or shredded
dash of cinnamon
1/4 cup chopped nuts (pecans, walnuts) and /or hemp seeds/sunflower seeds for the top
serve with organic cream, yogurt and/or maple syrup

1) Soak oats overnight in the milk to help provide optimum digestability.
2) Preheat oven to 350F. 
3) Add butter into large cast iron frying pan or baking dish and heat in oven until just melted.
4) Combine all the rest of the ingredients in a large bowl.  Stir well.
5) Pour into cast iron pan or baking dish, smoothing the top. Sprinkle with chopped nuts/seeds.
6) Bake at 350F for about 25 minutes. 
7) Serve warm with organic cream, plain yogurt and more maple syrup as desired.

Enjoy a warm and cozy morning!


Friday, April 11, 2014

Black Walnut Syrup!

On our small urban farm we've been busy collecting black walnut sap.  After about 2 weeks of collecting sap (from 10 spiles), and 20 hours of boiling it down, from a collection of about 120 litres of sap down to 4 litres of delicious, ultra sweet black walnut syrup - and our first pancake breakfast with fresh homemade syrup - we think that's not too bad, and definitely worth the effort! 

When a friend asked how to know when the sap is syrup (so as not to keep boiling too long and get taffy or maple sugar!) we found that it becomes fairly obvious - the bubbles become brown and foaming, and it's important to watch that the pot doesn't boil over.  We tried to capture a photo of this in the 3rd photo down below.  For the first 15-18 hours of boiling there was still a lot of water evaporating so if possible this is a good stage to do outdoors (or with good ventilation or kitchen range hood fan going).  For the last hour or so it goes much more quickly.  With lots of stirring needed at this point so the near-syrup doesn't burn on the bottom of the pot, and a candy thermometre handy to read the temperature, the sap has become syrup when it reaches 219F.  At that point, pour into hot sterilized (clean) mason jars, scrape out the pot and lick the spoons!  Then start a batch of pancakes.  Yumm!  We keep a good stockpile of syrup in our fridge and store the rest for longer storage in mason jars in the freezer.  This keeps well for many months. 


Tuesday, March 11, 2014

Tapping trees!

We decided it was time!  The days have been warm and sunny, so we got all our maple syrup gear together and tapped our trees this week.  The sap was already running well, especially on the most southerly facing sides of our trees.  To get good sap flow we have noticed that it really makes a difference which side of a tree is tapped.  Given we are tapping here in our yard in the city, we have limited tree options (so we area again tapping our black walnuts and manitoba maples).  We also have  buildings and other obstructions keeping full sun off the trees, but last year yielded several litres of delicious finished syrup, plus loads of learning opportunities - we called it a success!  Funny though, living in southern Ontario, you never really know what the spring weather is going to be like - for example, tomorrow, there is an unexpected snow storm blowing in.  But this is March and the weather can still change every day.  We are hopeful that this snow will melt quickly, and the days will warm up again by the end of the week...we'd like to get back to tapping!

There are lots of great books and websites giving details instructions on how best to tap trees.  Better yet, ask someone locally who has done it (or follow along while they are tapping) to learn hands-on.  We offer a few basic tips that are geared toward the small-scale novice home based tree tapper:
  • ideally, tap the south side of your trees for the best running sap
  • sap runs when day times are between 0-10 degrees C, and night times drop to just below freezing
  • tap above a thick root or below a strong branch
  • tap healthy trees (stay away from hollow or diseased trees)
  • tap at least 6 inches away from last year's tap hole
  • tap approx. 3 feet up from the ground
  • when drilling use a 7/16 inch drill bit and drill tap hole on a slightly upward angle
  • clean out sawdust from tap hole before inserting spile
  • some trees that can be tapped include birch, black walnut, sugar maple, manitoba maple 
  • black walnut syrup is made from a ratio of 60:1 (60 litres sap to 1 litre syrup)!
  • sap can be collected in food grade pails or containers, but should be kept cold until boiling time
  • sap will run for several weeks (4-6 weeks) in a good year
  • boiling down takes many many hours, and is best done outdoors do to the high moisture content that is evaporating from your sap (it will make your kitchen quite humid)
  • invest in good spiles and hooks, but you can rig up plastic pails instead of sap buckets (if you are on a shoestring budget) - but use some kind of filter or screen to catch residue falling into your sap


Thursday, April 11, 2013

Fresh syrup!

Well...after collecting sap from our 8 trees (we're just a small homestead in the city!) for 2 weeks and boiling the sap down, we came out with just over 2 litres of delicious syrup!  What a fun learning experience, small-scale that is was, with so much anticipation and incredible results.  Remember, these were syrups made from Black Walnut and Manitoba Maple, not Sugar Maple.  There was lots of tasting at all stages: sap from the tree to thickening syrup, and in the end both our syrups are delicious, yet very distinct flavours that are different from other maple syrup.  More wild and nutty tasting, and oh, so satisfying!  Just another one of those projects we've wanted to try, as we continue to learn to make our handmade life here at our little city farm.  I'd do it again next year, or even look around the neighbourhood to see if other homeowners would like to either share their trees or do their own tapping and share the boiling (in that case we could build a larger evaporator and boil on a fire pit).

Eating our pancakes this morning was the perfect blend of seasons - made with the last blueberries of the past year's harvest, yogurt topped with our last jar of home canned peaches, side by side with this fresh new syrup was the ending of the old year and starting of a new year of production, garden and harvest.  Happy spring!


Tuesday, April 09, 2013

Sap boiling day...and fresh oatmeal bread

We decided today was the day.  We've been storing our sap long enough, and the days are getting warmer.  We started out with sap boiling outside, and this went well for several hours.  While boiling we enjoyed the first really sunny spring day, with an outdoor lunch picnic, and planting up the cold frame with lettuce, chard and spinach greens.  Then the sunshine turned into a surprise spring rainstorm...not so great for an outdoor boiling event.  The sap boiling was moved indoors - given we are doing a very small batch this didn't seem so bad to have some of it be done on the stove.  Hoping for sunshine tomorrow to take the boil outdoors again.   And, if we ever do this on a bigger scale we'd set up a proper fire pit and evaporator...some day.

During the boil day we were staying close to the house, so it seemed like a great day for baking bread.  Having it rising while we checked and stirred the sap, and freshly baked when we came in from the cold rain, was perfect!  We adjusted our favourite oatmeal bread recipe to use up this morning's left over oatmeal.  Yum!

Here's the recipe:

Oatmeal-Rye 4 grain seeded bread
2 cups left over cooked oatmeal
1/2 cup molasses
1/4 cup honey or maple syrup
3 Tbsp butter
2 tsp sea salt

Combine the above ingredients in a large bowl.

2 cups warm water
1 Tbsp quick yeast

Mix the water and yeast in a large measuring cup.  Stir, then let sit for about 5 minutes until it foams.

6 cups unbleached wheat or spelt flour
2 cups whole rye flour
1/4 cup millet grains
1/4 cup flax seeds
1/4 cup sunflower seeds
Extra oats and sesame seeds to sprinkle on top of risen loaves

When yeast has foamed, mix this with the wet ingredients.  Then add flour and seeds and mix well.  Knead about 10 minutes to make a soft dough. 

Put dough back into the large bowl that has been oiled, and cover with a cotton cloth.  Let rise 1 hour, or until double. 

Form dough into 3 medium sized loaves and place into lightly oiled loaf pans.  Wet top of loaves lightly with water, and sprinkle with oats and sesame seeds.  Let rise again for about 45 minutes in a warm room (near your stove that is preheating to 400F). 

Bake at 400F for 5 minutes, then lower heat to 350F and bake another 30-40 minutes until golden brown.
Let cool before slicing.


Sunday, March 03, 2013

Tapping!

We've started!  We are tapping trees in our yard this year - another one of those projects we've been meaning to try, and this year we are prepared just in time for the tapping season to start.  There is a short window of time, usually in March-April, when the nights are around -10C but days are around +10C, when the sap runs well.  We don't have sugar maples, but we do have other trees that are possible to tap.  Although less well-known, the birch, black walnut and Manitoba maple trees can also be tapped for a tasty light syrup.  We have 8 of these trees (which are mature enough) to tap in our yard (so that makes about 24 taps), and we're going for it.  We like to do things on a small budget, so though we did buy spiles (at $2.50 each), but since sap buckets cost $7 each we have rigged up our own buckets and lids using food grade plastic pails.  Once we've tapped for a week or so, we'll boil it all down over a long all-day outdoor fire - until the consistency seems like syrup. 

Here's a simple and quick summary for any of you urban homesteaders who want to try this yourself.  Of course, there are lots of great resources at the library and online that will give much more detail about the process (and we are still learning!), but we have heard and read stories of good success with these types of trees.  We are hopeful that all our efforts will be worthwhile.  More updates to come.

1. Once the daytime temps are around 10+ C but nights are still below 0 (around -10C)  you are ready to start.  Choose healthy mature trees, best if they have a good south facing exposure to the sun during the day.
2. Drill holes at a slight upward angle, using a 7/16 inch drill bit.  Make sure to get the woodchips out of the hole before tapping in your spile.  You can drill 2-3 hole per tree. 
3. Tap in spile using a hammer.  Hang your bucket or pail securely below, using a hook or nail, so that spout drips directly into container.  Add a tight lid to help keep out debris and squirrels!
4. Check your buckets every day, or even twice a day depending on how much the sap is flowing.  Empty into larger foodgrade pails or jugs and store in the cold until you are ready to boil.
5. To boil sap, build an outdoor fire or use a camping stove.  This will take at least 8 hours, which can be done in one day or over several (as long as sap is kept cold inbetween boilings). 
6. Using a stainless steel pan or pot bring sap to a temperature that is 7.5 degrees over the point of water boiling.  Keep it at this temperature, stirring and skimming off foam.
7. Once sap has boiled down significantly (the ratio is about 8 litres down to 1-2 cups) strain it through a filter (cheesecloth or other filter) and hot pack it into glass jars. 


Thursday, April 01, 2010

It's the season for urban maple tapping!

It's maple syrup season around this part of Ontario (has been for a few weeks, and in fact is almost over by now). A nearby town, Elmira, held it's annual maple syrup festival last weekend, and the thousands of visitors that flooded the town to take part in tours of sugar shacks and a free pancake breakfast definitely signifiy how much maple syrup is part of our national psyche - a Canadian trademark, the flowing sap announcing spring and allowing us to celebrate a short, sweet, almost sacred harvest from our iconic maple trees.

And, across the country urban foragers are also tapping into this wonderful syrup bounty - with urban maple tapping (as well as other trees, such as birch or black walnut) becoming increasingly common in urban neighbourhoods. Exciting - though not a job to take lightly! Tapping trees takes patience and diligence, not to mention the nearly 24 hour vigil of boiling down the sap on a fire into beautiful amber-golden syrup. This makes for a great community effort as there is plenty of time for socializing as you boil down the sap or check your neighbourhood taps each day. As it takes aproximately 40 gallons of sugar maple sap to produce 1 gallon of syrup, each precious teaspoonful should be carefully reverently savoured.

Urban maple tapping projects are going on in many cities across North America. Brooklyn boasts it's own "made in Brooklyn maple syrup". In Winnipeg not only sugar maples are tapped, but also Manitoba maples, birch trees and black walnuts for a delectable combination syrup. Not Farm From the Tree, a non-profit organization in Toronto, sells "I'd tap that - syrup in the city" t-shirts and coordinates groups of volunteers to help with tapping across the city. They largely tap Norway maples, which, although producing a lower ratio of sap to syrup, are more hardy in the city than sugar maples.

More links for urban maple tapping projects - read these exciting stories:

http://www.thestar.com/living/food/article/779756--urban-maple-tapping-project-pays-off-in-syrup

http://www.notfarfromthetree.org/archives/1219

http://themapletap.com/urban/

http://www.theglobeandmail.com/life/food-and-wine/aunt-jemima-no-more-foodies-make-their-own-maple-syrup/article1510312/

http://planetgreen.discovery.com/food-health/urban-harvesting-maple-syrup.html


I’d Tap That t-shirts (proceeds go to Not Far From the Tree)

http://www.etsy.com/view_listing.php?listing_id=41332279

Sunday, June 28, 2009

100-Mile Desserts: Maple Glazed Peanuts


Just in time for the long weekend holiday coming up, I thought I'd add the recipe for a very simple 100-Mile camping sweet treat. It can be made ahead of time at home (it transports well), or it can also be made over a campfire in a cast iron pan. It would be a fun and easy cooking project for kids to help with! Of course, be sure to ask first if anyone has peanut allergies.

We found locally grown peanuts at Pickards (available directly, or through Bailey's Local Foods). They offer redskin peanuts that are salted, unsalted or garlic. Any variety would do for this recipe. There are also a variety of other nuts available through the Ontario Nut Growers Association (hazelnuts, heartnuts, walnuts), but they are significantly more expensive and need to be shelled by hand.

Happy Canada Day! Enjoy this recipe:

Maple Glazed Peanuts
2 cups peanuts (e.g. Pickards Peanuts)
1/4 cup maple syrup
1 tsp salt (if peanuts are unsalted - e.g. Sifto salt)
1 Tbsp canola oil (e.g. Pristine Gourmet)

1) Pre-heat a large sturdy cast iron frying pan. Prepare a lightly oiled sheet of waxed paper on a baking tray and set aside.
2) Dry-roast the peanuts in the pan over medium heat for about 5 minutes, stirring constantly.
3) Add maple syrup, salt and oil. Stir the mixture to coat peanuts well.
4) Continue to stir well as the maple syrup boils down. This will take about 15 minutes.
5) When the maple syrup has boiled down, the peanuts will look glossy and sticky. Scrape them onto the oiled sheet of wax paper and let cool completely.
6) Break the maple-peanuts ("brittle") into small chunks. Store in sealed container or glass jar.