Pages

Sunday, April 17, 2016

Wild greens! Spring nettle quiche

Wild spring nettles are up!  Our patch in the woodland part of the yard is blooming well, and we were able to make some of our favourite nettle foods this weekend - nettle tea, nettle greens smoothie, and nettle quiche.  Nettle pairs well with so many foods, tasting a bit like a bitter dandelion or spinach.  Delicious with eggs and cheese (try our nettle-kopita recipe), but wonderful with honey in a strongly brewed herbal infusion.  It also makes a great addition to a herbal shampoo as it softens and conditions hair.

Nettle (Urtica dioica) also known as stinging nettle, is rich in iron and minerals.  Traditionally it has been used as a skin purifier, to aid rheumatism, help with allergies (hay fever), stimulate the digestive organs, to help promote milk production in nursing mothers, and so much more.

Keep in mind when harvesting that nettle stalks and stems are covered with tiny hairs that are very prickly and will sting the bare skin, thus the name "stinging" nettle.  For some foragers this is not an issue (you can gt used to the stinging over time) but as a new forager be mindful to harvest wearing gloves, long pants and closed shoes (not a great idea of walk with shorts or sandals into a tall nettle patch unless you don't mind the stinging), or very very carefully and slowly.  Once nettles are steamed, infused, or cooked the sting is completely gone.

Here is our recipe for nettle quiche:

Nettle Quiche
4 eggs
1 1/2 cups milk (dairy or non-dairy)
salt and pepper to taste
cheese of choice (e.g. feta, cheddar), about 1-2 cups
large handful washed fresh nettles, chopped
green onions and/or garlic greens
1 Tbsp butter, melted
one single-crust unbaked pie dough, arranged in pie pan

Whisk eggs and milk.
Add salt and pepper.
Put cheese, greens and other veggies into bottom of pie crust.
Pour egg-milk mixture on top of greens.
Pour butter onto the egg-mixture.
Bake at 400F for about 30 min.
Makes one large quiche.


Saturday, April 16, 2016

Seeds, Soil, Sourdough Event - Sat, April 23 from 10 am-1 pm at Little City Farm

Celebrate spring, Earth Day, and International Permaculture Day by joining us at Little City Farm for our annual Seeds, Soil, Sourdough Event!  Sat April 23, 10-2 pm.

Celebrate spring/planting season, Earth Day, and International Permaculture Day by dropping by Little City Farm on April 23.


Free demos & mini tastings:
  • learn about building with cob & strawbale construction
  • hands-on pollinator-friendly seedball making
  • lacto-fermented kraut tasting and take-home recipes
  • wild greens smoothies tasting (with nettles & dandelion greens)
  • permaculture info & resources
To purchase in our pop-up "farm store":
  • organic non-GMO seeds for your garden plantings
  • organic potting soil to start your seedlings
  • organic sourdough bread, organic pies to take home
  • wood-fired savory crepes for lunch!
  • organic gardening resources, books and more
  • handmade soaps & herbal salves
Self-guided tours of the Little City Farm "urban homestead":
This property is a work in progress.  See home-scale permaculture-inspired 
projects such as
  • hugelkultur
  • chickens & bees
  • composting area
  • vermicomposting
  • cob wood-fired oven
  • strawbale house natural construction
  • greywater pond
  • passive solar greenhouse
  • edible landscaping
  • pollinator-attracting plantings
  • herb areas, kitchen garden
  • permaculture zones
Little City Farm is located at 508 Duke St West, Kitchener.
Please walk or cycle if possible!  Bicycle parking on our driveway. 


More more info contact Karin at: 519-575-9174  / or  / info@littlecityfarm.ca

Saturday, April 02, 2016

Kids Homestead Club held at Little City Farm

A few weeks ago we held our first Kids Homestead Club here during the March Break.  For four days we had a wonderful eager group of 12 kids here (aged 6-12) to take part in hands-on homesteading fun.  We focused on learning about birds and pollinators, while using natural elements like soil, wool, wood, seeds and grain to create homestead projects and art.  The kids made their own bread in the wood-fired cob oven while talking about the importance of eating locally grown organic food; shaped dozens and dozens of pollinator-friendly seedballs with clay and compost; crafted wool-felted acorns and set out wool for birds to use as nest material; and each built a bird nesting box for small birds such as nuthatches, wrens and chickadees while talking about why our bird habitats are increasingly endangered.  It seemed to be a good pairing, learning practical hand-skills (such as hammering nails and kneading dough) while at the same time generating discussion about important environmental issues.  We all had a great time, and look forward to more kids activities here as we help to inspire our younger ones in the community to bring more homesteading hand-powered eco skills to their families.  Thank you to all the parents who also helped out during this week - we could not have done this without you, and hope you enjoyed yourselves too!


Grow Your Own Microgreens!

Oooh, the delicious sweet spicy savory pungent and fresh tastes of microgreens at this time of year!  The trials in the new greenhouse have worked out really well - our greens are now the perfect microgreen cutting size, grown both in trays in our house (which can take 7-21 days depending on the seeds and growing conditions), and grown in soil in the greenhouse grow bed.  The seeds were off to a slower start in the greenhouse (than in our house) since the nights are still very cool in there, but with longer days of sunlight things have really picked up and now the greenhouse is out-competing the house greens.

Doing especially well - mizuna, arugula, chard, kale, and cold hardy lettuces.  Maya also planted carrots (a few have germinated) and I planted cilantro (also moving along slowly, since it's such a heat loving plant), and a few days ago Greg added beets (i.e. old sprouted beets to grow now for their tops).  It's a mish-mash grow bed, and fun to have different family members adding their own suggestions.

We all crave these fresh greens at this time of year - to renergize our bodies and detox from winter sluggishness, giving our livers a boost with the dark leafy greens (more talk about wild dark greens like dandelions and nettles soon).

What are microgreens - 
Microgreens are immature (baby) versions of vegetables, herbs and edible flowers.  They are larger than sprouts, but are harvested when still much smaller than the full-grown vegetable.  Easy to grow microgreens include broccoli, chard, basil, kale, cilantro, radish, buckwheat.

How to grow your own microgreens:

You will need:
  • potting soil, lightly moistened
  • trays to grow in (garden plug trays, or upcycled food trays like plastic or styrofoam from grocery or take-out)
  • plastic wrap, damp newspaper, or plastic lid to fit your trays
  • seeds (non GMO, organic), soaked for several hours (follow package instructions)
  • water spray bottle
1) Add lightly moistened soil to tray, just enough to cover the bottom (about 1-2 inches of soil).
2) Sprinkle your choice of seeds evenly across the soil, pressing in lightly with hands (add enough seeds to fill the tray, but not more than one layer thick).
3) Cover with plastic wrap, damp newspaper or plastic lid - and leave covered until seeds germinate.  Then remove covers so mold doesn't develop on the soil.
4) Mist seeds at least 2 times a day.  Try not to let the soil dry out in between if possible, but do not over-water.  Soil and seeds should simply be lightly damp.
5) Growing period will take anywhere from 7-21 days, depending on seeds you are growing and your growing conditions (e.g. light levels, temperature of house, humidity, how often you water, etc).  During growing period the trays can be left on a kitchen counter - they do not need grow lights or direct sunlight.
6) To harvest - usually microgreens are harvested after the second set of true leaves has emerged.  Remember, microgreens are larger than sprouts, but smaller than the full grown vegetable.  Shoots, stems, leaves and even roots are all edible.  Harvest with sharp kitchen scissors.  Store in a sealed container in fridge for several days, but ideally harvest just before you want to eat!  Enjoy!


Happy hens in spring - sprouts & herbs

Our hens are absolutely crazy for any shoots of greens they can find at this time of year!  And we are happy to let them nibble around the garden as they like since our salad greens are protected under plastic in the grow tunnel, and new seedlings are not yet planted out.  We have also been supplementing the hens winter feed with sprouted greens, such as alfalfa and red clover sprouts, left over stalks of pea shoots after we harvest the tops for our smoothies, and their favourite - wheatgrass.  We pull out the whole mat of wheatgrass after it's been growing for about 10 days, and lay the mat in the hen yard.  Sometimes we sprinkle buckwheat groats among the wheatgrass blades, and the hens just love to graze and find these treats.

Herbs for hens have been another learning opportunity.  Since we already grow, harvest and use so many medicinal herbs for our own family, we thought we would find useful herbs to provide health benefits for the hens.  We have been tying bundles of herbs (lavender, sage, lemon balm) to hang around the coop as a way to help repel fleas and mites, as well as chopping up herbs like lemon balm, mint and parsley into their nest box - this boosts their health, gives them something to nibble at, and keeps them happily laying.  It also helps keep the eggs clean (we try to clean the nest box daily, taking out old straw/bran and adding new material, plus new chopped herbs).  Herbs can be fresh or dried. 

Other great herbs to add to hens food to boost their health include:
~ garden herbs like: chopped up garlic (bulbs and greens); oregano, yarrow.
~ wild herbs like: nettles,  comfrey leaf, dandelion leaves, and chickweed. 
~ sprouted greens like: alfalfa, buckwheat greens, sunflower shoots, pea shoots.
~ edible medicinal flower petals like: calendula, marigold and rose.

Most of these greens are readily available - easily to grow in your garden, or wild harvest locally.  To prepare a longer term herbal feed mix, harvest the herbs and dry them fully.  Then blend and crush them, store in a glass mason jar, and add a few Tbsp to your hens feed.  We sometimes mix in live cultured yogurt as well, when adding the herbs to the dry feed, as this is also beneficial for hens health and well-being.

A great source for Canadian organic non-GMO sprouting seeds is Mumms, based in Saskatchewan.

 Here the hens are happily eating their mat of sprouted wheatgrass.

This eggs was laid in a nest box lined with bran and lemon balm.  We also like to add mint leaves, rose petals, and marigold or calendula to the nest box.

Here are trays of pea shoots and buckwheat greens ready to feed to the hens as a treat.  We enjoy these sprouts too of course!


Spring on the homestead

There are signs of spring everywhere we look!  We've been out hunting for greens, buds and shoots - in the garden and around town.  We see:

~ wild edibles: like dandelion, nettles, and ramps starting to peek out tiny green tips from the undergrowth;
~ in the garden: shoots of garlic, green walking onions, sorrel, and herbs like mint, lemonbalm, motherwort;
~ on the trees: buds of service berries are gorgeously pink against the dark branches;
~ in the cold frame: our spring crop of micro kale, chard, spinach, mizuna, arugula and lettuce leaves.

What is greening up in your yard?  What are you harvesting?  What are you planting?


Sunday, March 27, 2016

Petals & Roots Kids Herbal Club this spring (for 6 weeks, from May 24-June 28)


New!  Petals & Roots Kids Herbal Club


Tuesdays from 4-5:30 pm, May 24 to June 28 (6 weeks)
with Karin Kliewer, traditional herbalist
held at Little City Farm (508 Duke St West, Kitchener)
www.littlecityfarm.ca


Do you have a budding naturalist or green thumb in your family?  This kids herbal club will give the opportunity to explore the green world of herbal healing plants.  We'll spend 6 sessions outdoors at Little City Farm (a small permaculture-inspired urban homestead in Kitchener), tending & harvesting medicinal herbs of spring.  Kids will learn basic plant identification, make herbal smoothies, find a personal plant ally, build a botanical plant press, make botanical sketches in a plant journal, create several simple healing herbal remedies to take home, and more!  Hands-on, creative, informative, fun!

Limited to 6 kids.  Ages 7+
$15/per week ($90 total) - commitment for all 6 sessions please
Please contact Karin if you wish to sign up your child:
Contact: info (at) littlecityfarm.ca / 519-575-9174

Saturday, March 12, 2016

Seed Starting Guide for 2016

Every spring, right around this time (spring equinox) we get out our big box of seed packages, sort them, map out our garden plan, and start our favourite varieties.  For those of you who are local, if you need organic non-GMO seeds, please drop by Little City Farm to check out our selection of seeds from High Mowing.  Every Saturday from 10-1 pm through the spring.  And consider taking our Seedling Starting workshop on April 2, as local organic farmer Angie Koch (Fertile Ground CSA) will be here to lead the class and answer all your seed-starting questions.

Here is the handy planting guide that we use each year - it's printed and up on our fridge for easy reference. Enjoy!
Seed Planting Guide From Little City Farm
www.littlecityfarm.ca For zone 5 to 6 in southern Ontario this is based on frostfree date of May 24

FEBRUARY (greens listed here can continue to be planted throughout the growing season)
Start
lettuce, chard, other greens in greenhouse or in flats indoors (to be planted out to greenhouse). Start selected medicinal and culinary herbs by middle of February. Some take 6-8 weeks to germinate!

10 WEEKS TO LAST FROST (aprox. March 15)
Start seeds of celery, eggplant, leeks, onion, pepper and flowers like impatiens, lobelia, verbena and perennials indoors.

8 WEEKS TO LAST FROST (aprox. March 29)
Start seeds of early head lettuce and flowers like begonia, coleus, nicotiana, petunia, salvia indoors.

7 WEEKS TO LAST FROST (aprox. April 5)
Start seeds of tomatoes, hot peppers, and early basil indoors.

6 WEEKS TO LAST FROST(aprox. April 12)
Start seeds of early left lettuce, early cabbages including cauliflower, broccoli, brussels sprouts, kohlrabi and kale, and small seeded annuals indoors. DIRECT SEED broad beans, carrots, peas, spinach, leaf lettuce, turnips, dill, parsley, and hardy flowers such as alyssum, candytuft, pansies, poppies, snapdragons, stocks, sunflowers and sweet peas. Plant onion sets or transplant onion seedlings outdoors.

4 WEEKS TO LAST FROST (aprox. April 26)
Start melon seeds indoors. If desired, start seeds of late basil, cucumber, squash, pumpkin, large-seeded annuals, and flowering vines indoors in peat pots. DIRECT SEED radishes, beets, cabbages, chard, head lettuce, and flowers such as hollyhock, and mallow. Plant potato eyes and transplant seedlings of early cabbages, except cauliflower.

2 WEEKS TO LAST FROST (aprox. May 10)
DIRECT SEED corn, tender bulbs such as glads, and annual vines such as morning glory. Transplant early lettuce seedlings.

WEEK OF LAST FROST (aprox. May 17-24)
Around the last frost date you can finally direct seed beans, cauliflower, cucumber, squashes, heat-loving flowers such as zinnias, marigold, and lavatera. Transplant your tomatoes. If you've got them, transplant cauliflower, squash and cucumber seedlings.


1 to 2 WEEKS AFTER FROST (aprox. May 31-June 7)
Wait for a couple of weeks after the last frost before direct seedling lima beans, soybeans, melons and herbs such as basil, summer savory and sweet marjoram. Transplant celery, melon, peppers, eggplant seedlings when the night temperatures stay well above 10 degrees C. Plant sweet potato slips. Start second crop of kale seedlings, reseed spinach and peas for second crop.


Saturday, February 06, 2016

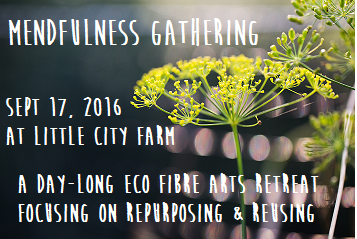
Mendfulness Gathering Announced! Sneak peek for this exciting day-long retreat coming in September at Little City Farm


http://littlecityfarm.blogspot.ca/2016/02/mendfulness-gathering-announced-sneak.html

Join us for our very special  
MENDFULNESS GATHERING 
coming September 17, 2016 at Little City Farm.

Check out our website for the event here:
www.mendfulnessgathering.com

Make - Thrift - Mend - Repair - Reuse - Restore - Reinspire

An exciting day-long eco-fibre-arts crafting retreat focusing on reusing and repurposing clothing and fibres.  Recharge yourself with this "mendful" retreat, taking time to learn new fibre-arts skills, meet other crafters, relax in the garden at Little City Farm, and find ways to bring more mendfulness into your life.

Here is a sneak peek:

The Workshops:
The day will be packed with 10+ hands-on workshops to choose from, led by a team of talented local fibre-arts-eco-crafters as our instructors!  Learn useful new skills by taking part in sessions such as:
  • spinning wool; 
  • felting wool (needle felting, wet felting);
  • natural plant dyes; 
  • repurposing wool clothing into new useful household goods; 
  • making rag rugs; 
  • creative stitching & mending as an artform; 
  • altering garments to renew them; 
  • sewing rope coil baskets; 
  • making reusable beeswax food wraps;
  • and more...
The Delicious Food:
We'll feed you a hearty healthful lunch in Little City Farm homegrown style (eat delicious foods as we would make for our family, and learn how to make these foods at home yourself): wood-fired organic vegetarian pizzas, freshly-picked garden salad with edible flowers & herbs, and homemade pickles & lacto-fermented krauts, fruity kombucha; plus hearty homegrown snacks, herbal teas and organic wholegrain baked treats throughout the day.

Early-Bird Registration:
Limited space - registration is on first-come basis until we are full.
Register before June 1 - $70
Register after June 1 - $80

REGISTER HERE on our website.

More Info / Questions:
Contact Karin at info (at) littlecityfarm.ca


Thursday, February 04, 2016

Organic Non-GMO Seeds (Soil & Gardening Books) Now Available at Little City Farm

SEEDS! SEEDS! SEEDS! PURCHASE ORGANIC NON-GMO SEEDS AT LITTLE CITY FARM!

 Seeds have arrived!

We are proud to now be able to offer our local customers a wonderful selection of organic non-GMO seeds. Seeds we carry come from High Mowing, a small family-owned ethical organic seed company. We have a selection of 48+ different seeds, with many heirloom varieties.


Including zucchini, cucumbers, squash, pumpkins, turnip, radishes, kale, chard, lettuces, pok choy, beans, peas, spinach, sweet corn, carrots, herbs, flowers.  Feel free to contact us for more details.

Also available limited quantities of:

TO PURCHASE SEEDS:
Drop by Little City Farm on Saturdays between 10-1 pm (from February through May, and also at our May 21, 2016 annual seedling sale), or contact Karin directly at: info (at) littlecityfarm.ca.


LEARN MORE: ORGANIC SEED STARTING WORKSHOP - April 2!
To learn more about starting seeds at home consider taking part in our great annual spring workshop on Starting Organic Seedlings coming on Saturday April 2, led by Angie Koch from the popular local Fertile Ground Organic Farm.


Wednesday, December 16, 2015

NEW Soap Workshops coming in 2016

Do you love beautiful natural handmade soap?  I know I do - although I have been making my own soap and teaching classes for almost ten years on this topic, I still gravitate toward handmade soaps at every new farmers market and health food store I visit.  There are just so many variations in how people make handmade soaps - different textures, colours, essential oils, shapes, patterns (marbling, layering), herbal additions, infused teas and oils, and more.  It's both science and art, that's what I love about soap making.  And I can customize it to suit my needs (organic ingredients, non-GMO oils), and my budget.  Endless creativity, always new ideas.

Do you want to learn all about the traditional cold process soap making method, using oils, lye and herbs to make your own soap?  Join us for one of the four Saturday soap making workshops we are hosting here at Little City Farm in the new year (Jan 30, Feb 13, March 5, April 9).  We'll walk you through all the steps for beginning soap making at home, plus each participant gets to take home their own small batch of soap made by hand from scratch during the workshop.  Sign up here or get more info.  They fill up quickly and we take limited numbers of participants, so please do sign up soon if you are interested.


Tuesday, December 15, 2015

Winter Sprout Garden in your Kitchen

We need our greens in winter.  And yet, most of us don't have gardens or greenhouses to grow what we need to keep ourselves healthy in the cold winter months.  However, all of us have indoor space that can work well for growing living sprouts and nutrient-dense microgreens.  Grow a winter sprout garden in your kitchen this year!  What a treat to eat fresh organic living greens all winter long. 

We usually have a rotation of various trays of pea shoots, sunflower shoots, and buckwheat going, as well as sweet brassicas (broccoli, kale, red cabbage) and spicy daikon radish as microgreens.  We also really like the crunchy bean mix and spicy lentil blend sprouted for only a few days in glass jars, the seeds purchased from Mumm's sprouts (a great company offering organic non-GMO sprout seeds, based in Saskatchewan). 

It only takes a few minutes a day to water your sprout garden, or harvest some greens to add to a salad or a breakfast green smoothie.  It takes a little planning to get the sprout rotation going smoothly - soaking seeds and sprouting them for a continuous harvest, but it's such a nice way to get gardening satisfaction in the cold dark days of winter, working with soil, seeds and greens, helping to coax the seeds to life - and to benefit from the living energy of these vibrant greens in healthful meals to keep us healthy all winter long.  Want to learn more?  We will be offering one sprouting/microgreens workshop in February here at Little City Farm - come taste a variety of delicious sprouts we grow, learn best tips for sprouting at home yourself, take home a sprouting chart as an easy reference, and a sprout starter kit to get your own kitchen garden growing this winter.


Local Superfood Sunchokes


It's time for our final harvest of sunchokes.  We can't believe it's mid December and we are still digging in soft garden soil. The ground is not frozen, there is no snow!  The sunchokes benefit from a light frost, as their flavour sweetens, so we were happy to wait.  Our final harvest is now in.

Sunchokes (Helianthus tuberosus) are a locally grown, easy to cultivate superfood.  They are native to eastern North America.  The plant is tall with a yellow sunflower at the top (in fact they are in the sunflower family).  Once they are planted in one spot, the roots will spread quickly and are hard to ever completely dig up (so choose spot wisely).  They are also known as earth apple, sunroot, Jerusalem artichoke, and other common names.  They are incredibly healthy, offering high levels of iron, B vitamins (especially vit B1), fibre, potassium, vitamin C, and are low-medium glycemic so easy on blood sugar.

The down side is that they don't store for very long.  They need to be kept in the ground as long as possible until near the eating time, best dug fresh and eaten that day.  They taste something like mashed potatoes when cooked - they can be steamed, boiled, baked, shredded and fried, and used as you would a potato.  We like them steamed with butter and salt, and some freshly chopped herbs like parsley, chives, dill, sage or basil.  If we don't have fresh herbs, the sunchokes are wonderful with pesto.\

We are happy to share our sunchokes with locals - so if you want sunchokes in your garden next year let us know.  We can share sprouts or roots in the spring.


Crazy for Kombucha!

We love our ferments in this house - and there are cultures and starters on various counters, shelves and the top of the fridge in our kitchen.  Kefir, yogurt, sourdough, and yes, kombucha! 

Kombucha, for those who have not yet gotten excited about this delicious tonic, is an ancient probiotic health drink.  It originated in Russia, and has been used for centuries in that culture to promote longevity, general health and well-being, mental clarity, digestive health, immune boosting, and a myriad of other health benefits.

Kombucha is easy to make - it takes some diligence to keep it going, just like feeding a sourdough starter each week, the kombucha SCOBY (symbiotic culture of bacteria and yeast) needs attention each week or two as well.  There are 5 steps - a) brewing tea and adding sugar (usually black tea, but also green or white or rooibos can work well); b) fermenting the tea with the SCOBY "mother" culture (usually 7-10 days, depending on house temperature); c) straining the tea and reserving some of this fermented tea to use in next batch with SCOBY; d) adding flavour (juice, fresh fruit, dried fruit, herbs, spices); e) carbonation in glass bottles (usually 1-2 days).

Our favourite combinations so far have been: white tea infused with organic peaches and lavender; green rooibos infused with organic lemon juice and ginger root; and our homemade grape juice added to a black tea ferment.   By the way, this kombucha ends up being very low in sugar as the SCOBY feeds on the sugar, so in fact you (or your kids) are not drinking a sugary drink, but a lightly sweetened elixir.  We also drink it in fairly small doses, a quarter glass a day or so.  We think of it more as a tonic than a thirst quencher.  I especially love adding herbs into the mix to get some added herbal medicinal benefits.

Delicious!  Want to learn to make your own kombucha in one of our hands-on classes?  Sign up for our Kombucha making workshop coming up March 12, 2016.