The joys of homeschooling! We were spending a day harvesting cayennes and hot peppers in the garden, then relaxing by the pond in the back - when a little spontaneous garden math happened. I love the possibilities of life learning, seizing the moment to explore deep questions when they arise, to learn by hands-on doing together in the daily activities of life. For more inspiration about life learning, check out Life Learning magazine a great Canadian-published e-magazine by the same folks who produce Natural Life magazine.
Showing posts with label homeschooling. Show all posts
Sunday, September 14, 2014
Friday, May 24, 2013
This Moment
{This moment} - This moment - an end of week ritual, no words, just a
special photo to remember, savour, enjoy.
Thursday, March 07, 2013
Playful learning - alphabet book
We're making a homemade alphabet book with our daughter, using the idea from Playful Learning by Mariah Bruehl. This book (and website) is filled with so many great project ideas! Here are a few things around the house that our daughter chose to represent letters of the alphabet... we'll print the photos we took, and clip them together into a booklet for her to remember.
Monday, February 11, 2013
Beautiful snow crystals
This weekend we had the biggest snowfall that this region has seen in a long time! It slowed the city way down, closed schools and universities, and brought neighbours out to help each other clear the sidewalks. We had a family yoga class on the morning after the big snowfall, so we headed out with our gear and daughter on a toboggan to make the trek to uptown. Another family arrived at the yoga class on snowshoes! Since the class was small and we were all not in a rush to head home after, we all went to Seven Shores, the great vegetarian fair trade cafe downstairs to have wonderful smoothies and relax. Upon arriving home it was time to shovel, and then of course build a snow cave with our little snowbear (who had never experienced this much snow before in her life!) What a great way to spend a snowy day.
The exploration of snow crystals during our snowstorm prompted us to read the beautiful true story about Snowflake Bentley, and then start our own little science experiment growing sugar crystals in a glass jar on our kitchen counter. How to do that:
Grow your own (sugar) crystals
You will need:
1 cup water, boiled
3 cups sugar
long string (yarn, twine or hemp, not nylon)
pencil or stick to hold the top
weight for the bottom (e.g. a piece of wooden popsicle stick)
glass mason jar
Add sugar to the just boiled water, stirring over medium heat until sugar is all dissolved and water is saturated. Then let cool 10 minutes. Pour into glass mason jars, drop string into sugar solution with weight tied on bottom and pencil on top to hold string up from the bottom of the glass. Do not let string touch sides or bottom of the jar. Let this steep for upto a week and watch the crystals grow! This is also known as "rock candy".
The exploration of snow crystals during our snowstorm prompted us to read the beautiful true story about Snowflake Bentley, and then start our own little science experiment growing sugar crystals in a glass jar on our kitchen counter. How to do that:
Grow your own (sugar) crystals
You will need:
1 cup water, boiled
3 cups sugar
long string (yarn, twine or hemp, not nylon)
pencil or stick to hold the top
weight for the bottom (e.g. a piece of wooden popsicle stick)
glass mason jar
Add sugar to the just boiled water, stirring over medium heat until sugar is all dissolved and water is saturated. Then let cool 10 minutes. Pour into glass mason jars, drop string into sugar solution with weight tied on bottom and pencil on top to hold string up from the bottom of the glass. Do not let string touch sides or bottom of the jar. Let this steep for upto a week and watch the crystals grow! This is also known as "rock candy".
Thursday, March 01, 2012
Make your own: Handmade Seed Paper
Recently we had another little "disaster" at our house. Somehow, two whole rolls of toilet paper made their way into our 3 year old's bath, and were dissolved with glee into mushy wet wads of mess. Wanting to go with the flow, I thought for a minute about how to solve this situation. There had been so much fun creating this "art" in the bath, and it would be wasteful to just strain it off into the garbage or compost. We decided this was the perfect opportunity for a lesson in making handmade paper. Toilet paper is not the best material to use as it's already recycled thin paper weight and made of short fibres. We shredded up additional scrap paper, including colours and new textures and scooped out all the soggy pulp into a large plastic bin. Here are our steps for making paper (best done in the summer months outdoors, but in a pinch you can line your table or floor with thick towels and make your paper indoors).
Handmade Seed Paper
You will need:
- Paper pulp (about 10 sheets of scrap paper, including different colours and textures will do)
- Blender or Food Processor
- Screen (we made one from an embroidery hoop and mosquito netting)
- Seeds (optional, to add into your paper for "growing" your paper in soil)
- Two large plastic water-proof tubs
- Felt pieces large enough to cover your screen, and/or old tea towels
- Rolling pin (to use as a press)
- Drying area (we are using our plant growing rack, but drying outdoors in warm weather would be perfect)
1) Soak your paper in warm water. Rip it into shreds, let it become a soggy mess!
2) Scoop out paper pulp with your screen and blend in small batches in your food processor/blender.
3) Now you should have uniform mushy paper pulp. Add small flat seeds or other bits you want to decorate your paper. We added marigold seeds.
4) Add about one cup of pulp into your plastic tub (which is filled with warm water). You will need to test the thickness of your paper when you screen it out, to see if you need to add more water or pulp to the mix.
5) Use your screen to strain out the pulp into smooth sheets. Press your screen down onto the felt or tea towels in your second plastic tub. Layer with more felt in between each sheet.
6) When you have made a stack of about 10 sheets of handmade pulp paper, roll the top of the pile gently with a small rolling pin to press out the water. Pour off as much water as you can.
7) Lay out your sheets to dry. Drying time will depend on the thickness of your paper, and the temperature. Indoors in a cool house it will take several days. You could set up a fan beside your drying rack to help with the drying. Flip them part way through the drying process to help speed the drying. Outside in summer weather they can be dried in a day.
8) Pulp should be used up within a few days as it will not keep.
9) Write letters or make drawings on your seed paper, then plant in the ground for new flowers to grow!
Handmade Seed Paper
You will need:
- Paper pulp (about 10 sheets of scrap paper, including different colours and textures will do)
- Blender or Food Processor
- Screen (we made one from an embroidery hoop and mosquito netting)
- Seeds (optional, to add into your paper for "growing" your paper in soil)
- Two large plastic water-proof tubs
- Felt pieces large enough to cover your screen, and/or old tea towels
- Rolling pin (to use as a press)
- Drying area (we are using our plant growing rack, but drying outdoors in warm weather would be perfect)
1) Soak your paper in warm water. Rip it into shreds, let it become a soggy mess!
2) Scoop out paper pulp with your screen and blend in small batches in your food processor/blender.
3) Now you should have uniform mushy paper pulp. Add small flat seeds or other bits you want to decorate your paper. We added marigold seeds.
4) Add about one cup of pulp into your plastic tub (which is filled with warm water). You will need to test the thickness of your paper when you screen it out, to see if you need to add more water or pulp to the mix.
5) Use your screen to strain out the pulp into smooth sheets. Press your screen down onto the felt or tea towels in your second plastic tub. Layer with more felt in between each sheet.
6) When you have made a stack of about 10 sheets of handmade pulp paper, roll the top of the pile gently with a small rolling pin to press out the water. Pour off as much water as you can.
7) Lay out your sheets to dry. Drying time will depend on the thickness of your paper, and the temperature. Indoors in a cool house it will take several days. You could set up a fan beside your drying rack to help with the drying. Flip them part way through the drying process to help speed the drying. Outside in summer weather they can be dried in a day.
8) Pulp should be used up within a few days as it will not keep.
9) Write letters or make drawings on your seed paper, then plant in the ground for new flowers to grow!
Snow bread
Recently, after a bit of a snowfall, we had a great time building a child-sized quinzhee (quincy?) - a snow house that is not an igloo but is a large mound of snow packed down and that is tunneled out to form a cozy shelter. While this was a fun project, the cold weather and snow didn't last and by the next day our quinzhee was shrinking considerably so it could no longer house a small person. By day three it was only knee sized. Disappointing for a 3 year old (and me) who had put in hours of work piling up the snow.
However, it only took a few minutes for our little one to brighten up with a new plan. "Let's play bake oven - this can be my outdoor kitchen" - meaning her miniature shrunken quinzhee was now an ideal child version of our outdoor wood-fired cob oven. She formed snow loaves of bread, lined them up on old boards to "rise", gathered small sticks to make a "fire" in the oven, and then "baked" the snow bread to perfection. Little round log bits were potatoes, baked alongside. Then she set up her "CSA stand" with a handlettered sign saying "fresh bread", and sold her snow loaves to all of us happy customers! Mmm, delicious. This is just another example of the endless lessons our kids can teach us about seeing the opportunity in every moment, even if it takes us in unexpected diretions, if we keep our minds and creative hearts open.
Tuesday, January 17, 2012
Herbal crafting with kids
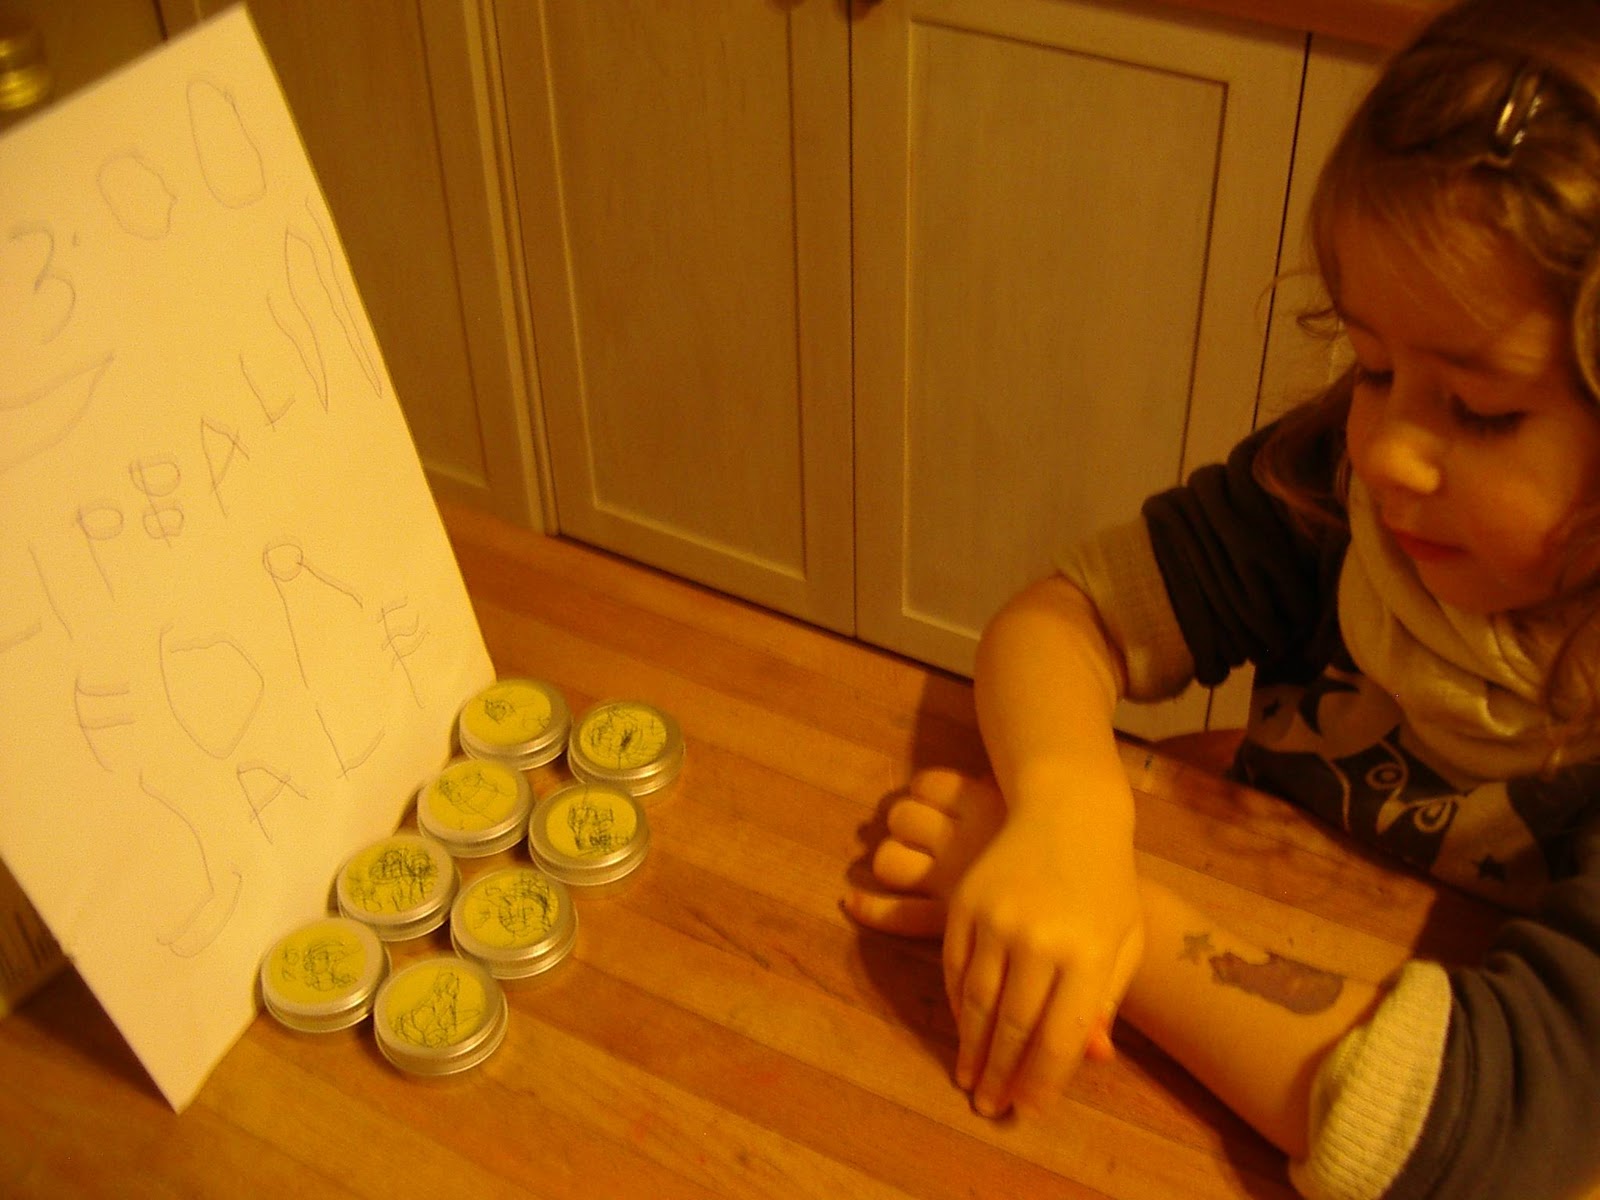
I have a budding herbalist in my household! Children thrive when given the opportunity for us to trust them with real, hands-on learning projects that they can do at their own speed and with their own style. On a recent evening my 3.5 year old and I made lipbalms together, upon her request (to my delight). She stirred and measured carefully, melted the ingredients on the stove (with supervision), tested the finished product for proper consistency, smelled numerous essential oils (settled on grapefruit), and designed her own custom labels. Then she promptly asked for some paper, and what letters were needed to make a sign for "her store". Follow our simple lipbalm recipe here.
Tuesday, December 20, 2011
Animal tracking with kids
We've recently been told that a fox has been seen in a nearby wooded area - and so we have been going on regular adventures to see if we can spot it's home. With new snow on the ground it's much easier to track animals here in the city, and when we look closely we can find a surprising amound of tracks (the usual birds, rabbits, mice). It's a good exercise in slowing down and honing skills of observation, even better when done with kids who get excited about discovering the smallest details. We did find several nice hollows, logs and burrows, and at each place Maya left a small handful of dried blueberries as a gift (because you never know if the fox might be hungry).
These fox searching walks led to us doing more research at the local library, and delving into other interesting links like this one for making your own fieldguide of your own backyard with kids or this one eco field guide for younger kids and then reading more about the very inspiring Forest Schools that are evolving all around the world, including this one that is organized by people we know who live near Thunder Bay.
Even though we are an unschooling family that lives in the city (on a tiny farm, but still yes, it's in the city) we have a strong leaning toward outdoor nature-based education and hope to be able to tap into something like this with a group of other families locally in the future.
These fox searching walks led to us doing more research at the local library, and delving into other interesting links like this one for making your own fieldguide of your own backyard with kids or this one eco field guide for younger kids and then reading more about the very inspiring Forest Schools that are evolving all around the world, including this one that is organized by people we know who live near Thunder Bay.
Even though we are an unschooling family that lives in the city (on a tiny farm, but still yes, it's in the city) we have a strong leaning toward outdoor nature-based education and hope to be able to tap into something like this with a group of other families locally in the future.
Friday, June 24, 2011
Peas and more peas...encouraging kids in the garden!
We are loving the fresh peas around here these days..the ones in Maya's garden have come up first (because she watered them faithfully every single day!). There is so much information out there about the benefits of connecting kids with gardens - tactile learning, confidence building, creativity, health, encouraging stewardship of the land, etc...Here are some simple tips on how to make kids feel successful and connected to their gardens and a nice article on this topic from the City Farmer website:
- give kids their very own space to garden in
- let kids help choose (buy/save) the seeds themselves
- encourage them to grow lettuce, carrots, peas, radishes that come up quickly
- spend time exploring the garden (learn about soil life, insects, plants, etc)
- add artful elements (let them make signs, fences, other decorations)
- allow kids to harvest, nibble, and cook with the foods from the garden!
- give kids their very own space to garden in
- let kids help choose (buy/save) the seeds themselves
- encourage them to grow lettuce, carrots, peas, radishes that come up quickly
- spend time exploring the garden (learn about soil life, insects, plants, etc)
- add artful elements (let them make signs, fences, other decorations)
- allow kids to harvest, nibble, and cook with the foods from the garden!
Thursday, June 16, 2011
Strawberries, rhubarb and homeschooling
Today was a home day - we spent a busy day volunteering at Fertile Ground CSA yesterday so we needed some quiet downtime. We made a simple strawberry rhubarb crisp (recipe below) with berries freshly picked from our little strawberry patch, and ate it while reading books in the backyard tent. We also turned some excess rhubarb into a small batch (7 jars) of ginger-rhubarb jam from Small Batch Preserving - mmm! The jam making turned into an impromptu lesson in basic mathematics as Maya started counting jam jars and moving them around to add them up in different combinations. Yup, they still added up to 7 jars no matter which way you arrange them! Life learning at it's finest!
Strawberry Rhubarb Crisp
1 cup strawberries, sliced
2 cups rhubarb, sliced
1 Tbsp flour or cornstarch
1/4 cup sugar or honey, optional
Topping:
1 1/2 cups flour
1 1/2 cups brown sugar
1 1/2 cups whole oats
5 Tbsp butter
3 Tbsp oil
1 tsp cinnamon and/or nutmeg
nuts, optional
1) Mix first four ingredients in bottom of unoiled 9 x 13 glass baking dish.
2) Mix topping ingredients in large bowl to form crumb mixture, then layer on top of fruit in dish.
3) Bake at 375F for 30 minutes, until top is golden brown and filling is bubbling.
4) Serve warm or cold, with yogurt, icecream or just on it's own.
Strawberry Rhubarb Crisp
1 cup strawberries, sliced
2 cups rhubarb, sliced
1 Tbsp flour or cornstarch
1/4 cup sugar or honey, optional
Topping:
1 1/2 cups flour
1 1/2 cups brown sugar
1 1/2 cups whole oats
5 Tbsp butter
3 Tbsp oil
1 tsp cinnamon and/or nutmeg
nuts, optional
1) Mix first four ingredients in bottom of unoiled 9 x 13 glass baking dish.
2) Mix topping ingredients in large bowl to form crumb mixture, then layer on top of fruit in dish.
3) Bake at 375F for 30 minutes, until top is golden brown and filling is bubbling.
4) Serve warm or cold, with yogurt, icecream or just on it's own.
Saturday, August 14, 2010
This mid August weekend...
ere goes another summer weekend at the homestead...watching more of those lovely bees in the bergamot patch; making salsa; harvesting calendula, red clover and arnica; harvesting tomatoes, beans and zucchini (who knew that pattypan squash were such great entertainment); enjoying cups of homemade herbal tea served by our wee one with her new teapot (a recent birthday gift); weeding in the garden; tending the chickens; cooling off with a nap in the shady tent; dipping our toes into our pond at the end of another hot day; and finally, a wood-fired pizza dinner on the back patio...
A friend mentioned we had quite a few more photos on the blog lately of our daughter - and yes, we admit our 2-year old is becoming the focal point of our daily routines, as any of you with wee ones out there know that the wonderful "twos" are busy, exciting, eye-opening, helpful, curious, full of wonder, hilarious, wise, beautiful, and oh so tempting to capture by camera...
Thursday, June 24, 2010
This year's best garden helper!
We've had some offers for volunteer help this summer at our little homestead, but the most eager helper by far is our two year-old! She keeps busy all day long, harvesting peas, learning names of herbs (she loves the wood sorrel, parsley and mint patches), making wildflower bouquets, feeding the hens and collecting their eggs, digging in the garden, pulling weeds, planting seeds and watering any dry seedlings, marking new rows with twigs or little rock piles, looking for snails and earthworms and lining them up them from biggest to smallest, checking the dial on the compost thermometre, decorating handmade garden signs, searching for strawberries, collecting red clover blossoms in her harvesting basket, counting the number of crows sitting at the top of our tamarack tree, watching "mama robin" in the nest that was built under our new porch roof, floating leaf boats in our pond...when I sometimes have a few fleeting worries about how our plans for homeschooling will work out, I just need to sit back and watch a day unfold to see that there is more than enough life learning going on around here to match any text book!
Subscribe to:
Posts (Atom)