Showing posts with label baking. Show all posts
Friday, July 24, 2015
Baking Whole Grain Bread with Children
What a fun workshop we had here today! Thirteen eager kids (aged 4-12) were over to learn about baking bread: working with sourdough, kneading and shaping their own loaves, making their own sourdough starter culture, grinding whole grains into flour, and baking the loaves in our wood-fired cob oven! We talked about breads from around the world, and what makes up bread (flour/grain, water, salt and yeast - and heat!). And there was lots of bread eating, laughing, creating, more eating, and playing - not to mention lots of flour and dough everywhere! Hands-on learning is always so inspiring to watch - we see the transformation of words and ideas into tangible knowledge that is learned through tactile experience (ideally using all the senses like today - taste, smell, touch, etc - as the ideal way to let a new concept really sink in). We hope to offer more bread classes (for kids and adults) again soon.
Wednesday, January 07, 2015
Fluffy Chia Spelt Biscuits
Oh yum! We've been enjoying winter soups and stews to warm us these past colds days. I love to always keep a pot of soup going on the stove, ready for a cozy quick nourishing meal. We like to have sourdough bread or these chia biscuits alongside a bowl of hearty soup. Here is a simple recipe for the fluffiest chia biscuits I have ever made. We experiment with different grains, but like whole spelt flour the best. They can also be made gluten-free by substituting GF flours for the spelt. These biscuits cut out well, and are fun for kids to shape or cut to their heart's desire. Isn't eating a star or heart shaped biscuit more delicious, especially if it was made by little hands?
Fluffy Chia Spelt Biscuits
Yields: approx. 10 large biscuits
1 1/4 cups whole spelt flour (or flour of your choice)
3/4 cup arrowroot flour
1 Tbsp baking powder
3/4 tsp sea salt
10 Tbsp organic butter
1 cup coconut milk (or other dairy or substitute)
2 Tbsp black chia seeds, ground finely
1) Preheat oven to 425 F.
2) Lightly oil baking sheet or line with parchment paper.
3) Mix together the dry ingedients in one bowl, and then add butter.
4) Blend butter using your fingers so the mixture resembles coarse crumbs. It's ok to have pieces of butter left in the mixture as this makes the biscuits flaky.
5) Mix wet ingredients in another small bowl and let sit for 5 minutes to thicken.
6) Then form dough by mixing wet into dry. Mix lightly to knead dough into two balls.
7) Pat dough into 1 inch rounds on a floured surface. Cut into rounds or shapes.
8) Bake for 15 minutes. Serve warm with butter or another delicious spread.
Fluffy Chia Spelt Biscuits
Yields: approx. 10 large biscuits
1 1/4 cups whole spelt flour (or flour of your choice)
3/4 cup arrowroot flour
1 Tbsp baking powder
3/4 tsp sea salt
10 Tbsp organic butter
1 cup coconut milk (or other dairy or substitute)
2 Tbsp black chia seeds, ground finely
1) Preheat oven to 425 F.
2) Lightly oil baking sheet or line with parchment paper.
3) Mix together the dry ingedients in one bowl, and then add butter.
4) Blend butter using your fingers so the mixture resembles coarse crumbs. It's ok to have pieces of butter left in the mixture as this makes the biscuits flaky.
5) Mix wet ingredients in another small bowl and let sit for 5 minutes to thicken.
6) Then form dough by mixing wet into dry. Mix lightly to knead dough into two balls.
7) Pat dough into 1 inch rounds on a floured surface. Cut into rounds or shapes.
8) Bake for 15 minutes. Serve warm with butter or another delicious spread.
Saturday, April 12, 2014
Sourdough Workshop
We had one of our regular Saturday homesteading workshops here today. This was the third workshop of a four-part "cultured kitchen" series which included four classes about creating live cultured foods at home - sauerkraut/kimchi, yogurt making, and sourdough bread (and apple cider vinegar is coming in the fall).
During today's workshop we walked through the steps of making and maintaining a sourdough starter, proofing the starter before bread baking (at least 8-12 hours), making the dough, and shaping loaves. We were working with real sourdough (not preferments or recipes that use commercial yeast) - so ingredients are basic and wholesome - organic hard bread flour, cool filtered water, sea salt, and wild yeast! The process really is quite simple, it's just a matter of making it part of a regular rhythm of your own weekly kitchen activities.
Participants made their own sourdough starters to take home (which now need to be fed for the next 10 days, and maintained after). We also sampled two sourdough breads I had made the night before, so that participants could see the full range of bread making from start (starter) to finish (eating) but still fit this all - a normally 2 day experience - into a 2 hour class. We tried sesame caraway rye (made with a 100% organic rye starter); and wholegrain country sourdough loaf with millet & sunflower seeds. Here are photos of the bread baking after today's workshop.
During today's workshop we walked through the steps of making and maintaining a sourdough starter, proofing the starter before bread baking (at least 8-12 hours), making the dough, and shaping loaves. We were working with real sourdough (not preferments or recipes that use commercial yeast) - so ingredients are basic and wholesome - organic hard bread flour, cool filtered water, sea salt, and wild yeast! The process really is quite simple, it's just a matter of making it part of a regular rhythm of your own weekly kitchen activities.
Participants made their own sourdough starters to take home (which now need to be fed for the next 10 days, and maintained after). We also sampled two sourdough breads I had made the night before, so that participants could see the full range of bread making from start (starter) to finish (eating) but still fit this all - a normally 2 day experience - into a 2 hour class. We tried sesame caraway rye (made with a 100% organic rye starter); and wholegrain country sourdough loaf with millet & sunflower seeds. Here are photos of the bread baking after today's workshop.
Sunday, February 09, 2014
Favourite Sourdough Bread
We finally have a weekly ritual of making sourdough bread. We've tried so many ways of baking bread over the years, from traditional yeast breads with lots of kneading, to artisan breads in "5 minutes a day" method, to unleavened breads, to biga and pre-ferment breads, to several-day-multiple-stage-elaborate sourdough breads. Since we love to play around with ferments (kimchi, crock pickles, kombucha, beer making, wine making, yogurt making...) we really do enjoy the sourdough process the best. However, we needed a version that was simple enough to follow with only a handful of steps, with a little kneading and shaping but lots of slow rising time that is flexible, functional yet with an artisan look and taste, and one that can be adapted with wholegrains and lots of seeds, and most importantly that can easily be incorporated into a family's life. I think we've found it. And best of all, if we don't have time to bake bread on a given week, we simply feed the starter as usual but use it to make sourdough pancakes (from our favourite recipe in the Tassajara Bread Book).
Our version of sourdough bread is based on a recipe for Country Sourdough Bread in a great book called Baking Bread with Children. It's a Waldorf-inspired baking book that incorporates loads of ideas on how to engage children in the tactile process of working with dough - including stories, legends, songs, poem and rhymes about bread, lots of simple recipes (including yeast breads, quick breads, and a few sourdough breads), and also information on how to build a wood-fired pizza oven and use it with children. Since we already have a well-used and much loved wood-fired cob oven we especially enjoyed seeing this section of the book among all the delicious recipes.
Speaking of fantastic kids books that talk about sourdough, here is another fun one-of-a-kind kids book that has made it into our collection - Suzy's Sourdough Circus. It uses a circus analogy to explain how the wild yeast makes the bread rise, and their website is packed full of information such as recipes and where to source a sourdough starter from someone near you (called "the sourdough share")!
We're certainly not experts in the sourdough bread process but we have developed this recipe that is simple, straight-forward and works well for us. Here's our wholegrain sourdough bread version. All books mentioned above have good instructions for how to make your own sourdough starter to get going with this process. Below are photos of several of our recent loaves! We love adding sunflower and sesame seeds.
Sourdough Bread
Ingredients:
5 cups hard bread flour or combination of wholegrain flours
1/2 cup wholewheat bread flour
1/2 cup rye flour (adding some rye gives bread the extra "chewy" texture)
2 cups filtered water (at room temperature)
1 cup sourdough starter (ideally reserved from previous batch of bread or pancakes)
1 Tbsp sea salt
Step 1 - Mixing the Sponge: Mix the 1 cup sourdough starter with 2 cups water and 3 1/2 cups of the bread flour or wholegrain flours. Let sit overnight in a cool place (let sit at least 8-12 hours). It should be bubbly and tangy smelling when it's ready to use.
Step 2 - Feeding the Starter: Now add the remaining 1 1/2 cups of bread flour or wholegrain flour, plus 1/2 cup wholewheat bread flour and 1/2 cup rye flour. Then stir well. Take 1 cup of this dough and store it in a glass or ceramic jar in the fridge. This is your sourdough starter for your next batch of bread! It should be used every week in order to maintain it.
Step 3 - Mixing the Dough: Add 1 Tbsp sea salt. Stir in more flour if necessary to make a firm dough but be careful not to add too much at once as you don't want the dough to become too dry. There should be just enough flour added to keep the dough from sticking to your hands and the table. Knead for 10 minutes to help dough become elastic and develop strong gluten fibres which help the bread to rise.
Step 4 - Rest Dough & Shape Loaves: Let dough rest for 15 minutes, covered with a damp cloth. Then divide into 2 loaves and shape into rounds or oblong. Stretch and fold the dough, roll it up tightly into a log and sealing the seams underneath. Coat with flour to keep from sticking.
Step 5 - Rising: Cover with damp cloth and let loaves rise on oiled or floured baking sheet for 2-3 hours (depending on air temperature and humidity) until they have doubled in size.
Step 6 - Preheating Oven & Baking: Preheat oven to 450F. When loaves have risen to double in size (and oven is preheated) score the top of each loaf with a sharp knife. This allows the bread to expand without bursting. Bake for 5 minutes at 450F, then reduce heat to 400F and bake for another 30-35 minutes until bread is golden brown and sounds hollow when tapped.* Let cool, then slice.
*A great way to bake bread with delicious crispy crusts is to bake directly on a ceramic pizza stone, or by adding a roasting pan underneath where a cup of hot water can be added to bring steam into your oven. We love using our outdoor wood-fired cob (clay) oven since the breads get a very dark crispy crust from baking on a stone hearth with the high heat we can use from the firing.
Variations:
- add small amounts of other wholegrains such as millet, oats, barley, buckwheat...
- add raisins or cranberries, apple slices and cinnamon...
- add other seeds (sunflower, flax, sesame, pumpkin), or nuts (walnuts, pecans), or dried fruit...
- add leftover moist grains such as cooked rice, cooked oatmeal, cooked millet
Our version of sourdough bread is based on a recipe for Country Sourdough Bread in a great book called Baking Bread with Children. It's a Waldorf-inspired baking book that incorporates loads of ideas on how to engage children in the tactile process of working with dough - including stories, legends, songs, poem and rhymes about bread, lots of simple recipes (including yeast breads, quick breads, and a few sourdough breads), and also information on how to build a wood-fired pizza oven and use it with children. Since we already have a well-used and much loved wood-fired cob oven we especially enjoyed seeing this section of the book among all the delicious recipes.
Speaking of fantastic kids books that talk about sourdough, here is another fun one-of-a-kind kids book that has made it into our collection - Suzy's Sourdough Circus. It uses a circus analogy to explain how the wild yeast makes the bread rise, and their website is packed full of information such as recipes and where to source a sourdough starter from someone near you (called "the sourdough share")!
We're certainly not experts in the sourdough bread process but we have developed this recipe that is simple, straight-forward and works well for us. Here's our wholegrain sourdough bread version. All books mentioned above have good instructions for how to make your own sourdough starter to get going with this process. Below are photos of several of our recent loaves! We love adding sunflower and sesame seeds.
Sourdough Bread
Ingredients:
5 cups hard bread flour or combination of wholegrain flours
1/2 cup wholewheat bread flour
1/2 cup rye flour (adding some rye gives bread the extra "chewy" texture)
2 cups filtered water (at room temperature)
1 cup sourdough starter (ideally reserved from previous batch of bread or pancakes)
1 Tbsp sea salt
Step 1 - Mixing the Sponge: Mix the 1 cup sourdough starter with 2 cups water and 3 1/2 cups of the bread flour or wholegrain flours. Let sit overnight in a cool place (let sit at least 8-12 hours). It should be bubbly and tangy smelling when it's ready to use.
Step 2 - Feeding the Starter: Now add the remaining 1 1/2 cups of bread flour or wholegrain flour, plus 1/2 cup wholewheat bread flour and 1/2 cup rye flour. Then stir well. Take 1 cup of this dough and store it in a glass or ceramic jar in the fridge. This is your sourdough starter for your next batch of bread! It should be used every week in order to maintain it.
Step 3 - Mixing the Dough: Add 1 Tbsp sea salt. Stir in more flour if necessary to make a firm dough but be careful not to add too much at once as you don't want the dough to become too dry. There should be just enough flour added to keep the dough from sticking to your hands and the table. Knead for 10 minutes to help dough become elastic and develop strong gluten fibres which help the bread to rise.
Step 4 - Rest Dough & Shape Loaves: Let dough rest for 15 minutes, covered with a damp cloth. Then divide into 2 loaves and shape into rounds or oblong. Stretch and fold the dough, roll it up tightly into a log and sealing the seams underneath. Coat with flour to keep from sticking.
Step 5 - Rising: Cover with damp cloth and let loaves rise on oiled or floured baking sheet for 2-3 hours (depending on air temperature and humidity) until they have doubled in size.
Step 6 - Preheating Oven & Baking: Preheat oven to 450F. When loaves have risen to double in size (and oven is preheated) score the top of each loaf with a sharp knife. This allows the bread to expand without bursting. Bake for 5 minutes at 450F, then reduce heat to 400F and bake for another 30-35 minutes until bread is golden brown and sounds hollow when tapped.* Let cool, then slice.
*A great way to bake bread with delicious crispy crusts is to bake directly on a ceramic pizza stone, or by adding a roasting pan underneath where a cup of hot water can be added to bring steam into your oven. We love using our outdoor wood-fired cob (clay) oven since the breads get a very dark crispy crust from baking on a stone hearth with the high heat we can use from the firing.
Variations:
- add small amounts of other wholegrains such as millet, oats, barley, buckwheat...
- add raisins or cranberries, apple slices and cinnamon...
- add other seeds (sunflower, flax, sesame, pumpkin), or nuts (walnuts, pecans), or dried fruit...
- add leftover moist grains such as cooked rice, cooked oatmeal, cooked millet
Wednesday, August 07, 2013
Wood-fired baking!
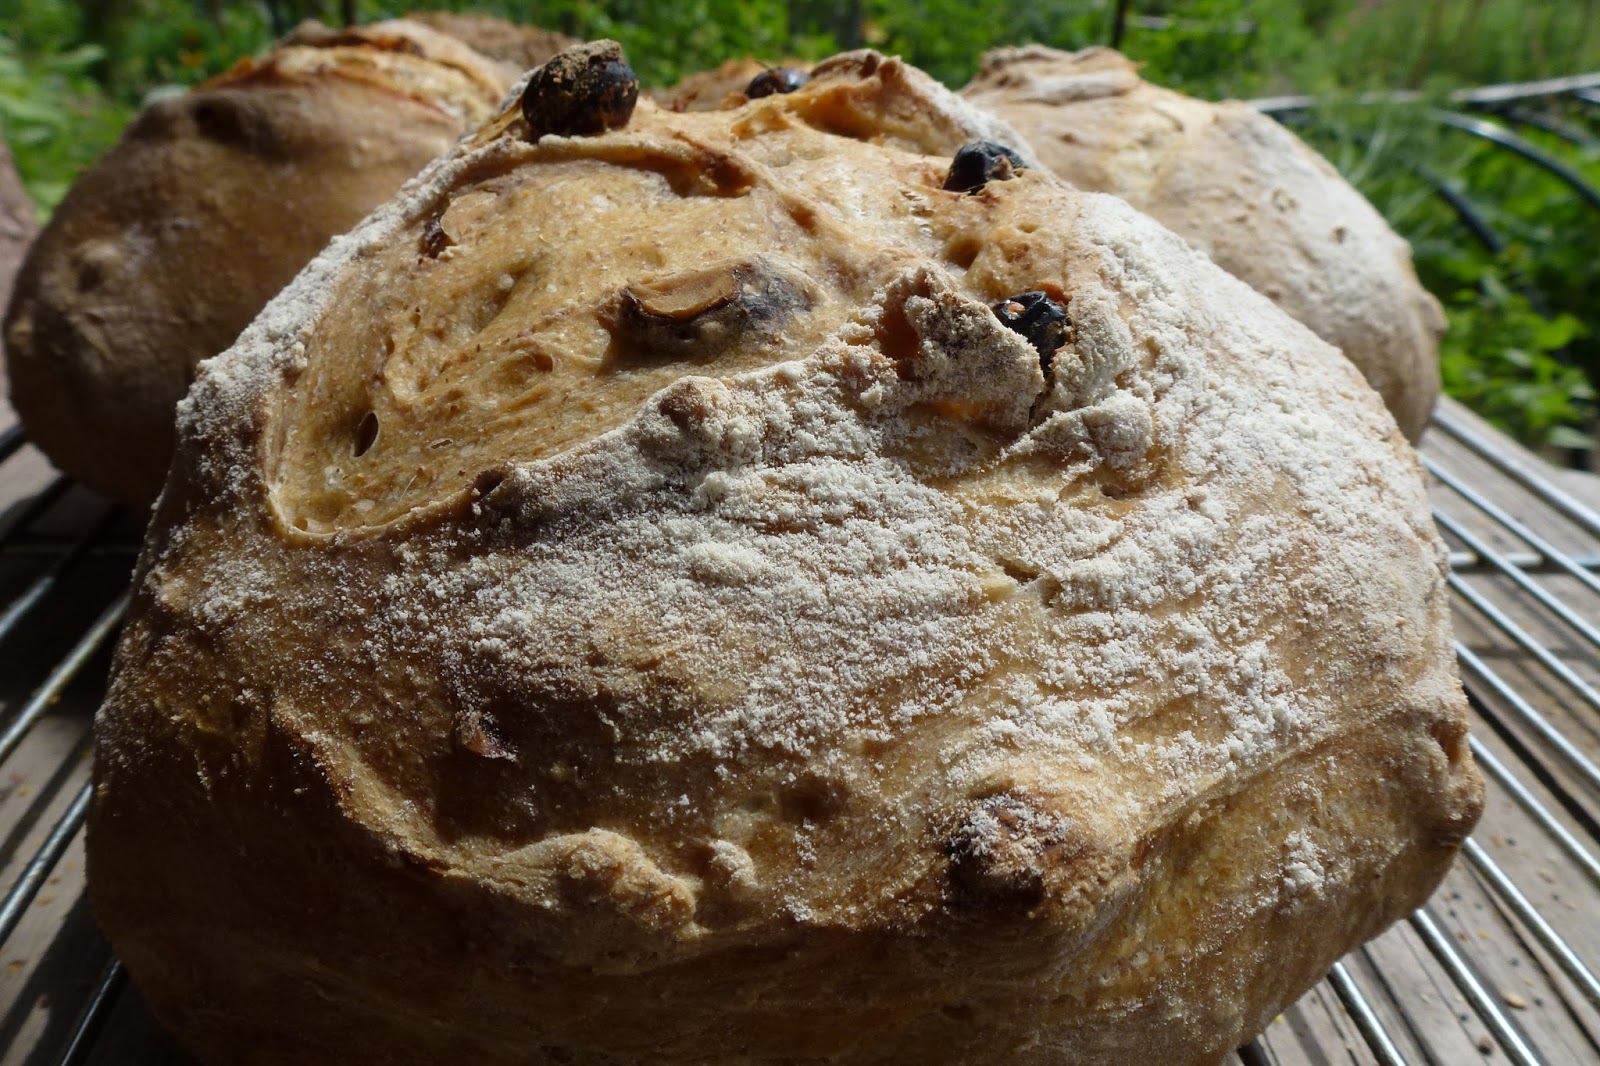
Each week during the summer months we have a CSA (community supported agriculture) food pick-up here. Our friend, Angie from Fertile Ground CSA, brings her gorgeous organic produce and her members pick up their bounty. We offer fresh bread and baked goods, made in our wood-fired oven. It allows us the joy of baking for a crowd each week, with freedom to experiment and try new recipes out, as well as many favourite repeats that members ask for. The favourite breads include: Superseed Bread; Walnut-Raisin; and Potato-Roasted Garlic-Rosemary Bread; and treats such as Vegan Pesto Rolls; Gluten-free Brownies (made with quinoa); White-Chocolate Roasted Almond Cookies; and Whole Wheat Sticky Buns. All our baking is made with organic flour, organic seeds, and healthful whole ingredients (including basil, zucchini, beets and other veggies as they come into season), with our grains mainly sourced from the local organic flour mill at Oak Manor Farms. Best of all, we get to bake in our outdoor wood-fired cob oven. We love so many elements of this oven - it was made by us with the help of family; is made of natural materials; it's fun to play around with the wood-firing learning to heat the oven just right for long enough baking time; we often eat a garden-fresh lunch while baking; and we get to be outdoors while we work. Here are some photos of this week's baking day.
Sunday, June 16, 2013
Cob Oven Workshop
We are back into the swing of workshops now that the garden has been planted. Little City Farm hosts several workshops each month, Saturday afternoons, on the topics of sustainability, homesteading skills, permaculture, natural building, organic gardening and more...
This weekend's workshop was on the topic of building with cob, and more specifically building a cob oven. We have a wonderful little cob oven in our backyard that is absolutely delightful for an aspiring or professional baker - especially if you like fires and working outdoors. We usually bake twice a week here, once to make bread and once for pizzas. The cob oven can also be used for baking all kinds of other things (cookies, pies, etc), plus roasting vegetables, drying herbs, making yogurt, and so on.
Cob is a mixture of sand, clay and straw (aprox 9 parts sand : 1 part clay and a little straw chopped into the mix for insulation value on one of the layers of the cob oven). Cob building is a very intuitive process and has been done in all parts of the world (i.e. earth building) in various forms - adobe, mud huts, cob cottages, and so on. It's an ancient building technique that anyone can easily learn. We like to recommend making cob bricks or balls before you start a project, in order to test your cob mix. There are only a few technical details to consider - the ratio of oven base to oven height; and the ratio of oven door height to height of dome. There are great books that walk you through the process step-by-step: books like Build your own Earth Oven by Kiko Denzer; The Cob Builder's Handbook by Becky Bee (a pdf version is here), The Hand-Sculpted House by Ianto Evans, and The Cobber's Companion by Michael Smith.
And for further inspiration, here's a slideshow we found online of handbuilt cob houses, cottages, garden walls, sheds, sauna, and several bake ovens...
Here are a few pictures from our cob oven workshop (with some participants getting muddier than others!), and baking pita in the oven:
This weekend's workshop was on the topic of building with cob, and more specifically building a cob oven. We have a wonderful little cob oven in our backyard that is absolutely delightful for an aspiring or professional baker - especially if you like fires and working outdoors. We usually bake twice a week here, once to make bread and once for pizzas. The cob oven can also be used for baking all kinds of other things (cookies, pies, etc), plus roasting vegetables, drying herbs, making yogurt, and so on.
Cob is a mixture of sand, clay and straw (aprox 9 parts sand : 1 part clay and a little straw chopped into the mix for insulation value on one of the layers of the cob oven). Cob building is a very intuitive process and has been done in all parts of the world (i.e. earth building) in various forms - adobe, mud huts, cob cottages, and so on. It's an ancient building technique that anyone can easily learn. We like to recommend making cob bricks or balls before you start a project, in order to test your cob mix. There are only a few technical details to consider - the ratio of oven base to oven height; and the ratio of oven door height to height of dome. There are great books that walk you through the process step-by-step: books like Build your own Earth Oven by Kiko Denzer; The Cob Builder's Handbook by Becky Bee (a pdf version is here), The Hand-Sculpted House by Ianto Evans, and The Cobber's Companion by Michael Smith.
And for further inspiration, here's a slideshow we found online of handbuilt cob houses, cottages, garden walls, sheds, sauna, and several bake ovens...
Here are a few pictures from our cob oven workshop (with some participants getting muddier than others!), and baking pita in the oven:
Tuesday, April 09, 2013
Sap boiling day...and fresh oatmeal bread
We decided today was the day. We've been storing our sap long enough, and the days are getting warmer. We started out with sap boiling outside, and this went well for several hours. While boiling we enjoyed the first really sunny spring day, with an outdoor lunch picnic, and planting up the cold frame with lettuce, chard and spinach greens. Then the sunshine turned into a surprise spring rainstorm...not so great for an outdoor boiling event. The sap boiling was moved indoors - given we are doing a very small batch this didn't seem so bad to have some of it be done on the stove. Hoping for sunshine tomorrow to take the boil outdoors again. And, if we ever do this on a bigger scale we'd set up a proper fire pit and evaporator...some day.
During the boil day we were staying close to the house, so it seemed like a great day for baking bread. Having it rising while we checked and stirred the sap, and freshly baked when we came in from the cold rain, was perfect! We adjusted our favourite oatmeal bread recipe to use up this morning's left over oatmeal. Yum!
Here's the recipe:
Oatmeal-Rye 4 grain seeded bread
2 cups left over cooked oatmeal
1/2 cup molasses
1/4 cup honey or maple syrup
3 Tbsp butter
2 tsp sea salt
Combine the above ingredients in a large bowl.
2 cups warm water
1 Tbsp quick yeast
Mix the water and yeast in a large measuring cup. Stir, then let sit for about 5 minutes until it foams.
6 cups unbleached wheat or spelt flour
2 cups whole rye flour
1/4 cup millet grains
1/4 cup flax seeds
1/4 cup sunflower seeds
Extra oats and sesame seeds to sprinkle on top of risen loaves
When yeast has foamed, mix this with the wet ingredients. Then add flour and seeds and mix well. Knead about 10 minutes to make a soft dough.
Put dough back into the large bowl that has been oiled, and cover with a cotton cloth. Let rise 1 hour, or until double.
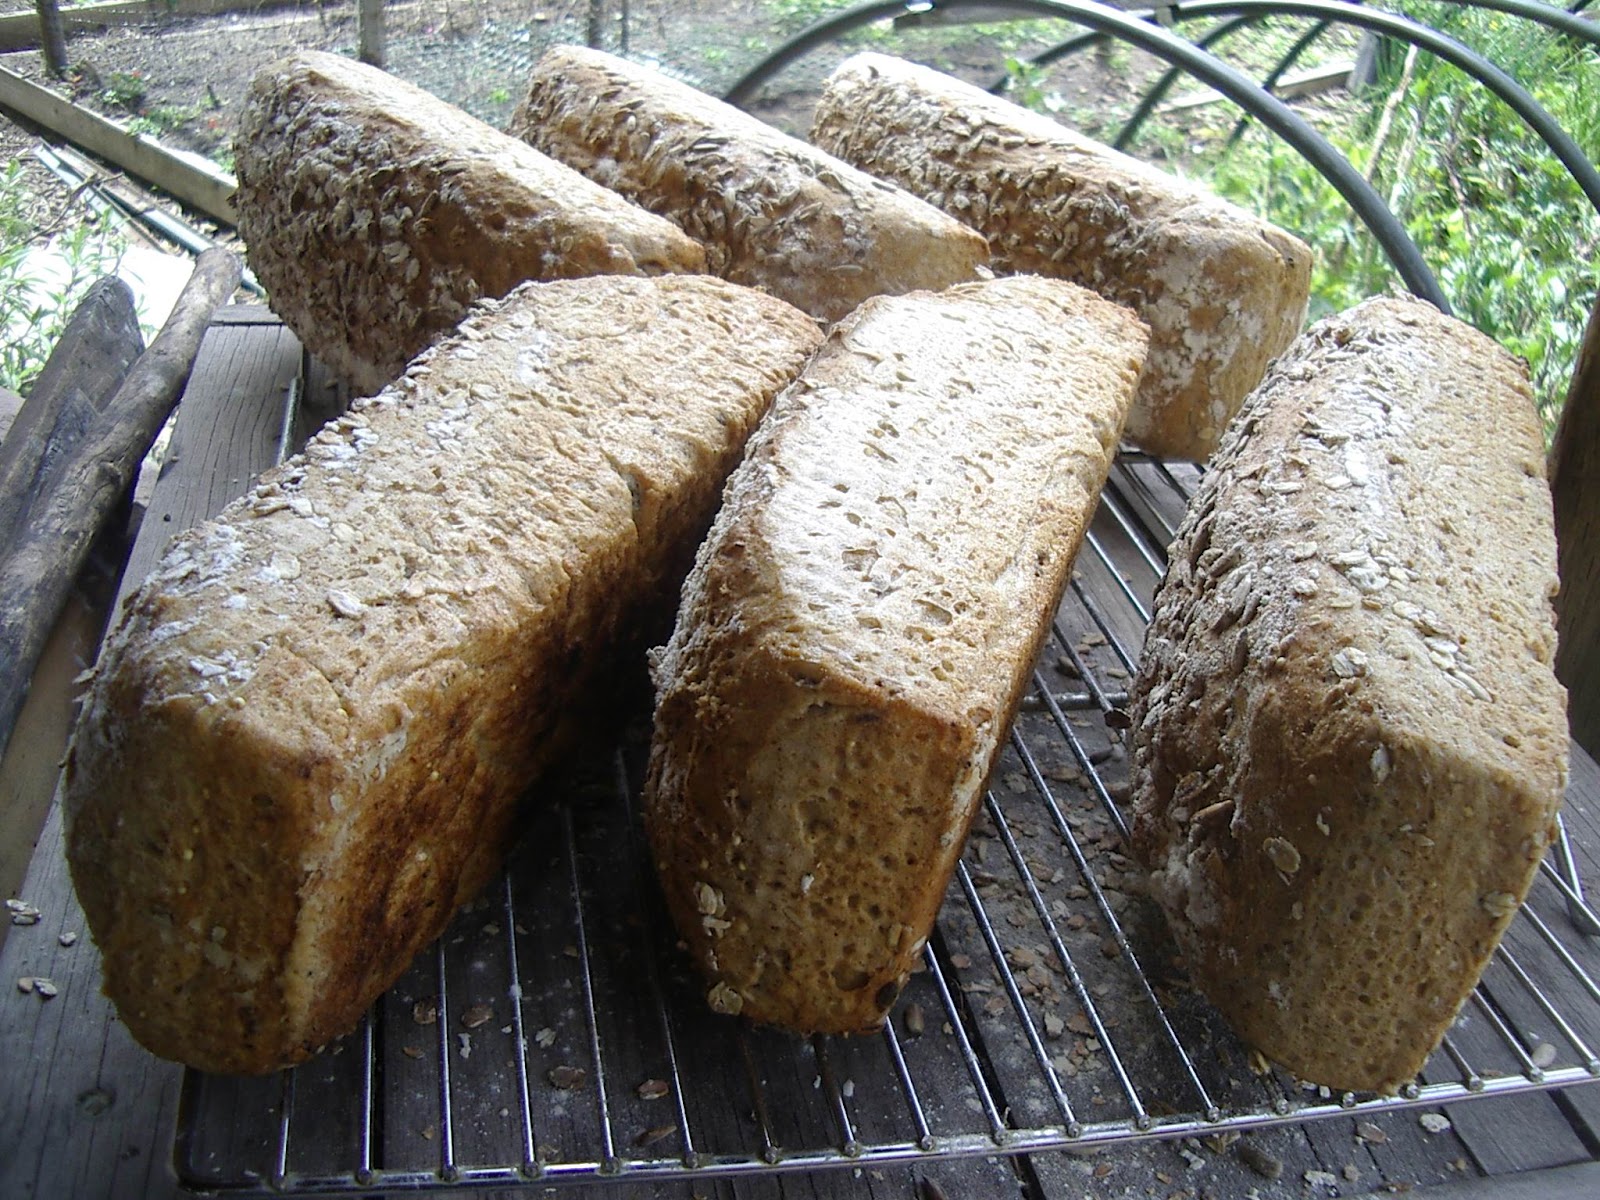
Form dough into 3 medium sized loaves and place into lightly oiled loaf pans. Wet top of loaves lightly with water, and sprinkle with oats and sesame seeds. Let rise again for about 45 minutes in a warm room (near your stove that is preheating to 400F).
Bake at 400F for 5 minutes, then lower heat to 350F and bake another 30-40 minutes until golden brown.
Let cool before slicing.
During the boil day we were staying close to the house, so it seemed like a great day for baking bread. Having it rising while we checked and stirred the sap, and freshly baked when we came in from the cold rain, was perfect! We adjusted our favourite oatmeal bread recipe to use up this morning's left over oatmeal. Yum!
Here's the recipe:
Oatmeal-Rye 4 grain seeded bread
2 cups left over cooked oatmeal
1/2 cup molasses
1/4 cup honey or maple syrup
3 Tbsp butter
2 tsp sea salt
Combine the above ingredients in a large bowl.
2 cups warm water
1 Tbsp quick yeast
Mix the water and yeast in a large measuring cup. Stir, then let sit for about 5 minutes until it foams.
6 cups unbleached wheat or spelt flour
2 cups whole rye flour
1/4 cup millet grains
1/4 cup flax seeds
1/4 cup sunflower seeds
Extra oats and sesame seeds to sprinkle on top of risen loaves
When yeast has foamed, mix this with the wet ingredients. Then add flour and seeds and mix well. Knead about 10 minutes to make a soft dough.
Put dough back into the large bowl that has been oiled, and cover with a cotton cloth. Let rise 1 hour, or until double.
Form dough into 3 medium sized loaves and place into lightly oiled loaf pans. Wet top of loaves lightly with water, and sprinkle with oats and sesame seeds. Let rise again for about 45 minutes in a warm room (near your stove that is preheating to 400F).
Bake at 400F for 5 minutes, then lower heat to 350F and bake another 30-40 minutes until golden brown.
Let cool before slicing.
Thursday, March 07, 2013
Leftover Grain Muffins
This is a quick muffin recipe that we like because it's so versatile. We make it with left over grains like quinoa, millet, oatmeal or rice - we mix up a batch of these muffins first thing in the morning using cold grain from last night's supper. Depending on the grain used, the liquid in the recipe needs to be adjusted. Our favourite grain to use is quinoa because of it's high nutritional value (quinoa is extremely rich in protein, fibre, iron - and is often called one of the "superfoods") and it's delicious slightly sweet-nutty flavour, which is really nice together with blueberries and toasted nuts. Kids love to help make them, and these muffins are a good way to get a nutrition-packed breakfast into everyone for a healthy start to the day. The muffins are ready in 20 minutes!
Leftover Grain Muffins
1 1/4 cups cooked quinoa (or other grain)
1 large egg, beaten
1 Tbsp butter, melted
1/2 cup milk or milk substitute (may need more depending on grain used in recipe)
4 Tbsp brown sugar (or other sweetener)
2 Tbsp baking powder
1 1/2 cups spelt flour (or any other flour)
1/2 cup berries or fruit
nuts, optional (toasted slightly)
Mix wet ingredients in one bowl. Mix dry in another. Combine wet with dry and stir to blend. Do not overmix or muffins will be dry. Scoop into 12 oiled or parchment lined muffins cups. Bake in preheated oven at 400F for about 20 minutes.
Leftover Grain Muffins
1 1/4 cups cooked quinoa (or other grain)
1 large egg, beaten
1 Tbsp butter, melted
1/2 cup milk or milk substitute (may need more depending on grain used in recipe)
4 Tbsp brown sugar (or other sweetener)
2 Tbsp baking powder
1 1/2 cups spelt flour (or any other flour)
1/2 cup berries or fruit
nuts, optional (toasted slightly)
Mix wet ingredients in one bowl. Mix dry in another. Combine wet with dry and stir to blend. Do not overmix or muffins will be dry. Scoop into 12 oiled or parchment lined muffins cups. Bake in preheated oven at 400F for about 20 minutes.
Monday, March 04, 2013
Favourite maple-hemp granola
Surprise, surprise - we eat a whole lot of homemade granola around here. We make it in huge batches, and love to eat it with homemade yogurt, or fresh berries, or warm applesauce. We often serve it to our bed & breakfast guests, and our daughter is a great helper when it comes to granola making time. There are lots of steps in the process where kids can be involved - measuring, mixing, stirring.
Here's our favourite recipe that we've perfected over the many many bowls that we've eaten. We like using maple syrup and hemp seeds because they are locally produced, delicious and healthful. Use organic ingredients where you can. Use gluten-free oats to make this recipe gluten-free.
Maple-hemp granola
12 cups organic whole oats
3 cups total nuts & seeds (we include flax, sunflower, sesame, pumpkin and hemp; sometimes chopped almonds)
1 cup maple syrup (or honey)
3/4 cup sunflower oil
3/4 tsp sea salt
1 1/2 cups raisins (add these AFTER baking)
Method:
1) Preheat oven to 350F.
2) Combine ingredients in large bowl and mix well.
3) Spread evenly on two lightly oiled baking sheet and place in hot oven.
4) Bake for 15 minutes, then take out and stir granola on the baking sheet.
5) Bake another 5-10 minutes, until lightly browned.
6) After baking add 1 1/2 cups raisins and mix.
7) Store in glass jars after the granola has cooled.
Here's our favourite recipe that we've perfected over the many many bowls that we've eaten. We like using maple syrup and hemp seeds because they are locally produced, delicious and healthful. Use organic ingredients where you can. Use gluten-free oats to make this recipe gluten-free.
Maple-hemp granola
12 cups organic whole oats
3 cups total nuts & seeds (we include flax, sunflower, sesame, pumpkin and hemp; sometimes chopped almonds)
1 cup maple syrup (or honey)
3/4 cup sunflower oil
3/4 tsp sea salt
1 1/2 cups raisins (add these AFTER baking)
Method:
1) Preheat oven to 350F.
2) Combine ingredients in large bowl and mix well.
3) Spread evenly on two lightly oiled baking sheet and place in hot oven.
4) Bake for 15 minutes, then take out and stir granola on the baking sheet.
5) Bake another 5-10 minutes, until lightly browned.
6) After baking add 1 1/2 cups raisins and mix.
7) Store in glass jars after the granola has cooled.
Sunday, January 27, 2013
Spelt Banana Bread
We're always on the look-out for healthy snacks, including wheat and sugar free options whenever possible. We are having fun going through Molly Katzen's kids cookbooks with our almost-5 year old, who loves helping in the kitchen. The recipes are simple, healthful and vegetarian - three things that are surprisingly hard to find in a kids cookbook! The books include step-by-step pictures so kids can follow the recipe even if they are not fully reading yet. We see how kitchen projects can build confidence for children - reading, measuring, numbers, cooperation as well as independence, learning to following something from start to finish to get delicious results - not to mention creativity, as each recipe gets adapted based on what we decide want to add or change. Needless to say, we love working together in the kitchen as a family and try to do a little of that every day.
Here is a new favourite recipe for a banana bread that is sugar-free. It's great for breakfast or mid-day snacks, and has lots of stages for kids to help (mashing bananas, beating eggs, mixing dry, mixing wet, etc):
Spelt Banana Bread
Ingredients:
2 cups whole spelt flour (or other flour you wish to use)
1 tsp cinnamon
1 tsp baking soda
1/2 tsp baking powder
1/2 cup chopped pecans or walnut
1/2 cup chocolate chips, optional (this makes the bread a little sweeter)
4 bananas, mashed
2 eggs, beaten
1/2 cup milk or milk substitute (or even yogurt)
1/2 cup applesauce, pearsauce, applebutter, plumbutter (whatever you have)
1 tsp pure vanilla
Method:
1) Preheat oven to 350F. Oil large loaf pan.
2) Mix dry ingredients in a bowl. Mix wet ingredients in another bowl. Combine wet with dry.
3) Stir just to combine, do not over-mix at this stage.
4) Bake aprox. 55 minutes until knife inserted comes out clean. Let cool before cutting.
Here is a new favourite recipe for a banana bread that is sugar-free. It's great for breakfast or mid-day snacks, and has lots of stages for kids to help (mashing bananas, beating eggs, mixing dry, mixing wet, etc):
Spelt Banana Bread
Ingredients:
2 cups whole spelt flour (or other flour you wish to use)
1 tsp cinnamon
1 tsp baking soda
1/2 tsp baking powder
1/2 cup chopped pecans or walnut
1/2 cup chocolate chips, optional (this makes the bread a little sweeter)
4 bananas, mashed
2 eggs, beaten
1/2 cup milk or milk substitute (or even yogurt)
1/2 cup applesauce, pearsauce, applebutter, plumbutter (whatever you have)
1 tsp pure vanilla
Method:
1) Preheat oven to 350F. Oil large loaf pan.
2) Mix dry ingredients in a bowl. Mix wet ingredients in another bowl. Combine wet with dry.
3) Stir just to combine, do not over-mix at this stage.
4) Bake aprox. 55 minutes until knife inserted comes out clean. Let cool before cutting.
Monday, May 07, 2012
This weekend
~ hosted walking tour group during this weekend's neighbourhood Jane's Walk (talked on the theme of moving from an industrial focus to post-industrial sustainable neighbourhood)
~ baked wholegrain bread loaves in the outdoor wood-fired cob oven to share with the tour group
~ harvested first rhubarb from this spring's garden for batch of pies (to be sold at our seedling sale)
~ cleaned and organized garden tools, finally
~ took walks to watch the 6 new baby goslings that have hatched in a nearby storm water run-off pond
Subscribe to:
Posts (Atom)