Pages

Showing posts with label recipe. Show all posts

Thursday, November 06, 2014

Holiday baking begins! Gluten-free gingerbread cut-out cookies

Last night the house smelled so festive!  It was a cold evening, so baking cookies was the perfect after dinner project to warm up the house.  We made our first batch of gingerbread cookies and I tried a gluten-free recipe from this book called The Whole Life Nutrition Cookbook..  The authors (a wife & husband team) also have a great website called Nourishing Meals: Healthy Meals for a Whole Life Nutrition Kitchen, which includes recipes and advice for eating a whole foods gluten-free organic healing diet.  Great suggestions for lacto-fermented vegetables, detoxification eating, and more.  I absolutely love both their cookbooks which have taken a prime spot on the main cookbook shelf in our kitchen!  They have a version of gingerbread cut-out cookies on their blog which looks delicious but is not actually the one from the cookbook - this version has hazelnut flour and an egg, whereas the book recipe I used had brown rice flour and ground flax seed (no egg, no nuts).

This gingerbread is so delicious - it is very likely the BEST gingerbread cookie recipe I have ever tasted.  The dough does get sticky, so chilling it is very important.  They advise rolling the dough between two sheets of parchment paper, and I don't think you could roll it out any other way without a lot of sticking.  Also the cookies definitely needed to be cooled before removing from the pan, as they were a little breakable when warm.  It was a fun project do with my 6 year old daughter, who loved helping mix the dough (especially shaking in ALL the spices we added).  We made a 4 x batch so it was a huge amount of cookies, many to give away to friends, and some of which my daughter hopes to sell at her own little booth during our Handmade Holiday sale on Nov 29.  Making them gluten-free and vegan should assure that almost everyone in the room can eat them.  The icing (still to come) is a cashew butter-coconut oil based mix, which pipes well out of an icing bag after it has chilled.  So not only do these cookies taste amazing, they were beautiful to roll out and cut into shapes (we used "woodland themed" cookie cutters - fir trees, gnomes, stars, reindeer, owl), but they are nutritious and healthful too.


Monday, September 02, 2013

Harvest foods

Now that our Symposium is over and the calendar page has turned to September, it's time to work on finishing our garden harvest, canning & preserving, drying, fermenting & pickling for the winter months.  The greenhouse shelves are stacked with drying racks layered with herbs; our kitchen counters are lined with jars of beans and cucumbers that are being lacto-fermented; our counters are covered in bowls and containers brimming with tomatoes, basil, eggplant and beans to be preserved into sauce, pesto and ratatouille.

And our meals these days are simple, but fresh and glorious with the abundant garden harvest - kale, chard, beans, various pestos, tomatoes tomatoes tomatoes every day!  Using these veggies on different kinds of pizzas has been a fun way to experiment lately.  We were recently at a wedding in Muskoka where pizza was served by All Fired Up, a portable wood-fired pizza catering business.  We loved their pear-pesto-arugula-goat cheese pizza, and made our own version of it last night using all these ingredients sourced from our yard (we even have our own pears this year!).  Yumm!

Fresh Pear-Pesto-Arugula Goat Cheese Pizza
Ingredients:

Fresh pears, 2 sliced thinly
Freshly made Pesto (our version uses fresh basil, sunflower seeds, olive oil, garlic, nutritional yeast, lemon juice, sea salt)
Fresh arugula, about 20 leaves (we used Surrey Greens, a spicy arugula-type leafy green)
Fresh soft goat cheese

Roll out thin whole-grain pizza dough.  Let rest 15 minutes on your pizza pan, pizza stone, or peel.  Spread with thin layer of pesto to cover whole dough.   Cover in concentric circles with sliced pears.  Sprinkle with arugula leaves, and dot with clumps of fresh soft goat cheese.  Bake at 500F for about 6 minutes!  Serve hot with fresh arugula leaves tossed on top.


Tuesday, April 09, 2013

Sap boiling day...and fresh oatmeal bread

We decided today was the day.  We've been storing our sap long enough, and the days are getting warmer.  We started out with sap boiling outside, and this went well for several hours.  While boiling we enjoyed the first really sunny spring day, with an outdoor lunch picnic, and planting up the cold frame with lettuce, chard and spinach greens.  Then the sunshine turned into a surprise spring rainstorm...not so great for an outdoor boiling event.  The sap boiling was moved indoors - given we are doing a very small batch this didn't seem so bad to have some of it be done on the stove.  Hoping for sunshine tomorrow to take the boil outdoors again.   And, if we ever do this on a bigger scale we'd set up a proper fire pit and evaporator...some day.

During the boil day we were staying close to the house, so it seemed like a great day for baking bread.  Having it rising while we checked and stirred the sap, and freshly baked when we came in from the cold rain, was perfect!  We adjusted our favourite oatmeal bread recipe to use up this morning's left over oatmeal.  Yum!

Here's the recipe:

Oatmeal-Rye 4 grain seeded bread
2 cups left over cooked oatmeal
1/2 cup molasses
1/4 cup honey or maple syrup
3 Tbsp butter
2 tsp sea salt

Combine the above ingredients in a large bowl.

2 cups warm water
1 Tbsp quick yeast

Mix the water and yeast in a large measuring cup.  Stir, then let sit for about 5 minutes until it foams.

6 cups unbleached wheat or spelt flour
2 cups whole rye flour
1/4 cup millet grains
1/4 cup flax seeds
1/4 cup sunflower seeds
Extra oats and sesame seeds to sprinkle on top of risen loaves

When yeast has foamed, mix this with the wet ingredients.  Then add flour and seeds and mix well.  Knead about 10 minutes to make a soft dough. 

Put dough back into the large bowl that has been oiled, and cover with a cotton cloth.  Let rise 1 hour, or until double. 

Form dough into 3 medium sized loaves and place into lightly oiled loaf pans.  Wet top of loaves lightly with water, and sprinkle with oats and sesame seeds.  Let rise again for about 45 minutes in a warm room (near your stove that is preheating to 400F). 

Bake at 400F for 5 minutes, then lower heat to 350F and bake another 30-40 minutes until golden brown.
Let cool before slicing.


Tuesday, March 27, 2012

Make your own: Butter

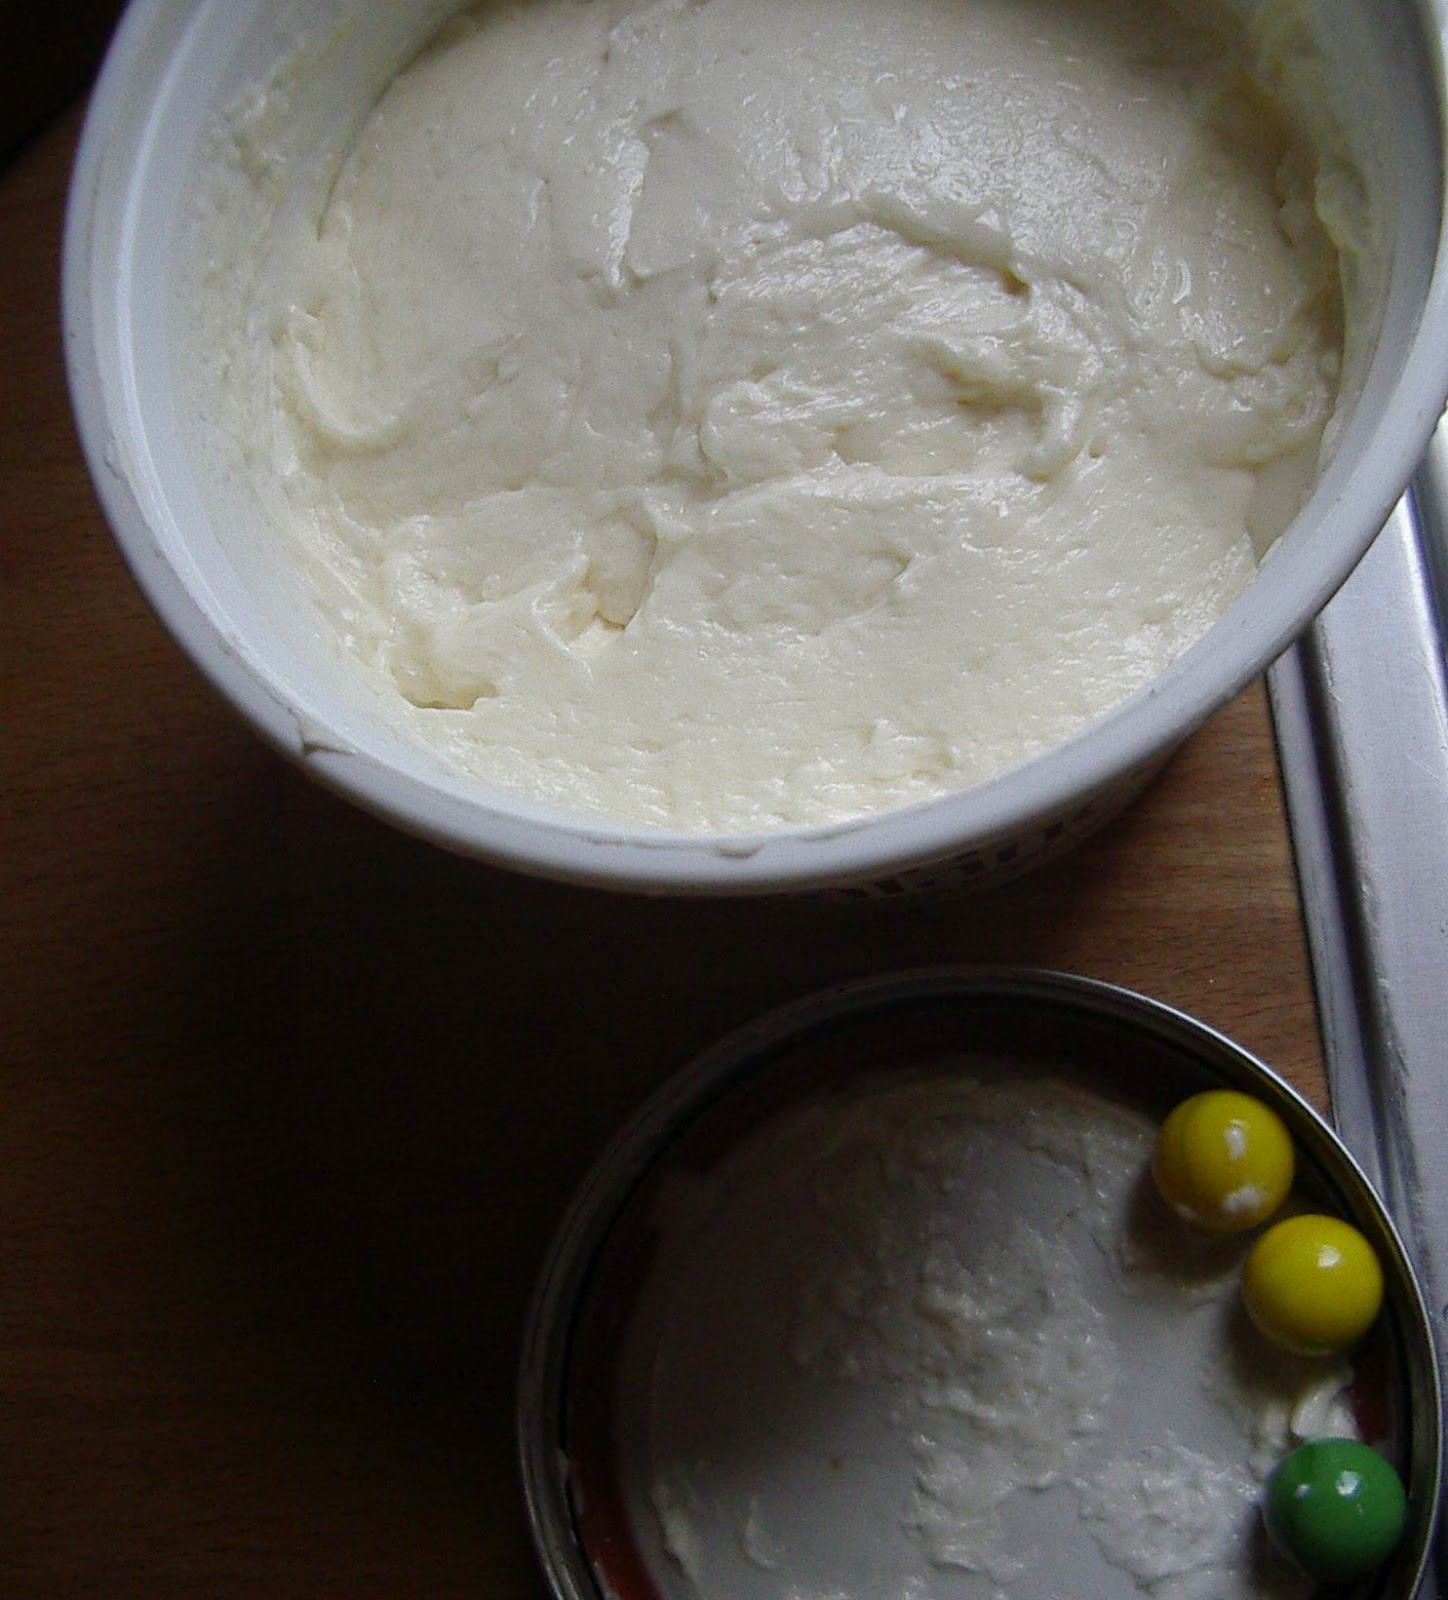
While we've been making our own yogurt and cheese for some time, and even tried our hand at homemade icecream (with our handcrank icecream maker) last summer, butter was something I had not ventured to try yet.  This week we realized how easy it is...as long as you have a lot of patience as well.  Give yourself about an hour, and a few helpers, while you shake the jar to create butter.  Here's how we made our own delicious creamy smooth butter:

What you will need
500 ml of fresh organic milk (raw if you can)
1 litre clean glass mason jar with lid
3 clean marbles
container to hold your finished butter

1) Pour milk into jar.  Add marbles and tighten the lid.
2) Start to shake the jar vigorously up and down.  The marbles will rattle around, but will become quiet as the  whey separates and the milk turns into butter.  Be patient!  It takes a while, but the butter will come.  Some books tell you to sing a little butter-making song while you agitate the jar, which helps to keep kids interested in participating. 
3) Pour off a little of the whey to help speed up the process of thickening, and when your butter is desired thickness spoon it into a plate or container and remove the marbles.  You can paddle the butter to smooth out the lumps and press out whey. 
4) After butter is stored in the fridge for half an hour it will be very firm.  Enjoy!


Monday, May 02, 2011

Dandelion season! Dandelion fritters and more...

It's dandelion season!  For those who don't already love these wonderful wild "weeds", you must know that there are a multitude of benefits and uses of dandelions.  The leaves, flowers and roots are all edible, tasty and healthful - the greens make a great salad or steamed dish, flowers can be battered and made into fritters or added fresh as garnish for salads or made into a healing tea that aids headaches, menstrual cramps and more, flowers can also be brewed into dandelion wine or processed into dandelion icecream!, and the roots can be stir-fried or dried and ground into a powder to use for a nourishing hot beverage.  Best of all, they are abundant and easily wild-harvested in almost any neighbourhood.  Kids will love helping to pick the bright yellow flowers.  They are a superb early spring wild food to be gathered, alongside nettles and burdock root.  As with all wild-harvesting, be sure you are picking in an unsprayed area and don't overharvest (although with dandelions you probably don't need to worry as much as they self-propogate so freely), and remember to spread health through your neighbourhood by blowing those white dandelion seeds into the wind!

Here is a simple recipe for dandelion blossom fritters:
1 egg
1 cup milk or milk substitute
1 cup flour
50 large dandelion blossoms, freshly picked

Mix the batter (egg, milk and flour).  Heat frying pan with small amount of oil.  Dip each dandelion blossom one by one into the batter, and fry briefly until crispy.  Eat warm as is, or dip into maple syrup for a special sweet treat.  Enjoy!

Saturday, April 23, 2011

Spring farm quiche

Here's a quick and easy recipe we love to make, using up several eggs and loads of garden greens and herbs.

Spring farm quiche

Crust:
1 1/2 cups spelt flour (or wheat, etc)
1/2 tsp sea salt
1/2 cup chilled butter
3-4 Tbsp cold water

Blend into soft dough using food processor.  Form into ball, and roll out using extra flour on table.  Makes one large crust.  Press into pie pan.

Filling:
5 eggs
1 cup milk
1/2 cup butter
1 lb greens (arugula, spinach, mizuna, mache, mustard), lightly sauteed
herbs for sprinkling (chives, parsley, cilantro)
1 cup shredded cheese
red pepper slices, optional

Blend filling ingredients mixing well.  Pour into prepared crust.  Bake at 350F for about 45 minutes or until top and crust are golden.  Serve warm or cold, with fresh green salad.

Tuesday, March 29, 2011

End of winter freezer clean-up


Although we preserve much of our food each year through canning, pickling, fermenting, cold storage/root cellar, and dehydrating/drying, we also still use a freezer for a few fruit and vegetable items.  This time of year we are trying to use up the pesto, beans, and berries that are still taking up space, to make way for newer produce only a few months away.  Today we received our bulk order of fresh maple syrup from a local farm (10 litres) which we decided to store in the freezer rather than canning, so in preparation for freezer space I pulled out the last elderberries, and red/black currants picked from our yard last year and made jelly!  It only made a small recipe, about 6 x 125 ml, but since I am a fan of the "small batch preserving" method this jam making session worked out perfectly in between making dinner and cleaning up the dishes.  I even used a regular soup pot for the canning process, with only a vegetable steamer basket to hold the jars in place - used less water and took much less time to heat up than a huge canning pot.  I used Pumona's low-sugar pectin for the first time, and LOVE it. Using this pectin reduces the amount of sugar by about half to that of a regular recipe (or they also give recipes if you want to use honey instead of sugar), and the jam/jelly gels beautifully.  I am going to stock up on Pumona's, as usually by canning season in August the shops here that carry it are all sold out. 

Thursday, August 12, 2010

Tomato harvest begins!

We've had a few tantalizing samplings of the first ripe tomatoes over the past weeks, as some Yukon Reds and Early Girl varieties tend to ripen on the early side of summer.  However, this week it became tomato season in earnest  in our garden, and we need to keep diligent watch for those ripening beauties hanging off the vines and hiding under the cascading leaves waiting to be picked every day.  I say keep watch, because our free-roaming hens (in particular Gypsy and Sadie) love to find these tomatoes and take one peck out of them, leaving the rest to rot on the vine.  We are trying not to lose too many tomatoes in this way, though we certainly have enough to share and don't really begrudge the hens enjoying a few bites of the bounty (but they are equally happy with tomato compost scraps, which is a much better arrangement for us).  So now it's Manitoba Reds, Moonglows, Mennonite Oranges, Sungold Cherries, Isis Candies, Peacevines, Sweet Baby Girl Red Cherries, Yellow Pears, Cherokee Purples, Patios, Brandywines, Green Zebras, and loads of Tomatillos that are filling every basket and bowl in our kitchen.  Needless to say, meals are centring around tomatoes, as many of these aren't really the sauce or canning variety.  We're eating toasted tomato sandwiches, tomato pizza, tomato soup, stuffed tomatoes, salsa fresca, bruschetta, tomato tabbouleh, and today two varieties of tomato pie.  Delicious!  A rustic savoury free-form tomato tart (with olive oil pie crust, four kinds of colourful heirloom tomatoes, and local goat feta), and an Italian zucchini pie (to which we of course added tomatoes, plus loads of fresh basil, thyme, oregano, and sweet vidalia onions).

Both of these recipes, plus many we have been using during this season are from Simply in Season, a wonderful cookbook that is based around seasonal eating, and celebrates meals made with local ingredients (local for much of North America that is).  The recipes have been tested by many kitchens, and sent in from contributers across the country - generally simple, wholegrain, healthful fare that highlights the abundance of each season.  Recipes are by name of vegetable (very helpful!) as well as title of recipe.  The book also includes short essays, nutritional notes, information about farmers markets and CSAs, food advocacy (food justice, food politics), and other brief commentary from each contributor to accompany their recipe.  We have two earlier cookbooks from the same series, Extending the Season, and More With Less Cookbook - also both with many well-worn annotated pages from years of use.  For anyone looking for one simple cookbook to encourage you toward more local eating, this is a great one to have close at hand in your kitchen.

Sunday, July 18, 2010

New garden projects & the family hammock

We've been working on the side yard (former construction site while our straw bale addition to the house was being worked on), and have slowly started to map out what this new section of the property will look like - new keyhole garden beds, a large area to expand our lavender production, map out where another fruit tree or two can be planted, perhaps a new bicycle shed/wood shed for easier access, and a winding path of flagstone throughout, and a little patch of lawn (well, clover, grass and wildflower seeds interplanted) with just enough room to put down a picnic blanket, kids playing, and setting up a small tent for hot summer nights.  It's exciting to have this whole new area plot of land to dream about - little by little this property takes shape.

And, after the busy weekend, we spent some time relaxing in our favourite spot on the back porch, the family-sized hammock!


Saturday, July 10, 2010

Making kombucha - the "elixir of long life"

This past week we had guests from an urban farm in Ottawa staying with us at our bed and breakfast.  They said for them it was like "coming home", and we too thoroughly enjoyed their company and had long conversations about permaculture, cohousing, land trusts, food co-ops, and lacto-fermenting foods.  They shared their home-brewed kombucha with us and left a bottle so we could get our own batch started!  Kombucha is a wonder drink, known by some as "the elixir of long life" because it is full of antioxidants and probiotics (along the lines of kefir, live culture yogurt, kimchi, etc).  It promotes healthy intestinal flora, stimulates the immune system, boosts energy levels, and has been reputed to heal a long list of health issues by detoxifying and cleansing the blood/body. 

We had been talking about starting kombucha after reading about it in the Wild Fermentation book, so I was extremely pleased to receive this gift!  Hopefully, if all goes well, in several weeks we will have a "mother" mushroom which we can pass on to others who want to start their own brews.

Here's a recipe for making your own kombucha at home.  It's also readily available in various flavours from health food stores.  I have not found information yet about whether kombucha can successfully be made without using refined sugar - this is one down side of this drink, as it does contain a fair amount of sugar sweetener, but the sugar is needed (as in wine making) for the microbes to multiply and assist fermentation.

Kombucha
1) Get some live kombucha (e.g. if you don't have someone to give you a starter culture, they can be purchased online, or you can use 1/2 cup from a kombucha tea you buy at the health food store)
2) Steep 4-8 tea bags (black or green, not herbal) per 4 litres (aprox 1 gallon) water.  Tea can be made with cold filtered water and let tea bags steep until tea is desired strength; or make a hot tea and let it cool before adding starter culture.
3) Add 1-1/2 cups sugar, which helps fuel the kombucha microbes (the more sugar, the stronger the sour flavour will be in your finished kombucha).
4) Add kombucha starter culture, or the 1/2 cup kombucha tea from your last batch or store bought bottle. 
5) Stir well, then cover with cheese cloth - securing cover so flies can't get in, but allowing kombucha to breathe.
6) Let sit for one week (or more) on kitchen counter - if "mushroom" grows it has worked.  Save mushroom ("mother") and use to float in your next batch of kombucha.  In another week or so the mushroom will grow another small mushroom on it, which can be saved and used, or given away!
7) Bottle kombucha (siphon into glass jars) and store in the fridge.  At the point of bottling, you can add various interesting flavour additives such as chopped ginger root, raspberries, or lemon slices, into each bottle.  The finished kombucha will taste like a fizzy carbonated sour-sweet iced tea drink.  Drink 1/2 cup each day for health benefits.

Thursday, January 14, 2010

Winter Kimchi


I mentioned earlier that I've started another live cultered sauerkraut. It's actually not quite a sauerkraut as it's not just cabbage - it's more of a winter kimchi - a spicy, garlicy, health-tonic made of pickled vegetables. Kimchi can be made in a variety of styles and originates in Korea where it is a national culinary art and passion.

This recipe is loosely based on the one found in Wild Fermentation: The Flavour, Nutrition and Craft of Live-Culture Foods by Sandor Ellix Katz, a fantastic cookbook and cultured food history. This cookbook is always close at hand in our kitchen, as we are trying to work our way through all manner of fermented foods and this wide ranging book covers everything from vegetable ferments (like sauerkraut and pickles); bean ferments (like miso and tempeh); bread ferments (like sourdough and dosas); dairy ferments (like yogurt and savoury cheeses); plus fermented grains, beverages, wines, vinegars and more!

This kimchi is extremely simple to make - the secret is just the right amount of spicing to suit your taste and then allowing enough time to ferment. The recipe is extremely adaptable, just use what vegetables you like or have at hand. Here is an aproximation of what I used:

Winter Kimchi
fresh garlic (3 whole bulbs)
onion (2 large)
ginger (1/2 inch sliced)
dried cayenne peppers (3 large including seeds)
carrots (3 large)
green cabbage (3 heads)
daikon radish (6 inches)
filtered water (14-18 cups)
sea salt (14-18 Tbsp)

First the vegetables are shredded or chopped to a desireable size, then stirred together in a large jar or ceramic crock. The container is then filled with enough brine solution to completely cover the vegetables when weighed down with a large plate and weight - to make the very strong brine solution 1 Tbsp of sea salt added to each cup of filtered water. Then the crock is covered with a clean cloth, and set on the counter to ferment. It can be tasted each day, and any mould is skimmed off. When it achieves desired taste the kimchi can be packed into jars, covered with brine, and refrigerated. True wild lacto-bacilli ferments are never canned or pasteurized, as this kills off the vital healthy bacteria. It can keep almost indefinitely in the fridge, but will likely be eaten in short order! Wild ferments like this are invaluable for building immunity and a healthy digestive system, and should be a regular part of everyone's daily meal routine. Delicious!

Wednesday, December 16, 2009

Immune building winter chai

Just in time for the holidays comes this lovely herbal chai recipe - spiced, fragrant and festive, yet rich in immune boosting herbs to keep away winter colds and flu. This recipe come from my sister - I don't know exactly where she first read it. Enjoy!

Immune Building Winter Chai
3 1/2 cups boiling water
2 cinnamon sticks
1 Tbsp fresh ginger root, grated
1 whole nutmeg, chopped or grated
1 Tbsp cardamom seed pods
5 tongues astragulus root
1 Tbsp dried burdock root
1 Tbsp dried dandelion root
1/2 tsp whole cloves
1/2 tsp star anise seeds
1/2 tsp whole allspice
1/2 tsp echinacea root

1) Simmer all ingredients in boiling water for 15 minutes.
2) Strain herbs, add warmed milk (rice, soy or dairy) to a ratio of half tea, half milk.
3) Add honey or sugar to taste.

Sunday, September 20, 2009

Pear Sauce and other harvest adventures


This is my favourite time of year - the days are warm and mellow, the garden harvest is at it's peak, fall fruits that I love (pears, plums, apples, local grapes) have come into season, evenings are perfect for bonfires and cozy woolen sweaters, and we've pulled out our warm quilt for sleeping again. This weekend saw all of the above - lots of garden harvest, some canning and preserving, some baking, a toasty fire, cozy clothes, and a few long fall walks...

We canned up the bushel of pears, and will be making pear pie (dutch pear pie) tomorrow with a handful of pears left over. Below is the pear sauce recipe - very easy (it can even be done over two days, making the sauce one day and canning it the next) - and no sugar is added. We eat it with homemade yogurt and granola for breakfast, or as a dessert.

It was also time to pack the crock pickles (mentioned on this blog a few months ago when we started the crock) into jars - the flavours are just perfect and that is the point to put the pickles plus brine into jars in the fridge for longer storage. I have a friend who also just keeps these jars of fermented goodness in a dark cool storage area (non-refrigerated). I may have to try that as our fridge is pretty full these days. Fermenting foods is so simple, and so rewarding (and so healthful)! Like the sourdough starter that I've been experimenting with, it seems difficult to go wrong with it. Today's sourdough starter turned into 7 loaves and a large pan of sourdough cinnamon buns, and a pizza crust - this sourdough recipe is very versatile. Between fermented foods, sprouting indoors, winter kale, and our coldframe/greenhouse salad greens, I plan to get us through the winter months with fresh vitamin-mineral-enzyme rich locally produced food. The foods we've canned or put in the freezer will be a bonus too!

Easy Pear or Apple Sauce

Bushel of pears or apples
7-12 large mason jars, rings and lids

1) Wash, cut and core pears (or apples), but do not need to peel.
2) Slowly simmer pears with a little water in large pot until they are extremely soft (several hours). Remember to stir occasionally.
3) Puree pears into thick sauce and heat sauce, continuing to stir often so it does not burn.
4) Meanwhile prepare canner by heating water and sterilizing jars.
5) When canner of water is boiling, fill hot jars with hot pear sauce to within 1/2 inch from top (i.e. 1/2 inch "headspace"). Wipe rims to remove any stickiness.
6) Heat canning lids according to instructions on package (usually 5 minutes in boiling water to soften the seals). Fasten onto the hot jars tightening slightly ("finger tight").
7) Set jars in hot canner, and when water returns to boiling, boil for 20 minutes (20 minutes for 500 ml jars).
8) Take jars out, let sit for 24 hours to cool. Check to see that all lids have sealed (concave if sealed). Label and store for future use!

Thursday, September 03, 2009

100-Mile Desserts: Zucchini Muffins


Here is a 100-Mile recipe for simple, sugar-free, delectable zucchini muffins using local ingredients. It's zucchini season and if you grow them in your garden you are probably looking for new ways to use them up. They can also be shredded and put in the freezer for winter baking. Zucchini adds amazing moist texture to any baking - cakes, muffins, breads...(and of course these are easily embellished with other non-local ingredients like nuts, raisins, dates, chocolate chips, or cocoa - once the 100-mile diet challenge is over).

Zucchini Muffins
2 cups light spelt flour
1 tsp baking powder
1 tsp baking soda
1/2 cup milk
1 cup maple syrup or honey (or half and half)
1/4 cup canola oil
2 cups shredded zucchini
1/2 cup applesauce*

* I actually didn't have enough applesauce, so I used 1/3 cup yogurt and 1 egg instead and they came out nicely. A touch of cocoa would be lovely, as zucchini and chocolate go nicely together. If you are using spices, then cinnamon, cloves and ginger is a nice compliment to these muffins.

1) Preheat oven to 350F. Line two muffin pans.
2) Mix dry ingredients in one bowl. In another bowl combine syrup/honey, milk and oil. Pour wet into dry and stir well to combine. Then add in zucchin and applesauce and mix in gently.
3) Divide batter into 17-18 muffin cups (makes about 1.5 dozen medium sized muffins, or 1 dozen large muffins).
4) Bake for about 20 minutes, until lightly browned and firm on top.

Saturday, August 08, 2009

100-Mile Desserts: Fresh heirloom watermelon


Fruit season is so special! Although we do grow a variety of berries and fruit on our property, I had not planted watermelon this year. The melons, pumpkins and squashes tend to crowd out the rest of our garden, so alas, I just can't fit everything in! I want to experiment with growing them vertically on sturdy trellises next season. However, we are very fortunate to have the Bailey's Local Foods buying club in town, offering us 100-mile organic fruit! This week I picked up two watermelons, one an heirloom yellow variety, grown on nearby farms. What a treat! These were served to our bed & breakfast guests for brunch this morning, but would also make a lovely simple healthful (and beautiful) dessert option.

Thursday, August 06, 2009

100-Mile Desserts: Peach & Blueberry Semifreddo


Here is a 100-mile dessert recipe using fresh peaches and blueberries that are in season right now. It's an Italian dessert, a frozen mousse, somewhere between rich creamy icecream and light fruity sorbet. It's a low-stress dessert as it can be made ahead of time and left in the freezer until you are ready to serve it. The recipe comes from the LCBO summer "food & drink" issue, and I've adapted it to be 100-mile (so no tropical coconut, mangoes or sugar as they suggest!)...here's the locavore version:

Peach & Blueberry Semifreddo
4-5 ripe peaches (about 2 lbs/1 kg) chopped
1/3 cup honey
4 large egg yolks
1 cup organic local whipping cream
1 cup blueberries

1) Oil a 1.25 litre loaf pan and line with smooth layer of plastic wrap.
2) Place peaches in blender and puree until smooth. Set aside.
3) Place 1 inch of water in bottom of double boiler or large pot, and bring to a simmer.
4) Combine honey and egg yolks in the top section oft he double boiler or a metal mixing bowl. Place over simmering water.
5) Using an electric mixer on medium speed, beat honey and eggs until very thick and pale yellow, doubled in volume and hot but not boiling.
6) Remove egg mixture from heat, add pureed peaches and beat for 1 minute longer or until well combined and cool.
7) Place whiping cream in another mixing bowl and beat to soft peaks. Fold whipped cream into peach mixture. Then fold in blueberries.
8) Spoon peach mixture into loaf pan. Cover with plastic wrap and freeze for at least 4 hours or up to 3 days ahead of serving.
9) When ready to serve, dip base of pan into warm water to help loosen the semifreddo from the pan. Remove top layer of plastic wrap and pull on the plastic lining the sides of the pan to loosen. Invert semifreddo onto a serving plate and peel off any remaining plastic. Use a knife warmed in hot water to cut semifreddo into slices for serving.
10) Serve with a side of a small amount of berries or fruit salad.

Thursday, July 23, 2009

100-Mile Desserts: Spelt Crepes


Well it's fresh fruit season, so let's make the most of it! Today's breakfast was delectable - crepes made of organic spelt flour, covered with fresh berries, edible flowers (johnny-jump-ups, and borage) and local organic whipped cream. Hardly our usual breakfast - which tends to be organic oatmeal with homemade applesauce and local maple syrup - but we had a fridge full of beautiful berries including ones picked from our own backyard (currants, gooseberries, raspberries) so these crepes were on the menu. They would make a lovely dessert as well.

Organic Spelt Crepes - serves 4

1 cup organic spelt flour
1/2 tsp salt
3 eggs
1 1/4 cups milk

1) Mix all ingredients together in a large bowl and whisk well until lots of small bubbles form.
2) Preheat cast iron skillet and lightly coat with oil. It is helpful to oil pan before making each crepe so they don't stick.
3) Pour 2-3 Tbsp batter into the pan, and quickly rotate so batter covers entire skillet.
4) Bake 1-2 minutes for first side, then gently flip crepe and cook about 30 seconds more for second side.
5) Remove from skillet and roll up.
6) Either serve with an inside filling, or top with fresh fruit and whipped cream or yogurt.

Makes 10 medium sized crepes.